Introducing Children to Robotics and Programming
By John Blankenship View In Digital Edition
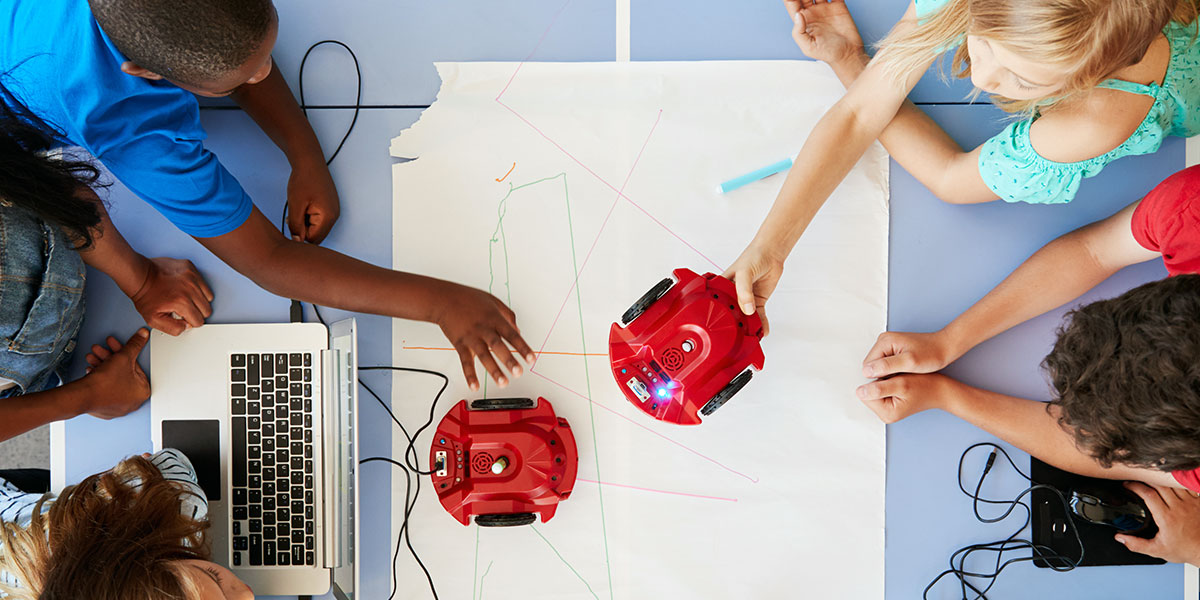
As hobbyists, we often find ourselves explaining robotics and programming to others. Usually, these discussions involve people that are familiar with the topics and understand the terms and techniques we’re using. Trying to share similar information with children often requires a totally different approach.
Perhaps you’d like to encourage an interest in technology in your own kids. Maybe you’d like to provide robotic presentations for local schools and clubs. I’ve done both, and whether you’re working with your kids or volunteering to help others, it can be very rewarding when you see that light come on in a child’s eyes.
There are many toys available that can teach children about science, but if you really want to develop problem-solving skills and promote logical thinking, it’s hard to find something better than robotics and programming. As with any teaching situation though, you need to match the material and presentation to the abilities of the learner.
How Young is Too Young?
I have introduced programming and robotics to a wide variety of age groups. I feel 10 year olds are a good place to start. By that age, they are comfortable communicating with a keyboard and have the rudimentary math skills needed to appreciate and understand the introductory topics that will be needed.
In any educational environment — and even more so with children — it’s vital that the learner find the experience rewarding. Older kids might be motivated to learn something if they thought it would help them get a job or into college. For younger children, just having a pleasurable experience might be all that’s necessary.
For them, the question becomes, “How can we ensure that a presentation on robotics will be enjoyable?” Let’s examine some ways of making robotics exciting for children.
Engage the Learner
One of the best ways to keep a learner interested is to simply keep them involved. Don’t just show how to make the robot do something. Ask questions such as “What does the robot need to do now?” or “How do you make the robot turn left?”When you get an answer, let them type in the commands they think will work, and run the program themselves.
Encourage them to evaluate how well their idea worked based on the robot’s actions. Seeing how the robot responds is a wonderful teaching tool because its actions provide immediate feedback to the user. Getting a young learner to actively evaluate how the robot responds and make adjustments to their program will generate far more excitement than just showing them how to do something.
Appropriate Complexity
Another way of ensuring your presentation will be warmly received is to make sure the examples you use are simple enough to be successfully accomplished by the learner, yet complex enough to present a reasonable challenge.
You can increase the complexity of your examples over time, but in the beginning, it’s vital that the challenges you propose are easily solved with a reasonable amount of effort.
Meaningful Examples
Everyone — regardless of their age — will put more effort into solving a problem if they feel that achieving the goal has value. Sometimes a goal can have real value; for example, a young American Indian in the 1400s would be motivated to learn how to shoot a bow and arrow because it could ensure their ability to eat.
A member of an archery club today might want to learn to shoot just to be admired by their peers.
For young children, goals don’t have to be quite so encompassing, but they do need to have a clear purpose.
In addition to being relevant, it’s important that the tasks chosen be discussed before the actual teaching starts. The point is to let the child see what the goal is before they start looking at programming commands, etc.
If someone is adept at programming, then showing them the commands for a new or different programming language can be a suitable approach. However, for a young child totally new to programming, showing them a list of commands is not motivational because they don’t have the background for visualizing how they might be used.
A much better approach is to create a need first. For example, once the child determines the robot needs to turn and move (in order to accomplish some task), they will want to learn commands that can make that happen.
Applying These Ideas
At first glance, these ideas may seem more complex than necessary, but they often seem very reasonable when viewed in context. Let’s explore an example to help solidify some of the assertions made.
Our primary objective for this example will be to teach the child how to move a robot around its environment. Obviously, if we just tell the child they’re going to learn how to make the robot move, it might not seem very exciting — especially after the robot is moved a few times. A better approach might be to set up a problem to be solved that requires the robot to move around its environment.
I often draw something similar to Figure 1 on a piece of paper or on a classroom white board. I show it to the child (or children) involved and explain that we want the robot (the circle at the bottom of the figure) to move from where it is to the spot marked X. I explain that the line represents a wall, and we want the robot to go around the wall in order to get to the X.
![]()
FIGURE 1.
Using this simple diagram, you can have a discussion about what the robot has to do to get to the X. Generally, it doesn’t take long for them to realize they can accomplish the goal if they can make the robot do only two things: move forward and make turns.
When you introduce commands that can perform these actions (rTurn and rForward, for example) the student will want to learn not just what the commands do, but how parameters can be used to control the amount of movement.
Using RobotBASIC’s Integrated Robot Simulator
I use RobotBASIC (a free language available from RobotBASIC.org) for a lot of my experimentation and have found it can also be used with children. Normally, the RobotBASIC commands like rTurn and rForward control a simulated robot.
I actually prefer to teach children about robotics by using the simulation because it allows every student to have their own personal simulated robot. This ensures everyone is engaged because each person must type in their own commands to get their robot to do anything. They don’t just sit and watch others do the work.
If you prefer a real robot for your teaching, you can use cardboard or other common objects to build a wall as shown in Figure 2. Notice the robot in the figure. It’s a Parallax Scribbler S3. Two previous SERVO articles (Part 1 and Part 2) explained how to modify and program the S3 so it can respond to RobotBASIC commands just like the simulator.
![]()
FIGURE 2.
The rest of the examples in this article will utilize the simulator, but with minimal effort you should be able to apply all of the principles discussed in this article to any real robot of your choosing.
When I use the simulator to teach children using this go-to-the-X example, I generally let them locate the robot on the screen (rLocate) and move it around a few times. Then, I explain that we need to draw the wall on the screen so that we can have the same problem described with the paper drawing.
Drawing Lines to Represent Walls
I have found that 10 year olds can easily learn about drawing lines in a coordinate system. I start by explaining that the RobotBASIC output screen is 800 dots across and 600 dots down, and that the 0,0 point is the upper left corner of the screen.
I explain how the LINE command works and ask them to draw various lines on the screen, such as from the upper left corner to the center of the screen.
Since the center of the screen is 400,300, the line can be drawn with the command LINE 0,0,400,300. I have them draw different lines and then multiple lines (using the LineTo command) which makes it easy to introduce the idea that a program is a series of statements that execute in order.
Once they learn how to place lines in various positions and orientations, I slowly introduce commands like LineTo, SetColor, LineWidth, etc. As they learn to use these commands, you might be surprised at how excited just drawing lines on the screen can be for a 10 year old.
A major point not to forget here is that the student is actively involved. They are typing in the commands and creating the graphics they see on the screen. Some learners will make typing errors for sure, but this just gives you the opportunity to explain what error messages are and how they can be dealt with.
Eventually, the child will able to draw something similar to the wall in Figure 1. When the wall is complete, they can LOCATE the robot on the screen at an appropriate spot. A sample program to do this is shown in Figure 3 with its output shown in Figure 4.
LineWidth 5
SetColor GREEN
Line 150,0,350,200
LineTo 450,250
LineTo 450,200
LineTo 400,150
LineTo 600,200
SetColor RED
Line 400,185,415,200
Line 415,185,400,200
rLocate 400,300
FIGURE 3.
![]()
FIGURE 4.
Making the Robot User-Friendly
As the students start using the commands to control the robot, they’ll run it into the wall, make typing errors, etc. The immediate feedback they get from the robot’s actions generally will translate quickly into an understanding of how to solve the problem.
Usually, when they’ve just started moving the robot around, I ask if it would be nice if the robot could move slower, or if it could leave a trail as it moves so that it’s easier to follow the robot’s actions (and associate them with the programming statements). I write the commands to accomplish these actions on the white board and give a simple explanation of how they work and where they need to be inserted into the program.
I tell them that adding these capabilities is optional, but I have found that most choose to add them to their program. Note: It’s important to make the trail invisible so that the robot doesn’t think it’s a wall. Using the trail, most students quickly obtain a clearer understanding of how a sequence of commands can control the robot’s movements. If your experience is anything like mine, in a very short amount of time, you’ll have children jumping up, waving their arms, yelling “look at mine, look at mine.”
A typical solution to the find-the-X problem is shown in Figure 5.
rSpeed 5 // slows down the robot
rPen DOWN,RED // leave a trail
rInvisible RED
// start moving the robot
rTurn 90
rforward 200
rTurn -70
rForward 150
rTurn -90
rForward 150
rTurn -25
rForward 150
rTurn -90
rForward 50
rTurn -55
rForward 45
FIGURE 5.
The code should be added to the end of Figure 3, right after the rLocate statement. The output generated by that code is shown in Figure 6.
![]()
FIGURE 6.
Adding to the Challenge
If you have enough time, you can change the length or angle of one of the walls and show them how the same program will fail simply because the wall is different. Have them change their program to fix the problem.
You can even make it into a contest where each student creates a wall for another student to navigate around with their robot.
Depending on the age of your learners, you can start talking in general terms about making the robot autonomous. Typically, children will not be able to explore such behaviors without significant experience, but I have found even 10 year olds can be introduced to sensors and be given simple programming tasks that utilize sensor data to control the robot’s movements.
Even without a full understanding of how autonomy can be achieved, they seem to be excited because they can understand how such things might be possible.
In Conclusion
Hopefully, this short discussion has given you some ideas on introducing programming and robotics to younger learners. Watching a child get excited about things you love as a hobbyist can be very rewarding. SV
Article Comments