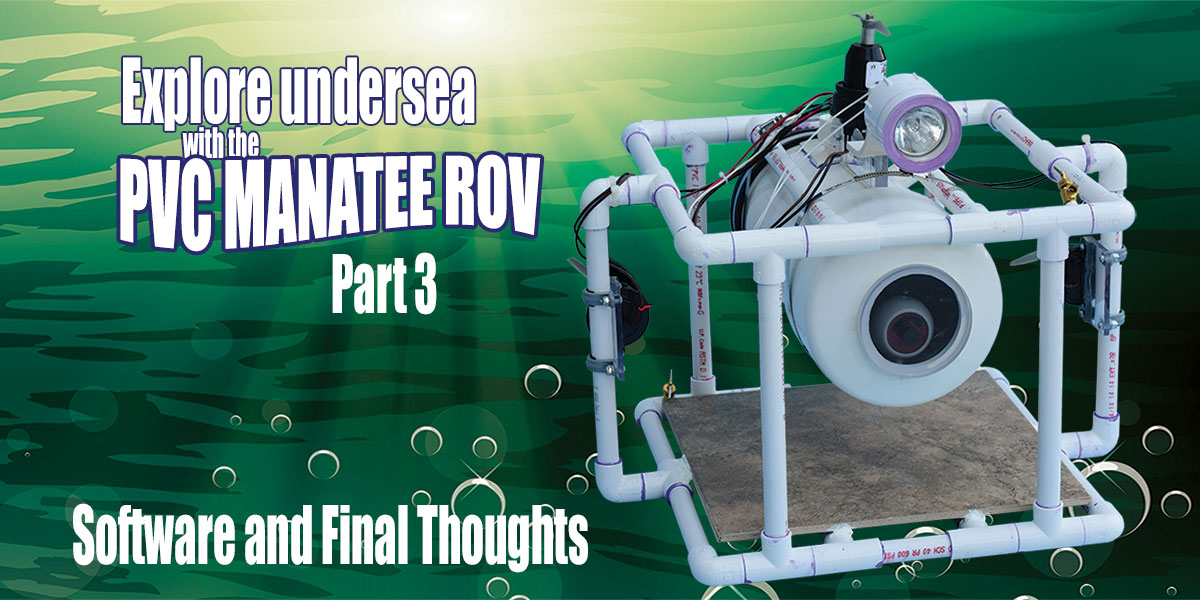
The ROV Manatee - Part 3
By Theron Wierenga View In Digital Edition
Build Your Own Remotely Operated Underwater Vehicle — Part 3: The Software and Final Observations
Last time, we covered the electronics package that reads the joystick and linear potentiometer, and then controls our motors. In this last part of the series, let’s finish with the software and some final thoughts.
The Joystick Software
Here is the main loop that reads the joystick and the serial receive method. Several Serial.print statements used for debugging are removed, but they can be found in the complete program available at the article link:
void loop()
{
// Read joysticks - returns 0 to 1023
xRight = analogRead(A3);
yRight = analogRead(A2);
xLeft = analogRead(A6);
// Normalize - returns a float -1 to +1 for
//.x, + 1 to - 1 for y
xNorm = normalizeX(float(xRight));
yNorm = normalizeY(float(yRight));
// Now apply wheelchair algorithm
if ((xNorm / 2.0) > 0.1) {nx = 0.1 + (xNorm
/2.0 - 0.1) / 2.0;}
else if ((xNorm / 2.0) < -0.1) {nx = -0.1 +
(xNorm /2.0 + 0.1) / 2.0;}
else {nx = xNorm/2.0;}
R = yNorm - nx;
L = yNorm + nx;
// Clip as necessary
if (R > 1.0) R = 1.0;
if (R < -1.0) R = -1.0;
if ((R <= 0.05) && (R >= -0.05)) R = 0.0;
if (L > 1.0) L = 1.0;
if (L < -1.0) L = -1.0;
if ((L <= 0.05) && (L >= -0.05)) L = 0.0;
// Convert values to 0-255 for PWM
iL = int(L * 255.0);
iR = int(R * 255.0);
// Send new commands only if different
if (iL != lastiL)
{
strTemp = formatString(abs(iL));
if (iL > 0) {mySerial.println(“LMF” +
strTemp);}
else {mySerial.println(“LMR” + strTemp);}
lastiL = iL;
}
if (iR != lastiR)
{
strTemp = formatString(abs(iR));
if (iR > 0) {mySerial.println(“RMF” +
strTemp);}
else {mySerial.println(“RMR” + strTemp);}
lastiR = iR;
}
// Now look at Up/Down - strictly linear
if (xLeft != lastxLeft)
{
// Up
if (xLeft < 512)
// Using X only for slider pot
{
yTemp = 255 - (xLeft / 2);
if (yTemp < 15) yTemp = 0;
strTemp = formatString(yTemp);
mySerial.println(“UMU” + strTemp);
}
// Down
else
{
yTemp = 255 - ((1023 - xLeft) / 2);
if (yTemp < 15) yTemp = 0;
strTemp = formatString(yTemp);
mySerial.println(“UMD” + strTemp);
}
lastxLeft = xLeft;
}
// Now check for any messages received from
// the ROV controller
mySerialEvent();
if (stringComplete)
{
String subStr = inputString.substring(0,
3);
if (subStr == “BAT”)
{
String temp = inputString.
substring(3, inputString.length());
float val = temp.toFloat();
Serial.print(“ROV battery voltage
= “);
Serial.println(val);
}
stringComplete = false;
inputString = “”;
}
delay(200);
}
void mySerialEvent()
{
while ((mySerial.available() > 0) &&
(stringComplete == false))
{
// get the new byte:
char inChar = (char)mySerial.read();
// add it to the inputString:
inputString += inChar;
delay(2);
// if the incoming character is a
// newline, set a flag
// so the main loop can do something
// about it:
if (inChar == ‘\n’)
{
stringComplete = true;
}
}
}
The ROV Controller Software
The main loop of the ROV controller is next, along with the battery read method. Again, Serial.print statements used for debugging have been removed but can be found in the complete download copy:
// These are for PWM
#define LMF 3
#define LMR 5
#define RMF 6
#define RMR 9
#define UMU 11
#define UMD 10
const int bat = A0;
void loop()
{
mySerialEvent();
if (stringComplete)
{
String subStr = inputString.substring
(0, 3);
String temp = inputString.substring
(3, 6);
byte val = (byte)temp.toInt();
if ((val >= 0) && (val <= 255))
{
if (subStr == “LMF”)
{
// always turn off opposite
// direction
analogWrite(LMR, 0);
analogWrite(LMF, val);
}
if (subStr == “LMR”)
{
analogWrite(LMF, 0);
analogWrite(LMR, val);
}
if (subStr == “RMF”)
{
analogWrite(RMR, 0);
analogWrite(RMF, val);
}
if (subStr == “RMR”)
{
analogWrite(RMF, 0);
analogWrite(RMR, val);
}
if (subStr == “UMU”)
{
analogWrite(UMD, 0);
analogWrite(UMU, val);
}
if (subStr == “UMD”)
{
analogWrite(UMU, 0);
analogWrite(UMD, val);
}
}
// Clear variables for next read
stringComplete = false;
inputString = “”;
}
// Check 12 volt battery voltage and send topside
battery();
// Add a slight pause
delay(200);
}
void battery()
{
// Check 12 volt battery voltage
float fbat = float(analogRead(bat));
// 2.734 factor adjusts from 5 volt analog
// read to 12 volt scale
// adjusted to match voltmeter reading
float voltage = ((fbat/1023.0)*5.0) * 2.734;
mySerial.print(“BAT”);
mySerial.println(voltage);
}
Optional Components
1. Read Battery Voltage
A two-resistor voltage divider brings the 12 volt battery voltage down to the five volt range that an Arduino needs to do an analogRead. Then, to compensate, the program simply multiplies the analog value by a constant to return it to the 12 volt range. A test read was done and compared to the actual voltage read by a digital voltmeter, then the multiplication factor was adjusted. The Arduino code for a simple battery read function is shown in the previous controller software example.
2. 9DOF
There are lots of options using Adafruit’s 9DOF (nine degrees of freedom). The outputs in the example here are in degrees, and from this you get a three-dimensional attitude in space. The sensor should be mounted so that the row of pins is oriented to the right and the board is level with the pitch-roll (x-y) plane; this way, the pitch, roll, and heading (yaw) come out correctly oriented. Here is some sample code that Adafruit provides:
#include <Wire.h>
#include <Adafruit_Sensor.h>
#include <Adafruit_LSM303_U.h>
#include <Adafruit_L3GD20_U.h>
#include <Adafruit_9DOF.h>
/* Assign a unique ID to the sensors */
Adafruit_9DOF dof = Adafruit_9DOF();
Adafruit_LSM303_Accel_Unified accel = Adafruit_LSM303_Accel_Unified(30301);
Adafruit_LSM303_Mag_Unified mag = Adafruit_LSM303_Mag_Unified(30302);
/* Calculate pitch and roll from the raw accelerometer data */
accel.getEvent(&accel_event);
if (dof.accelGetOrientation(&accel_event, &orientation))
{
/* ‘orientation’ should have valid .roll
/* and .pitch fields */
Serial.print(F(“Roll: “));
Serial.print(orientation.roll);
Serial.print(F(“; “));
Serial.print(F(“Pitch: “));
Serial.print(orientation.pitch);
Serial.print(F(“; “));
}
/* Calculate the heading using the magnetometer */
mag.getEvent(&mag_event);
if (dof.magGetOrientation(SENSOR_AXIS_Z, &mag_event, &orientation))
{
/* ‘orientation’ should have valid
/* .heading data now */
Serial.print(F(“Heading: “));
Serial.print(orientation.heading);
Serial.print(F(“; “));
}
3. Pressure
I have experimented with a 0-0.5 MPa (megaPascal) pressure sensor. This model and others with higher ranges are available on Amazon and eBay. These sensors have a simple three-wire interface: five volts, ground, and 0-5 volt analog out. I chose the smallest range to obtain the best accuracy. Testing this sensor by doing an analogRead showed that each additional value of one represented an additional 2.5 inches of fresh water pressure. For example, a reading going from 150 to 152 represents an additional 5.0 inches of fresh water depth. The Arduino analogRead returns values between 0 and 1023, but I found that my sensor read 113 with no water above it (probably to account for the drop across an output transistor).
The test code appears next. A function to smooth out the readings by taking an average of 10 readings is included. This function uses a circular buffer, avoiding the necessity of doing 10 reads from the sensor before averaging. After each read, the oldest value is discarded and the new value added to the sum. The last ten values are averaged:
int const BUFFER_SIZE = 10;
// Number of samples you want to smooth out
int press, indexBuffer = 0;
int circularBuffer[BUFFER_SIZE];
int sensorDataCircularSum;
int filteredOutput;
int average; //typically the value you read from
//your sensor in your loop() function
void loop()
{
press = analogRead(A0);
average = smoothSensorReadings(press);
delay(100);
}
int smoothSensorReadings(int press){
// We remove the oldest value from the buffer
sensorDataCircularSum = sensorDataCircularSum -
circularBuffer[indexBuffer];
// The new input from the sensor is placed in the
// buffer
circularBuffer[indexBuffer] = press;
// It is also added to the total sum of the
// buffer
// This method avoids needing sum all the
// elements every time this function is called.
sensorDataCircularSum += press;
// We increment the pointer
indexBuffer++;
// We test if we arrived to the end of the buffer,
// in which case we start again from index 0
if (indexBuffer == BUFFER_SIZE) indexBuffer = 0;
// The output is the mean value of the circular
// buffer.
filteredOutput =(sensorDataCircularSum/BUFFER_SIZE);
return filteredOutput;
}
4. Flood lamp
A flood lamp was added to the ROV. It’s a simple 12 volt lamp that is enclosed in a PVC coupling. A clear Plexiglas piece is cemented to the front and a PVC plug on the back. It is wired to the 12 volt battery so it is always on.
Reflections
Here are some thoughts about what I might change or add. This ROV contains its battery power inside the watertight main tube. A second approach is to leave the main battery topside and run power down to the ROV in the tether. This means a larger, heavier tether that will probably need to have some floats added to make it approximately neutrally buoyant. As a trade-off, the main tube can be smaller.
The main tube should have been made a little longer, so the back of the tube extends out far enough for the black rubber cap to be removed without having to loosen the two large hose clamps that hold the main tube in place.
The uprights that mount the motors probably did not need to be extended outward. This will save a few elbows and simplify construction.
The motor mounting system was fairly simple. Quarter inch Plexiglas was glued with marine epoxy to the “ears” at the base of the motors, and then half-round plastic conduit clamps were used around the PVC uprights to attach the motors. The fit of the plastic conduit clamps was a bit loose, so a small square of 1/16 inch rubber was added inside the clamps to create a tighter fit. Additional instrumentation is certainly possible. The ROV controller board has connections for an Adafruit 9DOF board to add a compass, accelerometer, and gyroscope. There is also an additional place for a header to connect to a pressure gauge to measure the depth of water. A provision to remotely turn the flood lamp on and off would be useful.
A second vertical motor would allow the ROV to be tilted upward or downward for more natural movement. This would require a second joystick or linear potentiometer for control, and a fourth motor driver. A different microcontroller would also be necessary as additional PWM outputs would be needed. It is possible to connect the Arduino Nano controlling the joysticks via a USB cable to a laptop computer to read data (such as the battery’s voltage) using the Arduino’s GUI serial monitor. A useful additional feature would be a small LCD display mounted in the joystick box for reading returning data or status. The ROV Joystick board has pads for a header connected to the I2C bus (A4 and A5), as well as power connections that can be used to connect a serial type LCD display.
Final Thoughts
I hope this homebrew project has served as an inspiration to go out and build stuff. Nothing is ever perfect the first time, but that’s part of the fun of the hobby: improvements. SV
Downloads
201605_Wierenga.zip
What’s in the zip?
Express PCB schematic and PCB files
Arduino Code Files
Article Comments