Animatronics for the Do-It-Yourselfer — The Ins and Outs of Making Things Move
By Steve Koci View In Digital Edition
Up and down, in and out ... how do we make it go? This question can keep me up at night as I try to devise a solution to get some crazy mechanism I have dreamed up to work. We have explored many different methods in this series of articles to accomplish this, and now I have another option for you to consider. We are going to explore how linear actuators and linear servos can help us become more successful builders.
LINEAR ACTUATORS/SERVOS
Many times, our designs require that a part simply extend and retract. This motion can certainly be achieved by utilizing a servo or motor and adding an additional linkage to convert the rotational motion to linear motion. However, if that is the plan, then why not use a product where that work has already been done for you?
In their simplest form, linear actuators provide a forward and reverse motion. They utilize an internal motor and worm gear that converts the motor’s rotary motion into a linear motion. This is often preferable to the circular motion provided by a motor or servo. Just like a pneumatic cylinder, they extend and retract in a straight line. However, unlike pneumatics, they do not require the use of air or any of the extra equipment. Best of all, they are much quieter!
The wide variety of styles and features can make choosing the right actuator seem like a daunting task. We will explore some of the options available in the hope of demystifying the process, and allow you to start incorporating them into your designs.
When drawing up your creations, confirm that the load rating of whichever model you choose is sufficient for what you are doing. Also spend some time determining exactly what stroke length you need as there is a wide selection to fit your needs. Of course, cost is also an important factor, so make sure your plans fit within your budget!
So Many Choices
POWER DOOR LOCK ACTUATOR
If you want to dip your toes in the water and try a simple actuator project, you might look at power door lock actuators (see Figure 1).
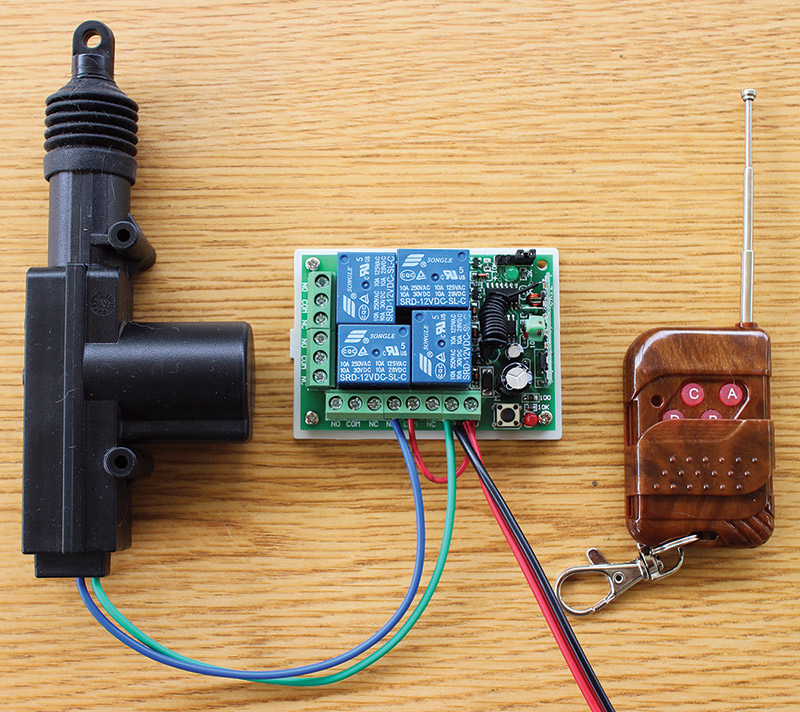
FIGURE 1. Lock actuator and wireless remote.
These present a very inexpensive way to experiment with the method, and can help to visualize how it can be incorporated into more complex designs. To keep it uncomplicated, you can utilize a wireless pushbutton controller to activate it. There are plenty of choices online, so pick one that fits your needs.
I usually choose the four relay model as this gives me the flexibility to include additional triggered items if needed. This setup can be put together for under $20 and will not only serve as a good test platform, but would work well in many actual prop applications.
These are not designed for extended use, so watch that you do not exceed the duty cycle. They are bulkier than a traditional actuator and are therefore more difficult to conceal inside of your armature. They also have minimal torque which relegates them to very lightweight chores.
Although this is a lightweight setup, it has many useful applications. Some examples on how you might incorporate it into your projects include having it quickly open and close a spooky box as a means to move a book on a shelf or to cause a character’s hand to quickly twitch up and down.
STANDARD LINEAR ACTUATOR
The standard linear actuator is the type of actuator most of us are familiar with. They can lift heavy loads, but the speed at which they operate can restrict their usefulness. The greater the load they are able to handle, the slower the shaft will move. I must admit that this seemingly unhurried pace was the reason I had not initially explored their use in more detail. As my designs became more complex, I soon discovered how useful they could be and how many applications I could use them in.
The most effortless way to hook one up is to simply connect it to power. It will extend until it reaches its limit switch. You then simply reverse the polarity and the actuator will retract. This can be cumbersome in practice, so by adding a double pole, double throw (DPDT) switch inline, reversing the polarity and thus changing the direction of travel just takes a flick of a switch.
You can also control the position of the actuator shaft by using an external motor controller. If you plan to do this, be sure to factor the additional cost into your budget plan. A better choice may be a linear servo which has an internal motor controller already installed.
Another significant feature of using a linear actuator is that once the rod reaches the limit switch (which is placed at the far end of its travel), it no longer draws power, thus extending your battery life. Another nice detail to keep in mind is that it will remain in place even if power is disconnected.
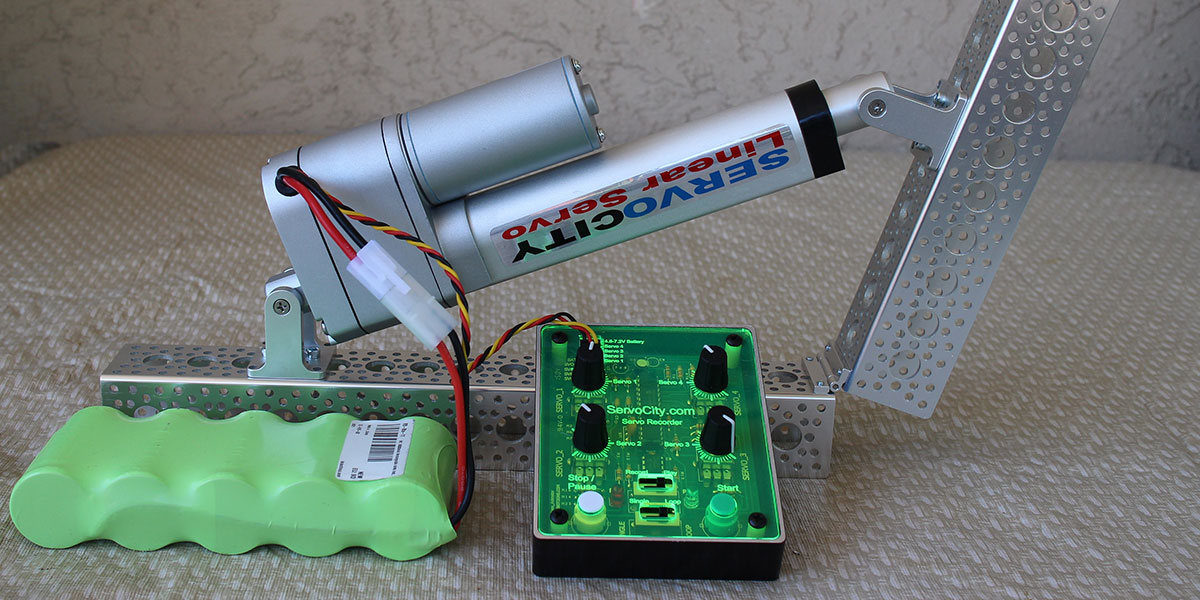
I am in the process of incorporating my linear actuator into a new project (Figure 2).

FIGURE 2. Parts gathered; now it’s time to build!
I would like to have a talking head with three-axis motion hidden inside a barrel. When appropriate, a switch will activate it, causing it to rise up. The head will then tell a brief story to anyone assembled nearby before dropping back down into the barrel to await its next activation.
For this application, I chose the 12V heavy duty linear actuator with 25 pounds of thrust from ServoCity (see Resources). This will give me the greatest speed at two inches per second, and still has more than enough power for my purposes.
The head will be installed inside of a box that will be mounted on drawer slides which will then be mounted on tracks installed between the barrel top and the base, providing the necessary stability. The linear actuator will be attached between the base of the barrel and the bottom of the box. Simple, but effective!
I am still trying to decide whether this character will randomly choose from a selection of prerecorded tracks or if he will be interactive. I can use a person who is situated off to the side to view the audience and converse with the character live. This is a great application if you have someone available who can play the part.
Used models can often be salvaged from their original installations. The set shown in Figure 3 was given to me by a friend who thought I could use them. I am thrilled when my friends think of me as they come across items like this!
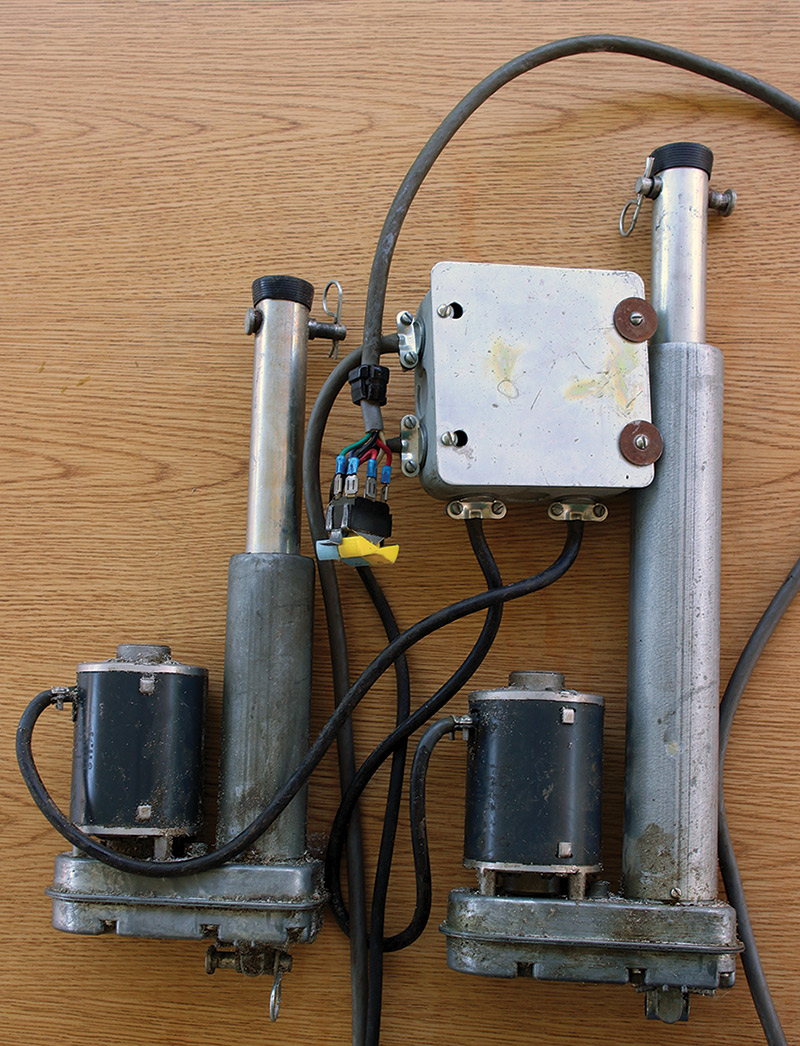
FIGURE 3. You cannot get cheaper than free!
I believe this came from a lift bed that was being disposed of. They are extremely heavy duty and I am still looking for just the right project for them.
LINEAR SERVO
These look much like a linear actuator but come with the control board built into the mechanism, so it does not require an external motor controller.
My first attempt at using one came when I was designing “ParkerBot” — my spider built onto a remote controlled chassis. I detailed the build in the September 2015 issue of SERVO Magazine where you can check out the entire design.
The mechanism which used a model from ServoCity (see Resources) worked perfectly (refer to Figure 4 and Figure 5), but the weight proved to be too much for the lightweight motors I was using to maneuver the spider. I ended up replacing the linear servo with a lighter weight channel mount servo powered gearbox.
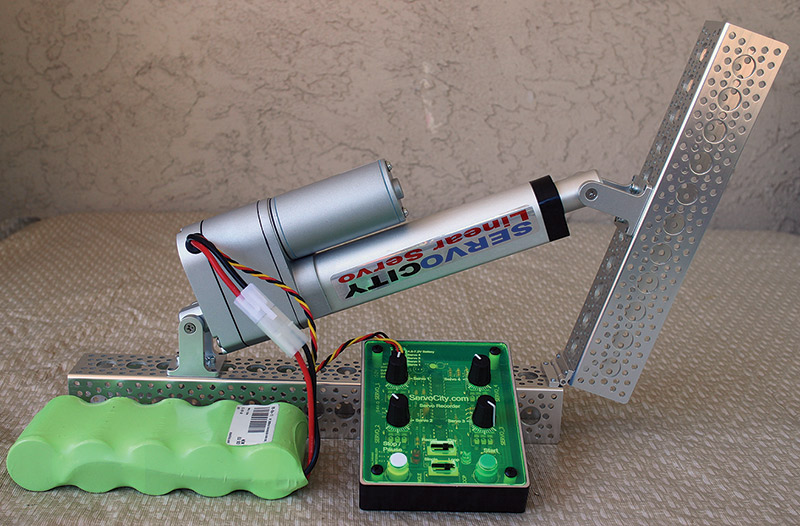
FIGURE 4. Testing the ParkerBot mechanism.
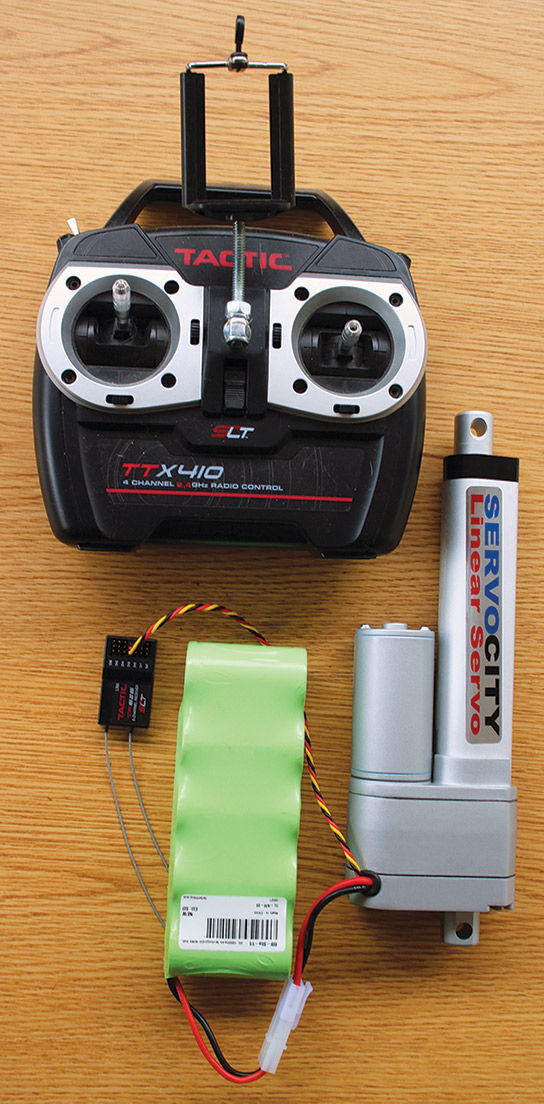
FIGURE 5. It works with the RC transmitter, as well.
Even though it did not work out as originally planned, I was excited to try to use one again. Watch upcoming articles to see where this will pop up as I have a new plan for it!
The internal circuitry is very robust and includes some nice features, including protection from reverse polarity as well as from over-current and over-temperature.
Firgelli Technologies offers a wide range of devices that the DIY animatronics builder will find useful (see Resources). The product that really caught my eye was the miniature linear servos that they stock (Figure 6).
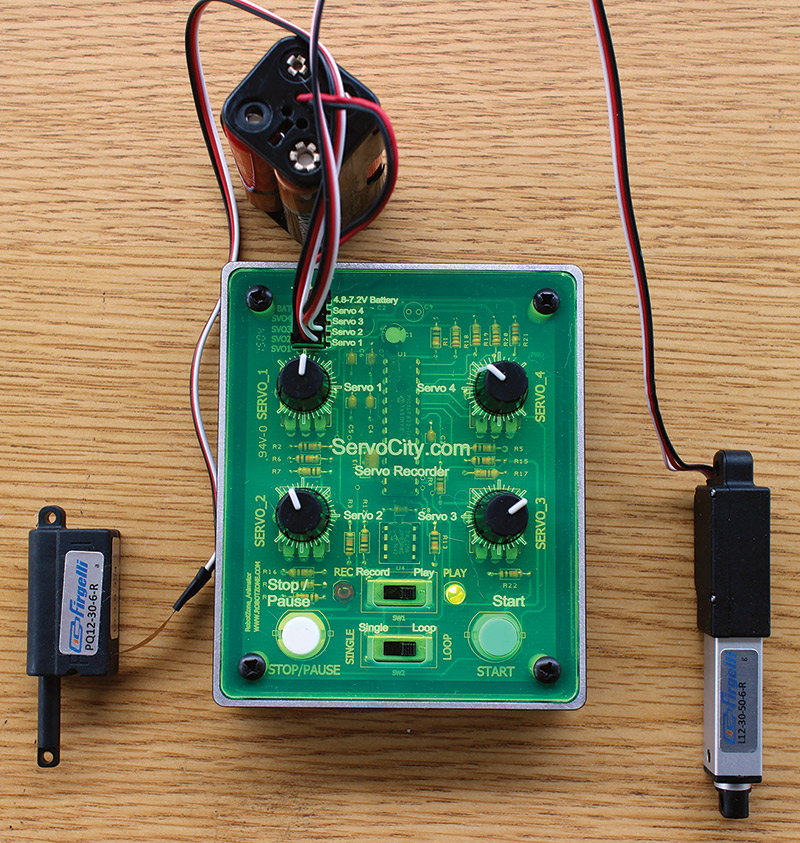
FIGURE 6. They are mighty and small!
Their small size and substantial torque make them the ideal solution for so many applications. Check out how they are being integrated into the open source Ada robotic hand at http://tinyurl.com/z7qt65q. It’s a fantastic job and a very worthwhile cause!
How often have you been considering a purchase and spent more time figuring out the necessary hardware than you did in choosing the original product? Well, no worries about that problem when purchasing these miniature linear servos as they include all the required mounting hardware. Now, that’s great customer service!
These are equipped with square shafts which mean they are non-rotating. This can be a distinct advantage, but does require a little creativity when it comes to mounting (see Figure 7).
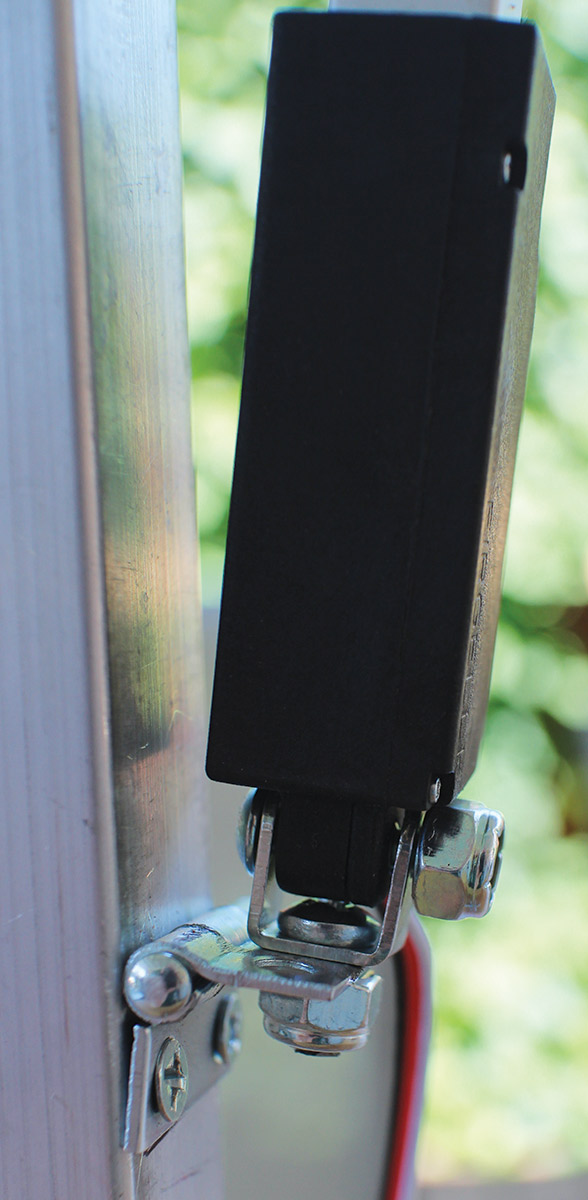
FIGURE 7. Moving on a hinge.
These miniature linear servos are surprisingly robust considering their small size. I am coming up with more and more places to include them as I get comfortable with their use. They are sure to show up in many of my builds — especially those that require strength but need to fit in tight quarters.
I wanted to put them to the test, so I installed one on an aluminum pop-up mechanism (Figure 8).

FIGURE 8. We have liftoff!
My plan was to install a lightweight plastic skull on it, then have it move up and down from behind a wall. I felt this would be a challenge for the tiny device, but it handled it with ease.
Always wanting to push the envelope, I put a heavier hairdresser’s head on it and it did not mind a bit. These things are impressive!
HIGH SPEED LINEAR ACTUATOR
The availability of the high speed linear actuator may be the ultimate electric solution! The performance of these can compete in many ways with pneumatic systems without all the extra required equipment (see Figure 9 and Figure 10.) The model I am using came from Fright Props and is controlled by their PicoBoo controller (see Resources).
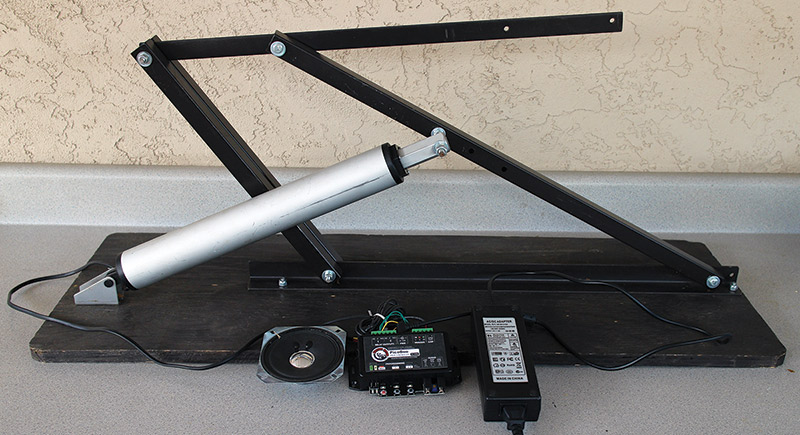
FIGURE 9. Look Ma, no air!
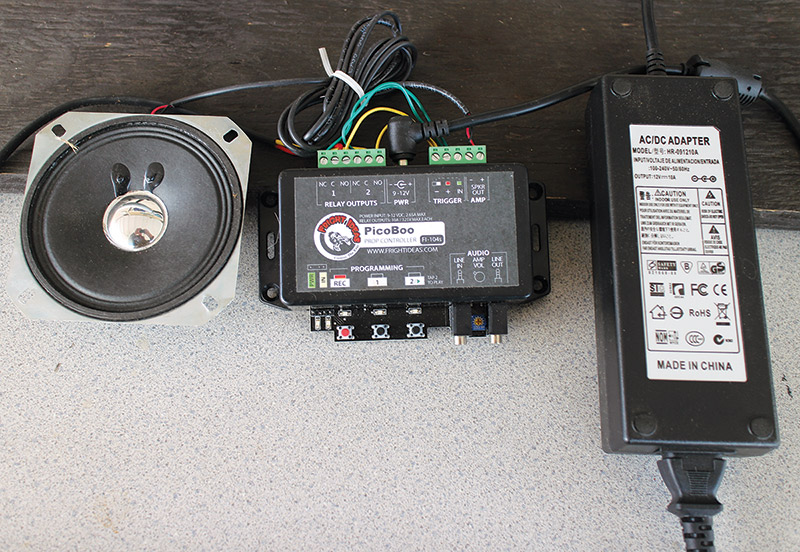
FIGURE 10. The brains of the operation.
Since many of the designs we devise require quick movements and the moving of heavier loads, we naturally think that pneumatics is the only solution. High speed linear actuators do an admirable job in many of these situations.
One drawback is their restrictive duty cycle of 10% or six minutes an hour. Now, this may not sound like much available time but you must consider the actual time that the actuator is being used. With some careful thought and creative programming, you can easily work with this requirement.
The installation may require more room than a standard linear actuator which has the motor added next to the shaft. The high speed actuator has the motor placed in line, so plan your design carefully.
Could linear actuators or servos replace pneumatic systems? It is possible if you do not have the ability to incorporate an air driven system. However, I think they are best when combined with pneumatics. There are many instances where a linear actuator will outperform a pneumatic cylinder and vice versa.
One such instance where I prefer to use a linear actuator is if you need your mechanism to remain rock solid in a particular place. By using an actuator, you avoid the shock effect you get with pneumatics.
Since air is compressible, a pneumatic cylinder can have a bit of a bounce.
Another application is in driving head movements. I have never been a fan of using pneumatics for this task. The action is too quick and I prefer my head movements to be smoother, more subtle, and controlled.
Also, it is nice to avoid running stiff air lines up into the head which leads to a neater installation.
In all fairness to pneumatics, actuators cannot exert as much force, operate as quickly, or run continuously. If you have the need for a large number of fast moving mechanisms, it would be advantageous to make the initial investment in a pneumatic system. You would then have the option of using whichever design fits each individual prop.
I am so pleased with the performance of the linear actuators and servos I have been experimenting with that I plan to retrofit a couple of my pneumatic props with them. I have several props inside my house where I am unable to run air lines. These require me to feed them air by utilizing an 11 gallon air tank for each prop.
In order to extend their use to last the night, I am forced to be very judicious in my programming, and strictly control the number of times a prop activates.
By replacing the pneumatic cylinders with electric actuators, I will no longer need to worry about the extra equipment, and will not need to refill the tanks every day. Now, they will be able to do their job whenever they are needed!
The other system that I am often asked about is hydraulics. They are similar, but are much more expensive and overkill for the majority of our purposes. They also can make a huge mess if they leak fluid (that’s another story!).
Perhaps, one day, I will hit the lottery and be able to give them a try. Until then, I will leave those for the professional prop builders.
Putting Things Into Action
I have shown several different options that you can use to control actuators. They include DPST switches, wireless relay remotes, and remote control transmitters. All reliable choices, but they are surely not the only ones.
A handy tool that is always within arm’s reach on my workbench is my four-channel servo recorder from ServoCity. It is a handy way to test the motions of any servo powered joints I create.
I can quickly add and record movements for up to four servos, and then play them back without having to use a microcontroller or do any programming. It is one more way to save some time during the prototype phase of a build (who doesn’t need more of that!).
It will also run your recorded program in a loop mode, so it functions as a prop controller as well. Tools that can perform multiple duties always have a place in my toolbox. It came in very handy when working with all the linear servos I have been playing with.
It is also possible to control your linear actuators or servos from a microcontroller. An informative tutorial is available from Firgelli Automations on using an Arduino to manage them, and can be found at http://tinyurl.com/zmermd9.
I will be using my favorite PICAXE microcontrollers for some of my projects, but choose whichever one you are comfortable with. The argument over which microcontroller is the best is not something I plan to engage in!
Time to Get Back to Building!
I hope you now feel qualified to integrate a few of these into your designs. They can fulfill a multitude of different tasks and are easy to operate. Even if you do not have an immediate need for them, keep them in mind the next time you are struggling to solve a design issue.
Once you factor in all the variables, you may find linear actuators and/or servos are the perfect solution.
May the passion to build be with you! SV
RESOURCES
Firgelli — http://tinyurl.com/cg9gejo
ServoCity — http://tinyurl.com/jdkp2yt
Fright Props — http://tinyurl.com/jf9htcw
Steve's YouTube channel — http://tinyurl.com/nma2doj
Article Comments