BUILDING TIPS: Balancing a Weapon Bar
By Ray Billings View In Digital Edition
I frequently get asked about balancing weapon bars, and figured a simple guide might be helpful. Although there are options for both static and dynamic balancing, I have never needed to do either in all of the years I have competed.
Don’t get me wrong, proper balancing of a spinning mass is crucial, but there is a way to make sure you get this right without any need for specifically balancing it once you are done. It really comes down to paying attention while you are machining it!
Here's a step-by-step guide:
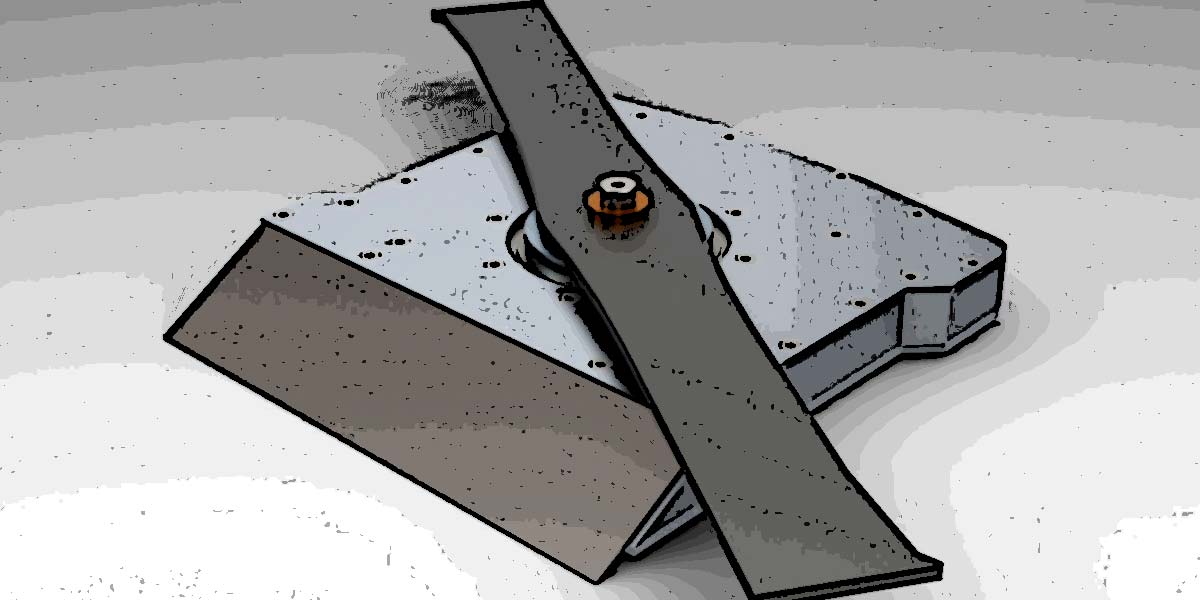
First off, decide on the dimension of your spinning bar. The ones here are approximately the dimensions for the spinning bar on my middleweight bot Mortician. Since your frame needs to be built around this and you need to figure your weight for the total of the bot, you really need to know the specifics on the spinning mass first. In this case, the bar is 5/8” thick giving a total volume of 109.73 inch^3. This makes the unmounted weapon bar just over 31 pounds (Figure 1).
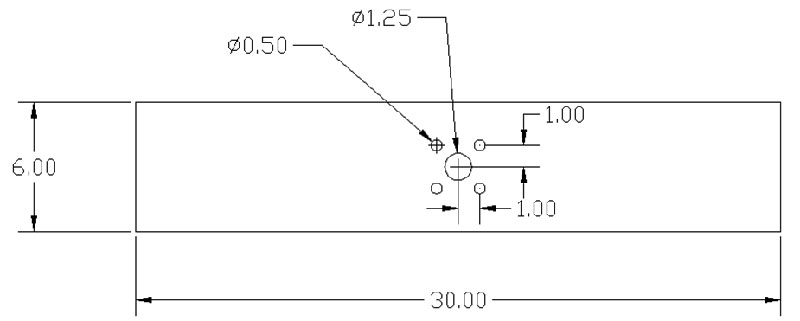
Figure 1.
Okay, I drew it out, I know the weight. So, can I just start cutting and drilling? Precision counts in all machining, but it really counts when you are machining a spinning mass. The first thing you do is the hole in the center that the bar rotates around. This feature will be what you reference for every other dimension. In machining terms, this is the datum.
The first thing you need to make sure is that your mill or drill head is perfectly at a 90° to the work surface. If you make a mistake here, there is no chance of ever getting it balanced correctly. The hole needs to be perfectly perpendicular to the plane of the bar.
Next, make sure the hole is centered on the bar. First, you check the dimensions in the narrower section; they need to be identical. If this isn’t identical, then shave off the side that is thicker until the dimensions match. This is the next most important dimension, since even slight differences will vastly throw the bar out of balance Figure 2).
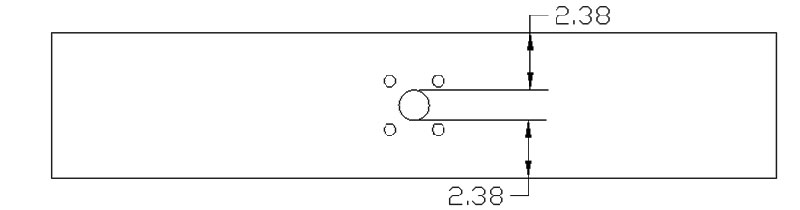
Figure 2.
Now, make sure the hole is centered in the longer section. Again, if one side is longer than the other, go ahead and shave it down to match. This is actually the most forgiving dimension, and a few extra thousandths of an inch will not really throw things out too far (Figure 3).
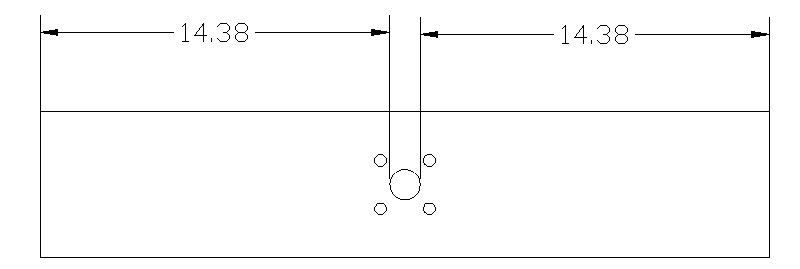
Figure 3.
Finally, we come to the mounting holes. They should look like Figure 3, not Figure 4. The weakest portion of the bar is from the central spin point through the narrowest section to the edge. Placing a mounting hole in this position drastically weakens the bar (Figure 4).

Figure 4.
As long as your machining is done precisely, you will never need to balance anything. SV
Article Comments