WiperBot: A 3D Printed Table Cleaning Robot
By Akhil Padmanabha View In Digital Edition
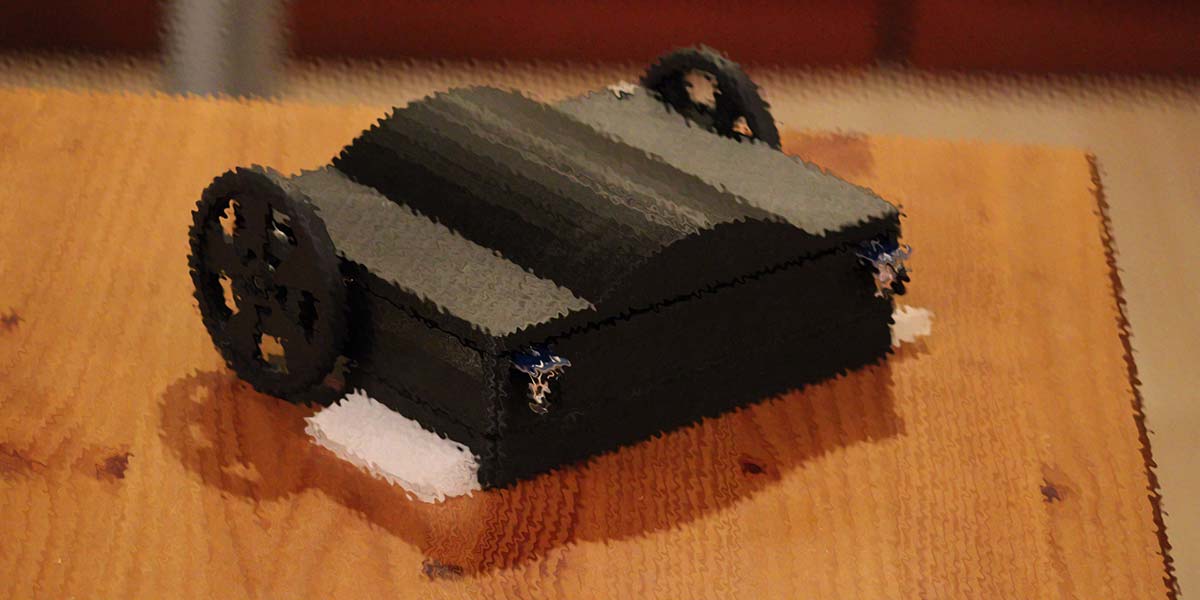
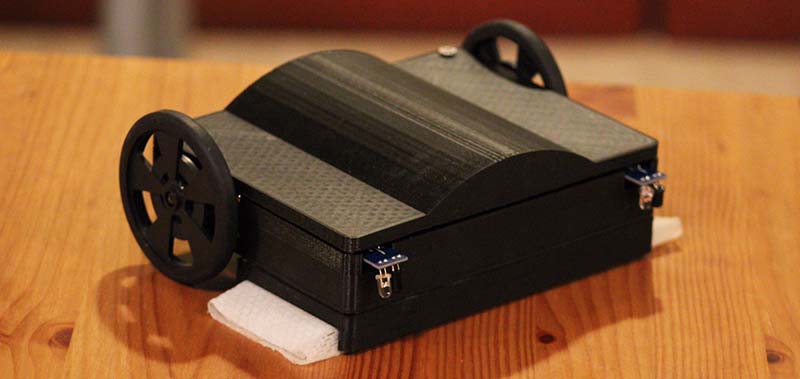
WiperBot is a 3D printed robot that is capable of autonomously wiping a dirty dining table. The hardware and software for WiperBot can easily be modified to accomplish other tasks.
Over the years, as an avid young roboticist, I used a variety of robotics kits in competitions such as First LEGO League and Botball. Upon having progressed past the beginner stage, I’ve been surprised with the low number of 3D printed robots that I have encountered.
For intermediate to advanced hobbyists (assuming you have access to a 3D printer), the cost of a printed chassis is significantly lower than a kit or a fully machined bot. In addition to this, a printed chassis gives you a lot more creativity and control, while also allowing your final product to look much more professional than a kit bot.
After recently purchasing my own 3D printer, I decided to make my first printed bot named WiperBot, specifically designed to tackle one of my most hated chores.
For this current school year, 11 of my friends and I moved from our college dorm into a house off-campus. We bought a long rectangular table for all of us to eat, study, and play games at. The table consistently got dirty with crumbs, sauces, and food residue, and created conflict as no one wanted to clean it. I realized that a robot could easily get the job done.
The goal of my project was to build and program a 3D printed and easily assembled robot which would autonomously wipe a dirty dining table.
Before starting the CAD design of the bot, I did some research into parts and sensors that would allow me to accomplish my goal. I knew that entirely fabricating the chassis out of PLA would be the easiest option in terms of machining, and the chassis would be sufficiently strong for the low-stress task.
In terms of the robot’s motion, I settled on two continuous rotation servos which are perfect for drivetrains of small robots. Continuous rotation servos are created by modifying the common 180 degree position servos, thus allowing them to turn a full 360 degrees. They are also easily programmable using a microcontroller such as an Arduino since they only need a power line and a pulsed signal. The servos were the perfect choice for my project as they are essentially a DC motor and gearbox, but in a more compact package.
Additionally, I purchased two wheels with silicone tires designed specifically for the servos. For the electronics of the bot, I quickly decided on an Arduino as my microcontroller, though a Raspberry Pi would have also sufficed. I also decided to power the Arduino with a 9V battery which — in future versions — could potentially be changed to a sleek wireless charging system consisting of a common rechargeable lithium polymer battery, a battery management system, and wireless charging coils.
I proceeded to pick out my sensors. I knew a gyroscope would be essential to having the robot drive straight and make accurate turns. I picked the GY-521 MPU-6050 — a six-axis accelerometer and gyroscope sensor — due to its cheap $5 price.
My robot would also need cliff detection to sense the edge of the table. I knew that iRobot uses infrared sensors on their Roomba robotic vacuum, and I was able to find cheap Arduino infrared obstacle avoidance sensors on eBay for $2 each.
Over the span of a couple weeks (when I found some free time in the middle of my busy college schedule), I used SolidWorks to design the bot. I wanted to make the assembly of the robot as simple as possible, so I made pockets in the chassis for the servos, battery, infrared sensors, and Arduino to easily fit into. These cutouts eliminated the need for mounts or fasteners to secure the servos or other components to the chassis. The only screws on the robot are used to attach the lid onto the chassis.
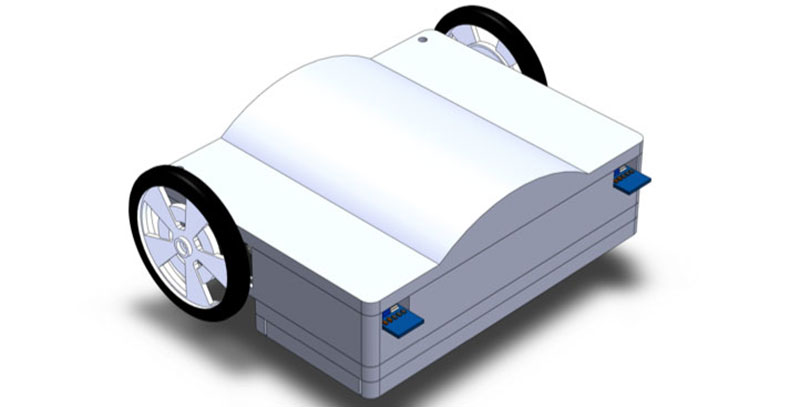
Final CAD design on Solidworks.
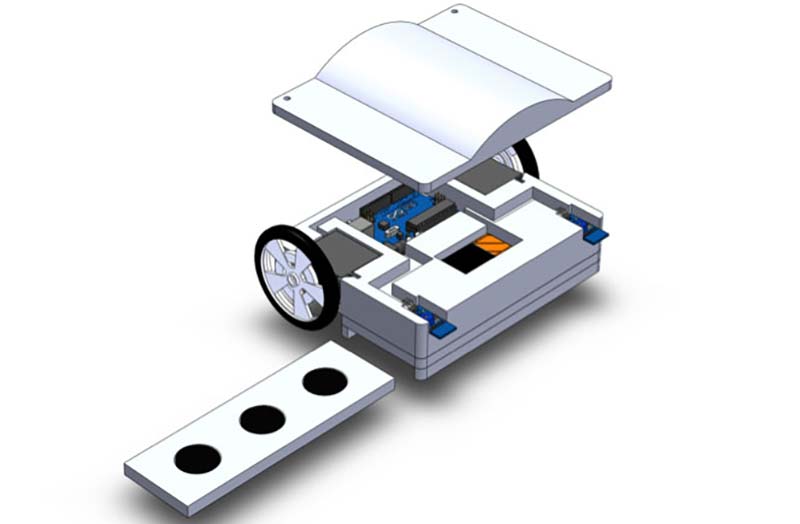
Exploded view of CAD design.
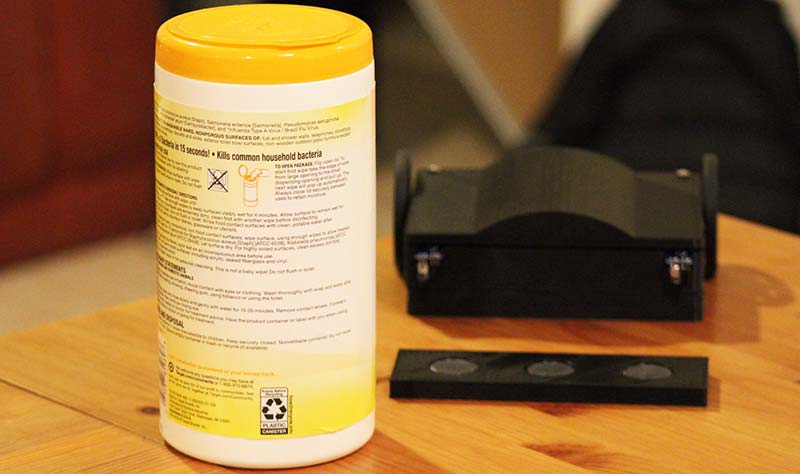
The last part that I planned was the cleaning method. For the first iteration of the WiperBot, I settled on an extremely simple design. I realized that a wipe pressed down on the table may be effective enough for wiping crumbs and potentially liquid spillage, so I chose to pursue this idea. The main consideration I made sure to incorporate in the design was to make the wipe flush with the table to maximize surface contact, thus increasing wiping quality.
I also wanted the wipe to be easily replaceable. So, to secure the wipe to the bot, a user would only have to wrap it around a piece of 3D printed plastic with magnets embedded in it, which would then attach magnetically onto the underside of the robot’s chassis.
Attaching Wipes Onto WiperBot
After touching up and reviewing the CAD of the bot, I went ahead and ordered my parts. In the meantime, I printed the chassis, wipe holder, wipe attachment, and lid. The assembly of the bot was extremely quick and easy as expected, only needing some superglue, two screws, and tape to secure the sensors. I was easily able to figure out the wiring using Arduino tutorials online for the MPU6050 and the infrared sensors.
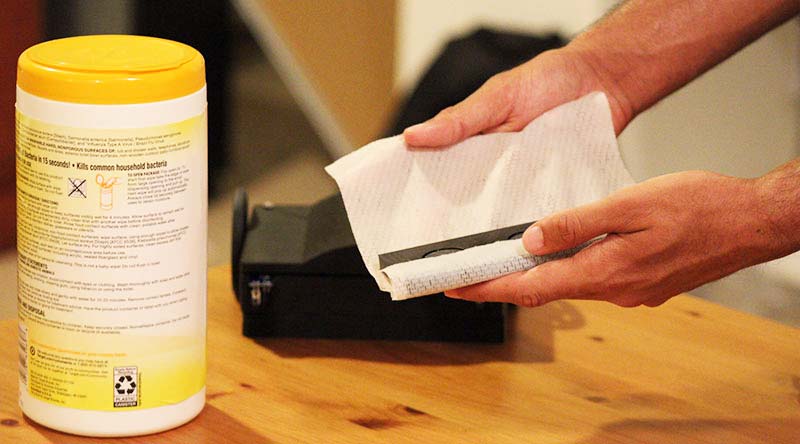
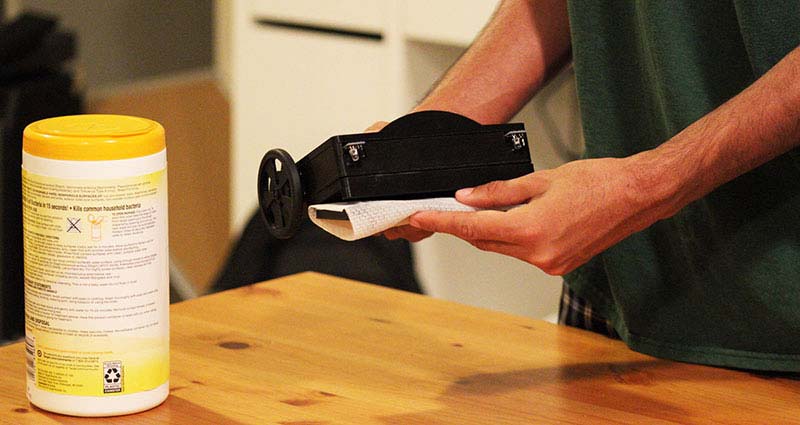
How to attach a wipe onto WiperBot.
Before starting to write code, I thought about different sweeping paths that the robot could take. I eventually settled on these steps:
Steps
- WiperBot starts program and waits 15 seconds for gyro sensor values to stabilize.
- Drives straight until it finds the edge of the table.
- Turns and drives straight until it finds the corner of the table.
- WiperBot commences the sweeping path by driving straight until the end of the table.
- Turns 90 degrees, drives forward, and turns another 90 degrees.
- Repeats steps 4 and 5 until it reaches the end of its sweeping path at the other end of the table
I proceeded to code WiperBot using the Arduino IDE (integrated development environment) which is a mix of C/C++ functions. The coding was overall straightforward, given my numerous years of experience with robotics. However, I had a hard time figuring out how to use the I2C protocol to communicate with the gyroscope as it was something that I had never done before.
For getting values from the gyroscope using I2C, I utilized and modified code from a library located on GitHub by Jeff Rowberg.
I created several functions along the way to simplify the coding process. One of the most used functions that I wrote was square-up code using the infrared sensors.
A “square-up” allows a robot to line itself up with a perpendicular line or surface. In many robotics competitions, square-ups are done using touch sensors and a wall. However, for WiperBot, I used infrared sensors to find the edge of the table and then “square up,” thus allowing it to straighten itself and fix any variance in heading. Take a look at the flowchart of my square-up code.
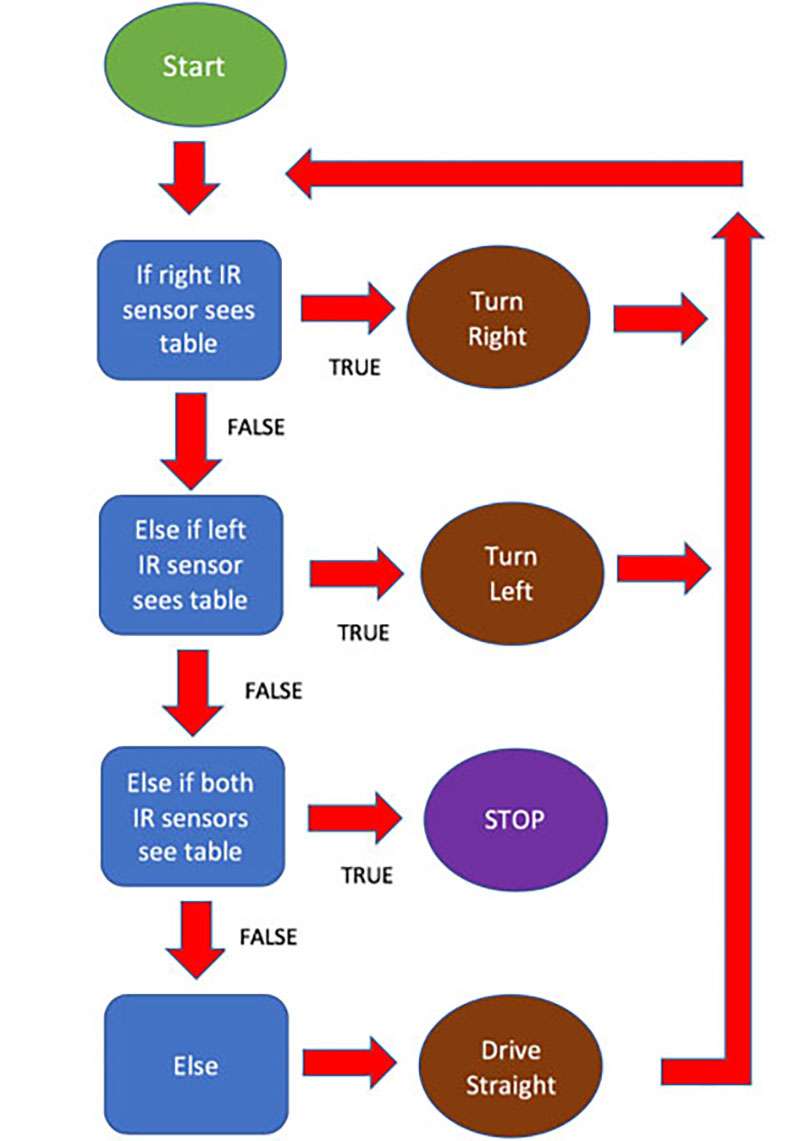
“Square up” code flowchart.
Another important function that I wrote used the gyroscope to maintain the robot’s heading while it’s traversing across the table. The code worked by recording an initial heading and then continuously comparing it to the current heading. If the current heading was larger than the initial heading, the robot would identify that it was tilting to the right and would automatically reduce the speed of its left wheel.
On the other hand, if the current heading was smaller than the initial heading, WiperBot would identify that it’s tilting to the left and would subsequently reduce the speed of its right wheel.
Finally, if the current heading was unchanged, the robot would continue with the same speed. This simple gyroscope code was crucial to WiperBot’s success because it allowed the robot to drive perfectly straight at all times.
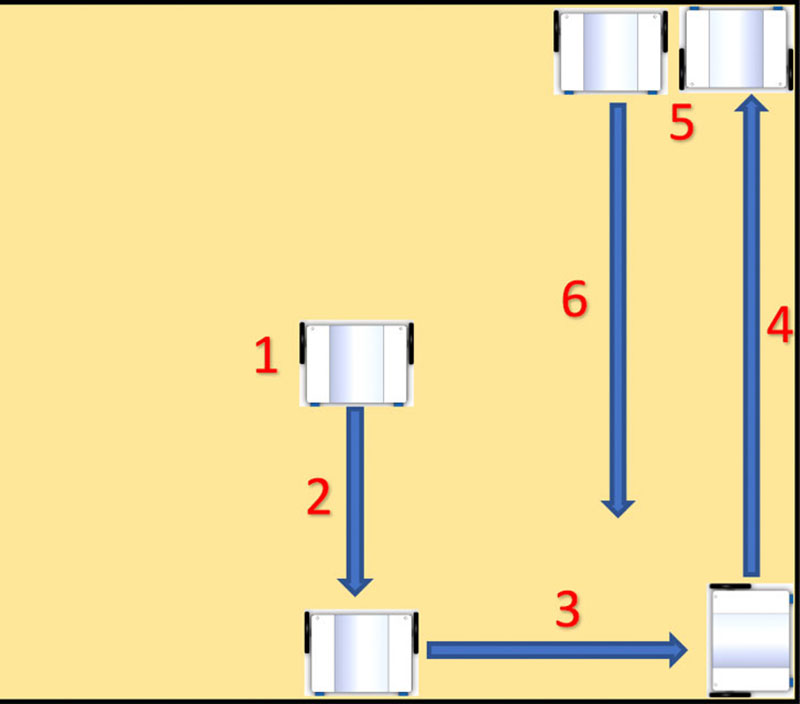
WiperBot’s path.
For future iterations of WiperBot, I plan to add capabilities such as obstacle avoidance which would use ultrasonic or infrared sensors to allow the robot to path-plan around objects on the table such as napkin holders, candles, and plates. I would also like to add the ability for the robot to wipe tables of other shapes.
Conclusion
The chassis and the code that I created for WiperBot can easily be modified and used for a variety of projects. This build proves that 3D printed robots are ideal for low-stress applications and can be used by makers to iterate quickly and cheaply on their ideas.
Even though WiperBot doesn’t make sense economically, I envision the day when we have cheap commercial robotic mechanisms to do menial household tasks.
Maybe, in the distant future, a WiperBot will be the centerpiece of every table in the world. SV
Akhil is a student at the University of California, Berkeley, pursuing an interdisciplinary education in mechanical engineering, electrical engineering, and computer science. He has actively participated in robotics for several years.
Article Comments