The Making of Andros
By Mitch Anderson View In Digital Edition
I was at the point where making “toys” was not fulfilling anymore. I wanted to put my skills to work for something useful. I decided to design a police/military robot. I knew that they are very expensive, and I thought I could do a prototype that would be more affordable. I realized the complexity — especially of the arm assembly — so I was a bit hesitant.
One evening while browsing eBay, I stumbled across a used “as-is” retired police robot. I thought it would be a great way to ease myself in this field by restoring a professional robot first and take those lessons into the next design.
So, I made an offer of $10,000 on the Remotec Andros Mark 4. Quite a price, but not so bad considering that a new one is over $250k. The list price on eBay was $20k, but they took my offer. Remotec is the name in this field, and they don’t sell to the public.
The Process
A week later, the machine came: 900 pounds including all accessories (such as a tether cable unit, for example). Some rubber tracks were broken, there was no documentation, and it seemed like it had not been fired up in a long time.
I called the company; unfortunately, they didn’t support this model anymore with parts or documentation.
I decided to re-do all the electrical stuff and remote control from scratch. I was facing 10 brushed DC motors, but I felt pretty confident that I could handle that.
Parts and Architecture
For RC, I decided to go with a traditional 12-channel radio with a built-in video screen: the DEVO F12. I like things that are compact, and having the screen right there was nice. On the receiver side, I used the matching DEVO RX1202. It’s stable and reliable, and much cheaper than the fancy RC names.
For the signal processing, I decided to use the Teensy 3.5 development board since I heard they are incredibly fast (compared to my old time favorite, the Arduino Mega).
I decided to use two processors: one for the traction wheels and the four “legs” (total of four motors); and one for the arm.
The “Traction Teensy” was the receiver of all 12 PWM channels using IRQ functions. The traditional PulseIn is very slow for the processor. This Teensy would also communicate eight of those values to the “arm” Teensy through an I2C protocol. I don’t think that any Arduino model could deal with all this stuff in a timely manner, but the two Teensy boards did. I was really impressed.
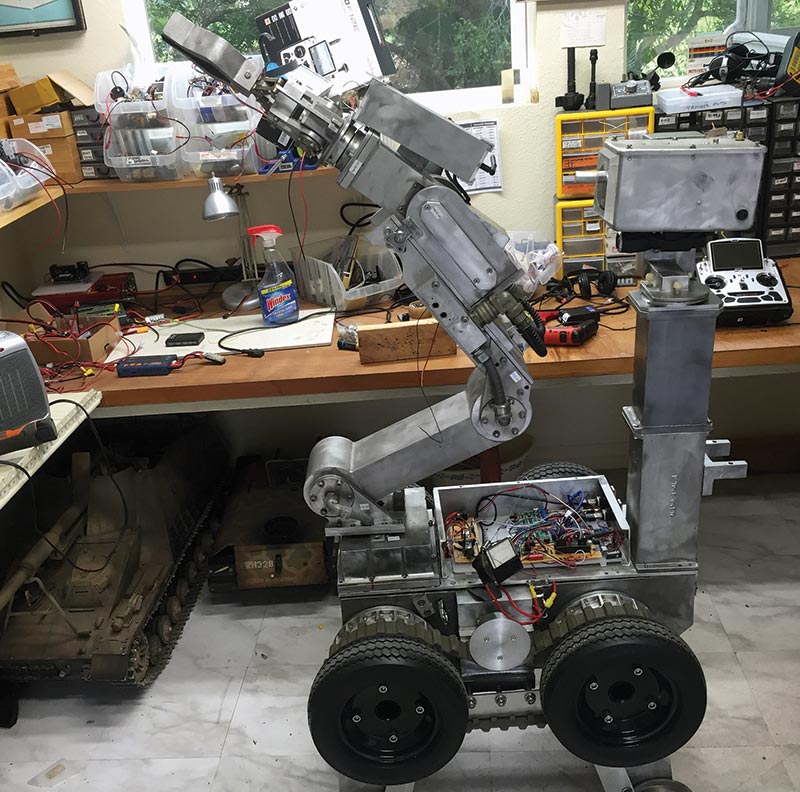
Robot on its “toes” and the upper electronics box open. The two Teensy 2.5s, the RC receiver, the telemetry unit, and antennas reside here. An analog ammeter has been temporarily attached on the side to monitor power consumption (almost 30A when the robot climbs stairs).
Next, I realized that I didn’t have enough proportional controls on the TX radio to deal with the wheel and arm commands at the same time. I contemplated adding a second TX, but that was going to be cumbersome. Carrying two radios for one robot?
I decided to make a “Mode” function in the software, connected to one of the RX binary switches. This way, the same proportional sticks would deal with either the wheels or the arm based on the Mode selection. I realized that I won’t ever drive and grab things with the claw at the same time.
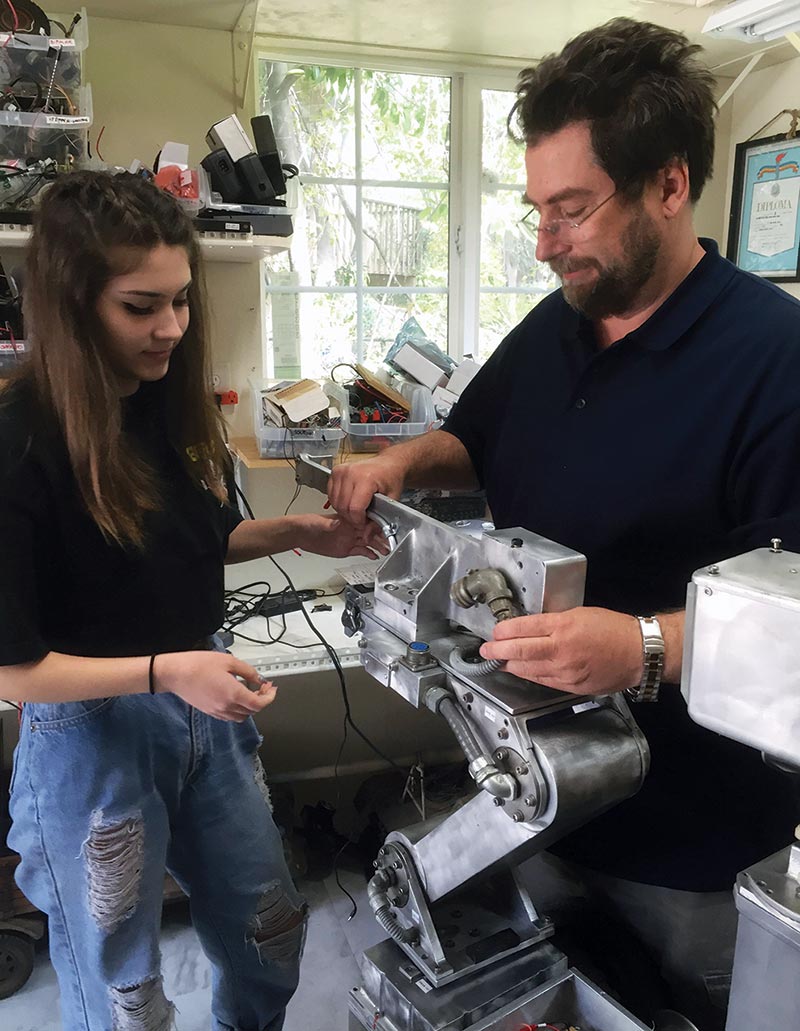
Mitch and Emma Anderson, the father-daughter team working on the robot arm. Here, they’re installing the rifle module that can replace the grip unit.
Mechanical Issues
With my daughter Emma’s help, we took apart all the hubs, cleaned them, and lubricated them. Andros runs on brass bearings (not wheel bearings), in order to deal with heavy loads. From existing pictures, I noticed the newer generations of this model have optional rubber wheels, so the unit (280 lbs) doesn’t wear out the tracks. This robot didn’t include that, but I wanted the option. Enter Home Depot’s wheelbarrow wheels at $25 a piece.
That was the easy part. Attaching them to the hub was a challenge.
As a spacer, we used a waterjet cut 2” thick piece of acetal on each wheel. We then made a connecting plate (1/4” aluminum) from the Andros’ hub to the wheel; each being screwed in to the hub by 20 10-24” stainless screws. Andros is supposed to be rainproof, so all parts we used are either aluminum, brass, or stainless; this way, nothing can rust. It all worked out well. The wheels are solid. I can ride on the robot, and I’m 250 lbs.
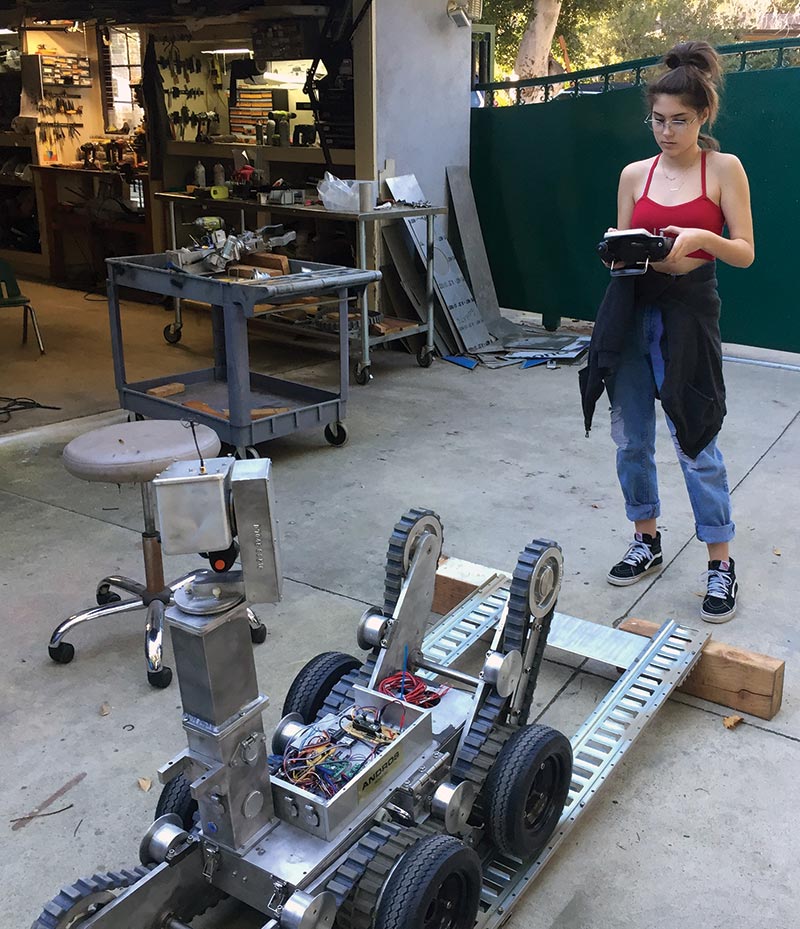
The first part of the project: The arm was detached, so we took care of the traction and the four legs. We also built a ramp to drive the robot into the family’s Volvo SUV. Since the robot weighs 280 lbs, we had to test the ramp before attaching it to the car. It bent, but it held okay. The ramp solution worked out well.
Powering and Controlling the Arm
We discovered the arm was more complex than the traction. Weighing 65 lbs on its own, we decided it would be better to detach it from the robot and install it on a separate table on wheels.
The first step was identifying the wires coming out at the bottom; there were about 45 of them. Emma and I sat down patiently with the ohmmeter, finding pairs of 2-3 ohms of resistance between them (that is a motor). Next, we applied 12V on each pair from a battery and observed the motion. We documented everything such as “base rotation, right-left,” “shoulder rotation extend-withdraw,” etc. Luckily, there was no interruption in the wires, so everything powered fine.
Next, I designed a circuit taking each pair to an H-bridge controller (nothing fancy; $16 on eBay), and I wrote the software on the Teensy that would take the RC signals and convert them to PWM and motor direction commands. After all was said and done, we connected all the above-mentioned pairs to the H-bridges. It all worked after a few hiccups, of course (inverted wires, loose wires, minor stuff).
So, there we were, on our knees with the remote picking up a 30 lb lead bar from the floor with the arm fully extended. That is impressive! Most arms are very limited in the weight they can hold.
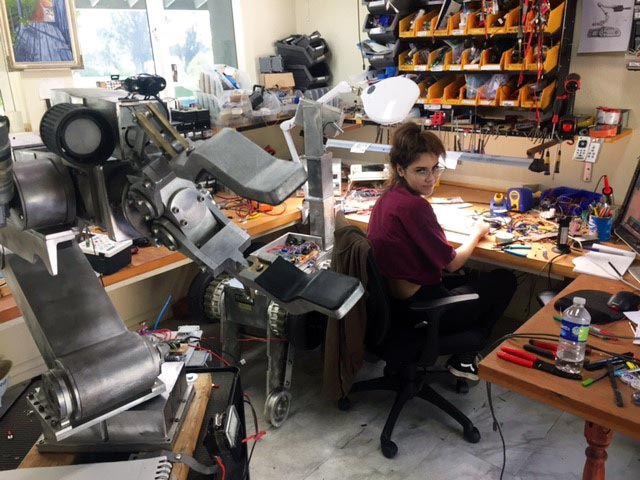
In the foreground, you can see the arm of the robot. It’s been detached and installed on a rolling table. Weighing 80 lbs, it was most challenging to get the pinout correct. There are seven motors and connections to the upper camera. In the background, Emma is soldering terminals to a test connector.
While playing with it, the shoulder motor quit working. It was turning, but the arm was not lifting. We took it apart and discovered that the worm gear axle broke. We found the Engel motors distributor and he told me it would take eight weeks to get me one. There was no way we could wait that long, so I went to a machine shop in my neighborhood.
We took the motor apart, and they welded an even thicker axle instead. We put the worm gear back in, and it now works like a charm; even stronger than before. The repair was $180, but well worth it.
Finally, we put the arm back on the base of the robot, reconnected the wires, and it worked.

The arm has been assembled back, but there were still issues to work on inside the main box. The robot opens like a box for access inside; the arm is resting on the table. This part of the body contains a 20 AH battery, four motors, a circuit breaker panel, DC motor control, and a few relays.
Cameras and Remote Video Receiving
Andros was designed with two cameras: one on the “hand unit,” and a fancier one (zoom, high-res) on the “periscope” assembly in the back. They were both feeding the signal in a switch that would take the video output and send it as UHF to a receiver.
I didn’t like the idea of switching the video, so decided to have two transmitters instead: one for each camcorder. I used the Boscam 2W RF model — the maximum power they make. I could then monitor both cameras (on two monitors) or switch between them by toggling the power to each transmitter — front or back. The front was easy — a simple super wide FOV 600x400 cam.
For the back, I used an older Sony (HDR-SR10) camcorder with HD and some image stabilization (nice to have when the robot is in motion). This camcorder came with an IR remote that would allow zoom, record, etc. I wanted to have these functions available from my radio controller.
I did some research on the ‘net and found the infrared commands for the zoom function for this model. I brought a couple of wires from one of the Teensy units to an IR LED that I parked in the camera box, right in front of the camcorder. I programmed one of the three-position switches on the radio TX to tell the Teensy to generate zoom in and zoom out IR commands to the LED. It worked.
Now comes the unpredictable part: The darn camcorder would go into “demo mode” after 10 min of power-on. Not acceptable! The Andros might survey suspects for hours at the time.
Disabling Demo from the Sony menus did not work. After power reset, it would go back to “Demo” after 10 min. What to do?
I found the IR code for the “take a picture” camcorder function and I programmed the Teensy to tell the camcorder to take a photo every seven minutes, or 500,000 milliseconds. It worked! It’s kind of fun, actually. As we play with Andros, a sudden big flash happens at the most unexpected times.
What does Andros do?
Andros is mainly a bomb squad robot. The robotic hand can handle a package, open a door, go in a building, or drag a disabled person. Andros can also handle tools, cut a door down, drill holes, dig in the ground, sweep the earth with a mine detector, and punch holes in various materials.
Andros also has a laser guided rifle unit. The rifle can be remotely aimed and fired.
The robot has long-range remote video and audio capabilities, and can go into dangerous environments (hostage situation, toxic, radioactive, etc.) and video broadcast with sound.
What do I want to do with Andros?
I would like to have a small “robot for hire” business. Action TV shows often feature robots. In a zoo, a similar robot was used to shoot a tranquilizer in a depressed feline that would not come out of the den.
In mines, similar robots dismantle non-exploded charges, inspect abandoned shafts for safety, and monitor toxic gas levels. In chemical plants, robots can turn off valves in places where humans would not do well. Many of these businesses would not invest in the acquisition of such a robot and for the personnel training. Enter Andros.
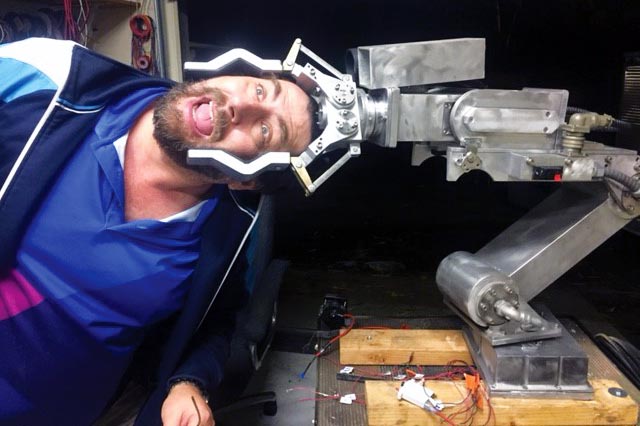
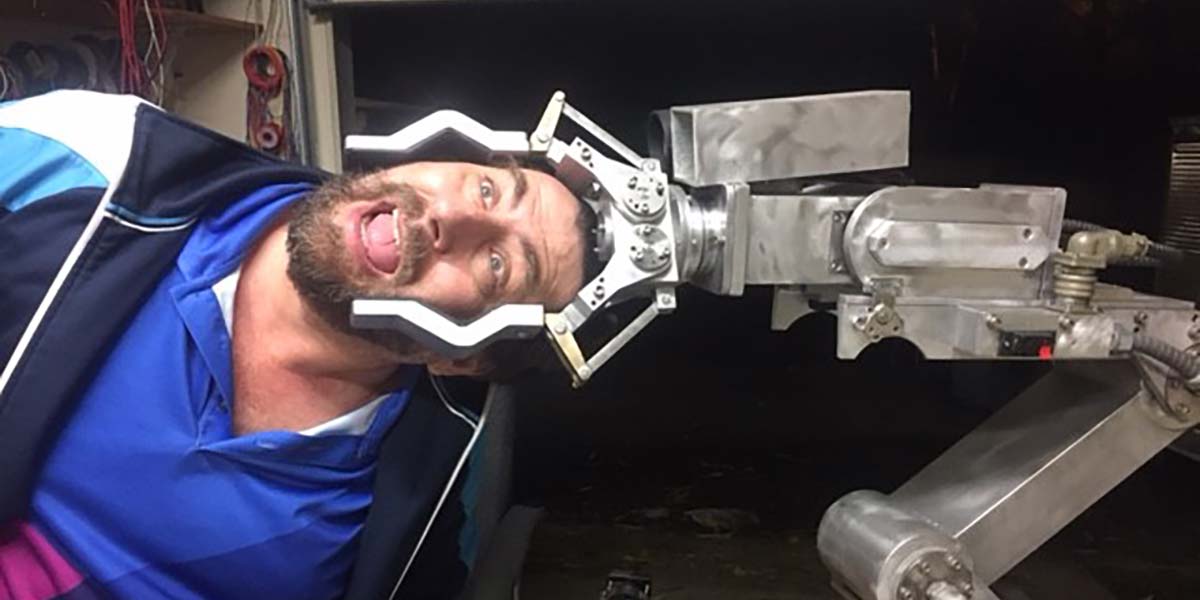
Mitch got attacked. (Oh no! Are the robots taking over?) No project is complete until you have some fun.
What will I do next?
I would like to have a small fleet of three robots, with Andros being the biggest. Next, I’m working on the smallest one: “Polverson 1.” I’m building it from scratch and am designing an object recognition-retrieval capability, so it can roam a lawn (for instance), and identify and pickup a golf ball.
I’m also discussing custom robotics projects with a couple of potential clients, but their products can’t be disclosed right now.
I’ve learned a lot from this restoration. The mechanical structure done by Remotec is very solid, and it would have taken me years to develop on my own. From what I know, I believe I’m the only private citizen to have a functional robot of this size and capability. SV
Mitch Anderson
I studied electrical engineering in my native Romania, and I took computer science in the US when I arrived at the age of 23. My dad (and hero!) was a mechanical engineer, overseeing a machine shop of 60 workers. It was my favorite hang-out as a kid. He was also an inventor; in 1965, he redesigned suspension parts for Tatra trucks.
When his design was adopted by the factory in Czechoslovakia, that earned him a promotion and a bonus. Later, he designed a rock drilling installation that would pump liquid cement inside the cracks of mountains. He worked for a hydroelectric dam company, and stabilizing tectonic movements was essential to the safety of the dam.
I started my career at Xerox in the ‘90s as a field support engineer. Having a lot of idle time between service calls, I decided to fix and re-sell PCs. When I got laid off in ‘97, I turned that side job into a full-time business. By 2004, we were employing 16 people, but I was getting burned out. The business world is exciting, but is also a battlefield. I needed a change and wanted to explore other areas of life.
I sold the business and devoted my time to my family — especially to my twins.
When my son was 12, he told me how much he envied my childhood. I said “What? There was communism, shortages, no human rights ...” “Yes, but you’d go to your dad’s shop and make things. In the summer, you send me to those camps where boys only care about exchanging ringtones.”
His words really got to me, so we started a garage workshop. I was eager to get my hands dirty again as well.
We made lots of WW2 1/6 scale vehicles, and even won a couple of modeling prizes. My daughter, Emma soon jumped in.
Article Comments