The M5StickC, First Impressions
By Theron Wierenga View In Digital Edition
I recently purchased an M5StickC after noticing a number of projects posted online using the M5StickC and M5Stick Plus. The two different models are similar. The M5Stick Plus has some additional features, including a slightly larger LCD display.
The M5StickC is a 48x24x14 mm plastic brick that contains an ESP32, a 80x160 pixel LCD display, a USB port for programming, three buttons, and an eight-pin header socket with power and three GPIO pins brought out. There are also a number of additional features inside.
M5StickC features include:
- ESP32 Based Built-in 2.4G Antenna
- LCD Color Display 80x160 pixels
- 5V DC Power Supply, Charges from USB Type-C
- 80 mAh LiPo Battery
- Grove Port
- 4 MByte Flash
- Microphone
- Six-axis IMU SH200Q
- Red LED
- IR Transmitter
- Real Time Clock
- Three Buttons: Power, Button A on Top, Smaller Button B on Side
- Extendable Socket
- Wearable and Wall Mountable
To get acquainted with this device, I purchased a package from Amazon that included a wrist watch strap. eBay has lots of offers as well. My initial interest came from an online article describing how to use the M5StickC to do bed leveling on a 3D printer. The article can be found at https://www.instructables.com/3D-Print-Bed-Leveling-Tool-Using-M5StickC.
A force sensitive resistor (FSR) is connected through the header pin socket and the pressure between the 3D printer nozzle and print bed is measured and displayed on the LCD.
After experimenting with the M5StaickC for a while, its use in robot construction became obvious.
The M5Stack website contains a large number of “HATs” which are small sensors or devices that can be interfaced to the M5StickC by plugging them into the header socket.
The range of devices is impressive and includes battery packs, PIR sensor, joysticks, speaker, servo motor interface, TOF laser range measurement, NCIR body temperature, ADC (analog-to-digital converter), temperature, humidity, and atmospheric pressure, and a thermal camera, to name a few.
So, along with the sensors and other devices already embedded in the M5StickC, additional connections from the ESP32 to other components are possible. There’s a lot of potential here for robot builders.
Figure 1 shows a laser ranging sensor HAT.
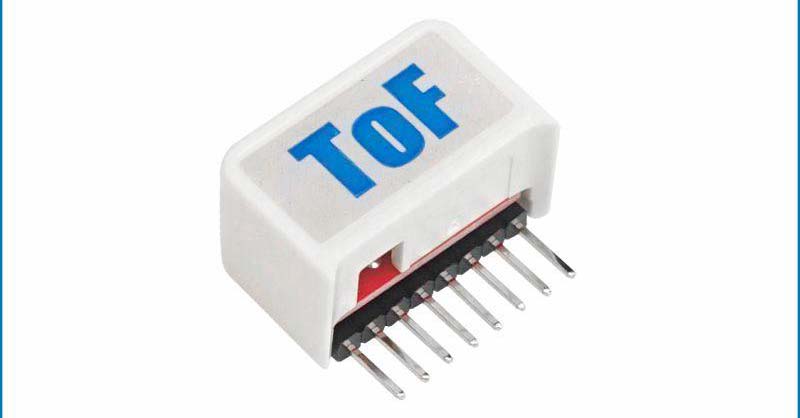
FIGURE 1. The ToF HAT is a high precision laser-ranging sensor specifically designed for the M5StickC.
The M5StackC hat page is at https://m5stack.com/collections/m5-hat. Figure 2 shows the M5StickC itself; Figure 3 shows its features.
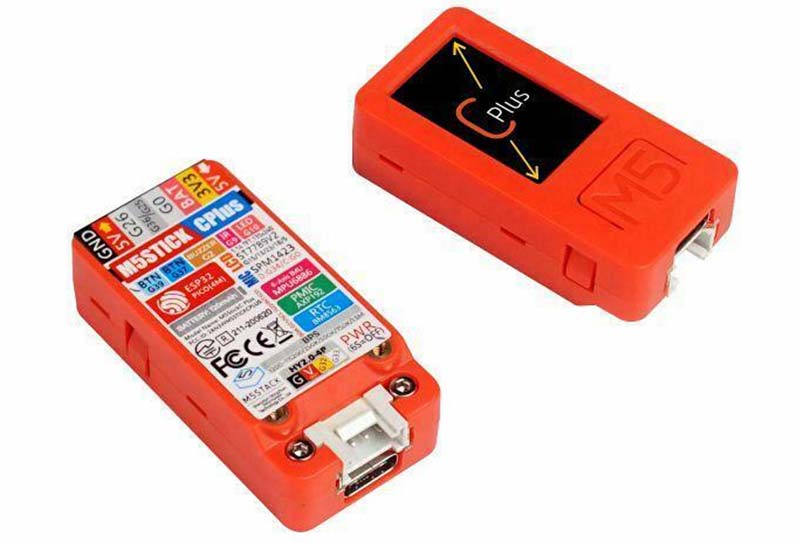
FIGURE 2. The M5StickC.
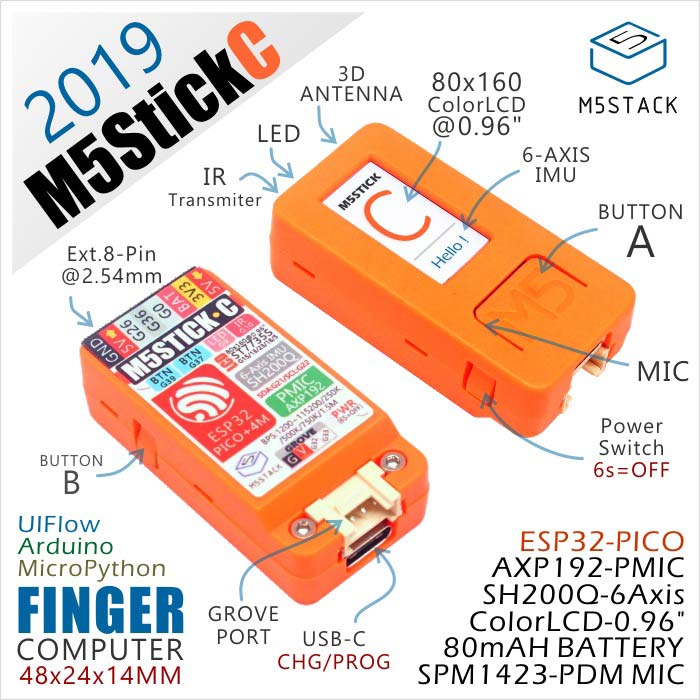
FIGURE 3. M5StickC features.
To experiment with the ESP32 in the M5StickC, I wrote a program that turns it into a wrist watch. Digital clocks are an area I’ve done lots of programming in and so was an easy project to experiment with and learn the M5StickC.
If you search online, you’ll find lots of examples from people who wrote a watch program. The included wrist strap also got me going in this direction. Be aware that this strap is not for larger wrists. It was a tight fit on me using the largest adjustment.
No additional hardware was added to the M5StickC and I used the Arduino IDE (integrated development environment) for programming. My main interest was in testing the ESP32 connection to the Internet, using the buttons, and writing to the LCD display.
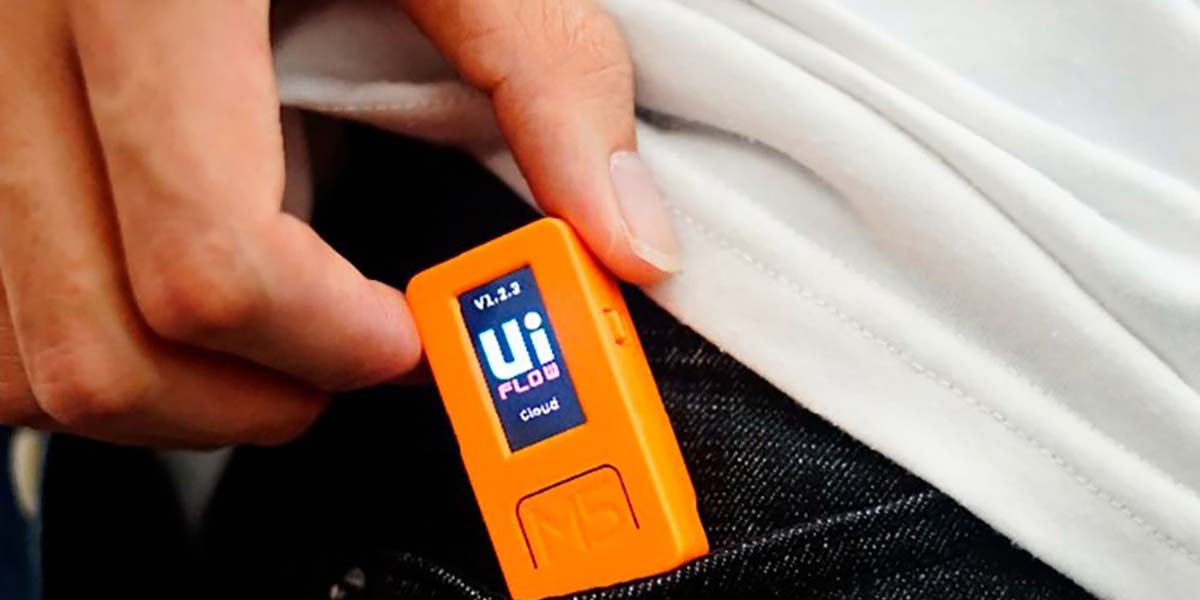
If you want to duplicate my efforts, here are some resources you’ll need. I like the Arduino IDE and so chose this method to program the M5StickC. It can also be programmed in MicroPython and with the M5Stack’s UIFlow, a graphic coding IDE. A free UIFlow download is available on the M5Stack website at https://m5stack.com/pages/download. If you need to install the Arduino IDE on your computer, you can find a guide at https://www.arduino.cc/en/Guide.
You’ll also need to install the software to program the ESP32 on the Arduino IDE. The tutorial found at https://randomnerdtutorials.com/installing-the-esp32-board-in-arduino-ide-windows-instructions is very helpful for accomplishing this task.
I also installed the M5Stack library which is available at https://m5stack.com/pages/download.
Once the M5Stack library is installed, you’ll have access to many example programs for the M5StickC. I strongly encourage referring to these examples. I did find some online examples of software for the M5StickC that have errors; notably in the use of the buttons. The example code provided me with the correct use of the buttons.
In my program, I use the Network Time Protocol (NTP) to obtain the current time from the Internet and the OpenWeather API to retrieve minimal local weather information (just the outside temperature and humidity). Information on these protocols can be found at https://www.ntp.org and https://openweathermap.org/api. You’ll need to open a free account to use the OpenWeather API.
The flowchart for the wrist watch program is found in Figure 4.
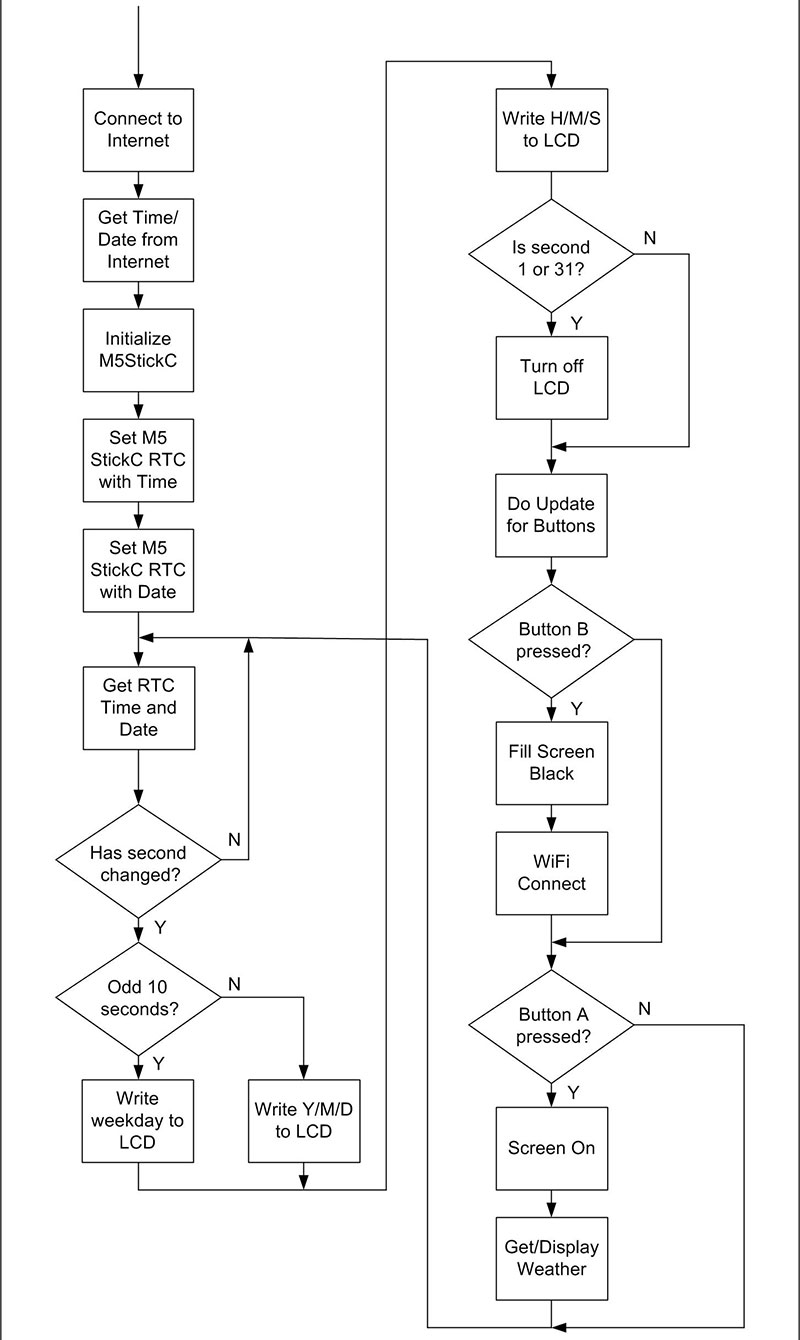
FIGURE 4. Flowchart of the wrist watch program.
Here’s the main loop portion of the program. It makes extensive use of the M5Stack library. The complete program can be found in the article downloads.
void loop()
{
while (RTC_TimeStruct.Seconds == last_sec)
{
M5.Rtc.GetTime(&RTC_TimeStruct);
}
last_sec = RTC_TimeStruct.Seconds;
M5.Rtc.GetData(&RTC_DateStruct);
if (RTC_TimeStruct.Hours > 12) RTC_TimeStruct.Hours -= 12;
M5.Lcd.setCursor(20, 15);
M5.Lcd.setTextSize(2);
if (((RTC_TimeStruct.Seconds /10) % 2) == 1)
{
M5.Lcd.print(daysOfTheWeek[RTC_DateStruct.WeekDay]);
}
else
{
M5.Lcd.printf(“d-d-d\n”,RTC_DateStruct.Year, RTC_DateStruct.Month,RTC_DateStruct.Date);
}
// M5.Lcd.printf(“Week: %d\n”,RTC_DateStruct.WeekDay);
M5.Lcd.setCursor(10, 45);
M5.Lcd.setTextSize(3);
M5.Lcd.printf(“d:d:d\n”,RTC_TimeStruct.Hours, RTC_TimeStruct.Minutes, RTC_TimeStruct.Seconds);
if ((RTC_TimeStruct.Seconds == 1) || (RTC_TimeStruct.Seconds == 31)) screen_Off();
M5.update();
if (M5.BtnB.isPressed())
{
M5.Lcd.fillScreen(BLACK);
WiFi_Connect();
}
if (M5.BtnA.isPressed())
{
screen_On();
do_weather();
}
}
Figures 5-7 show different settings on the watch itself.
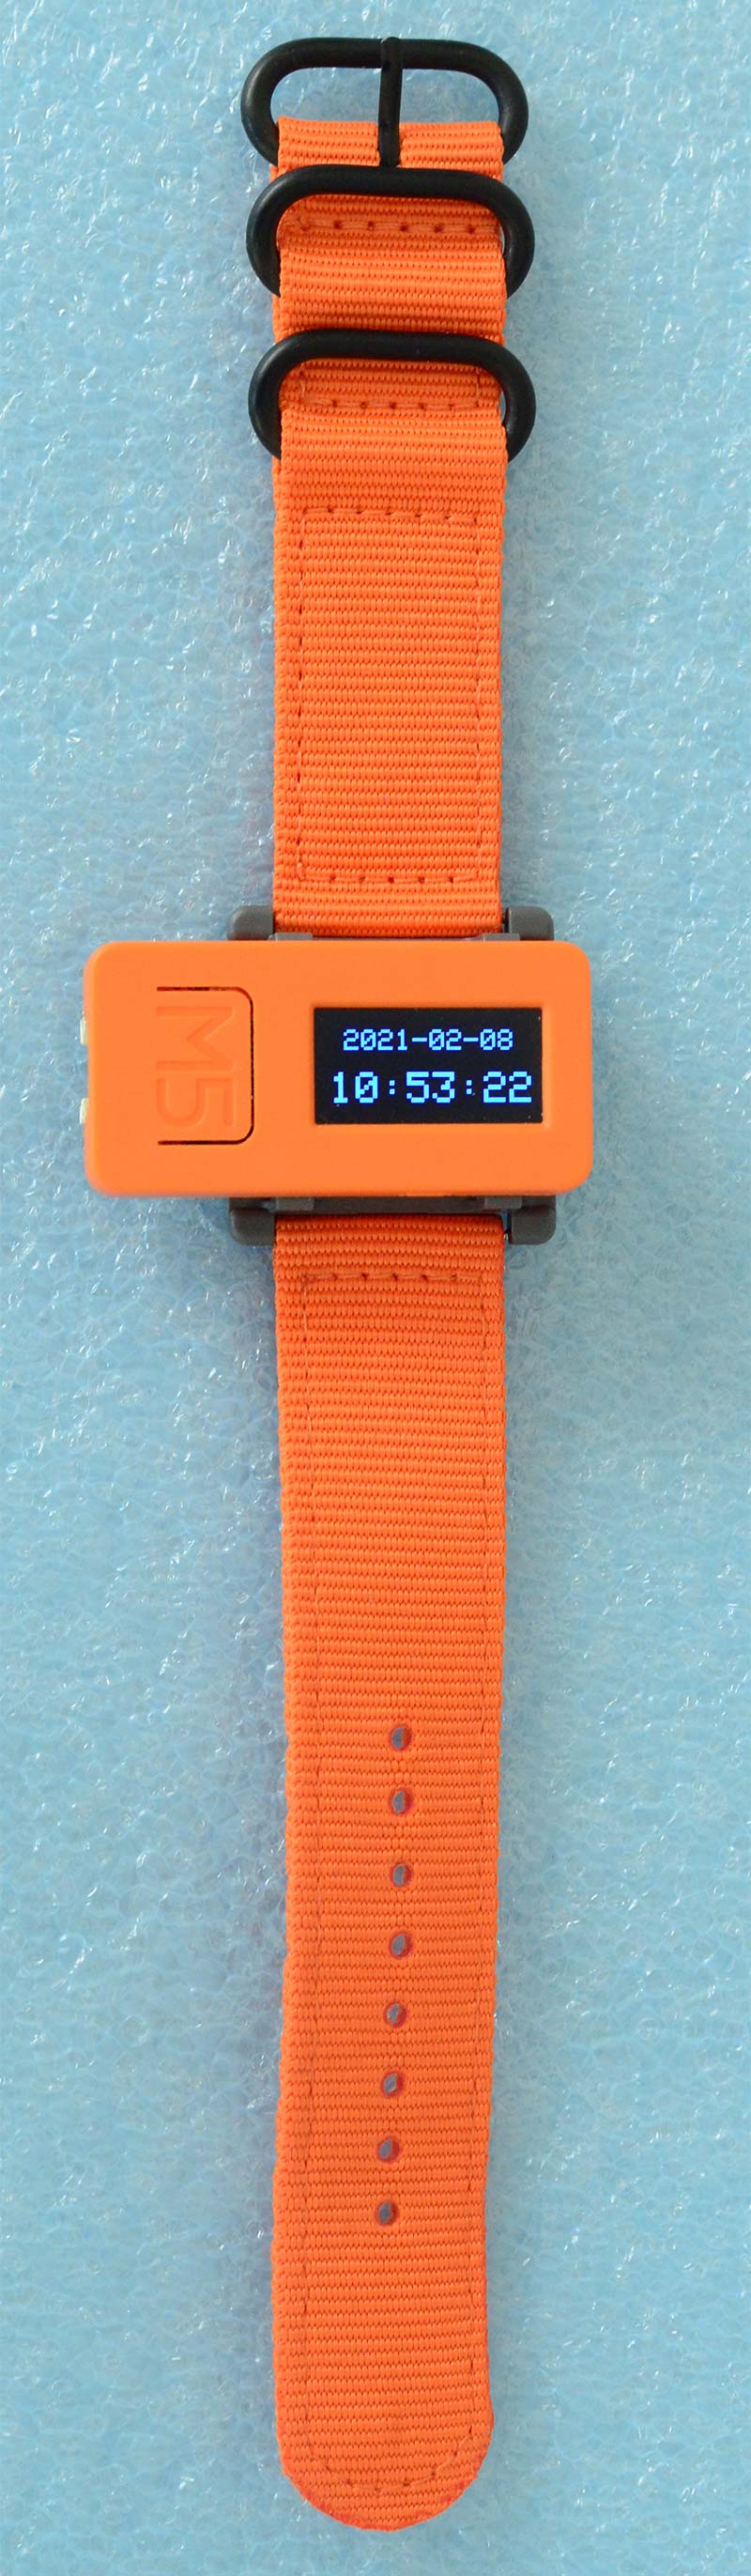
FIGURE 5. Watch showing date and time.
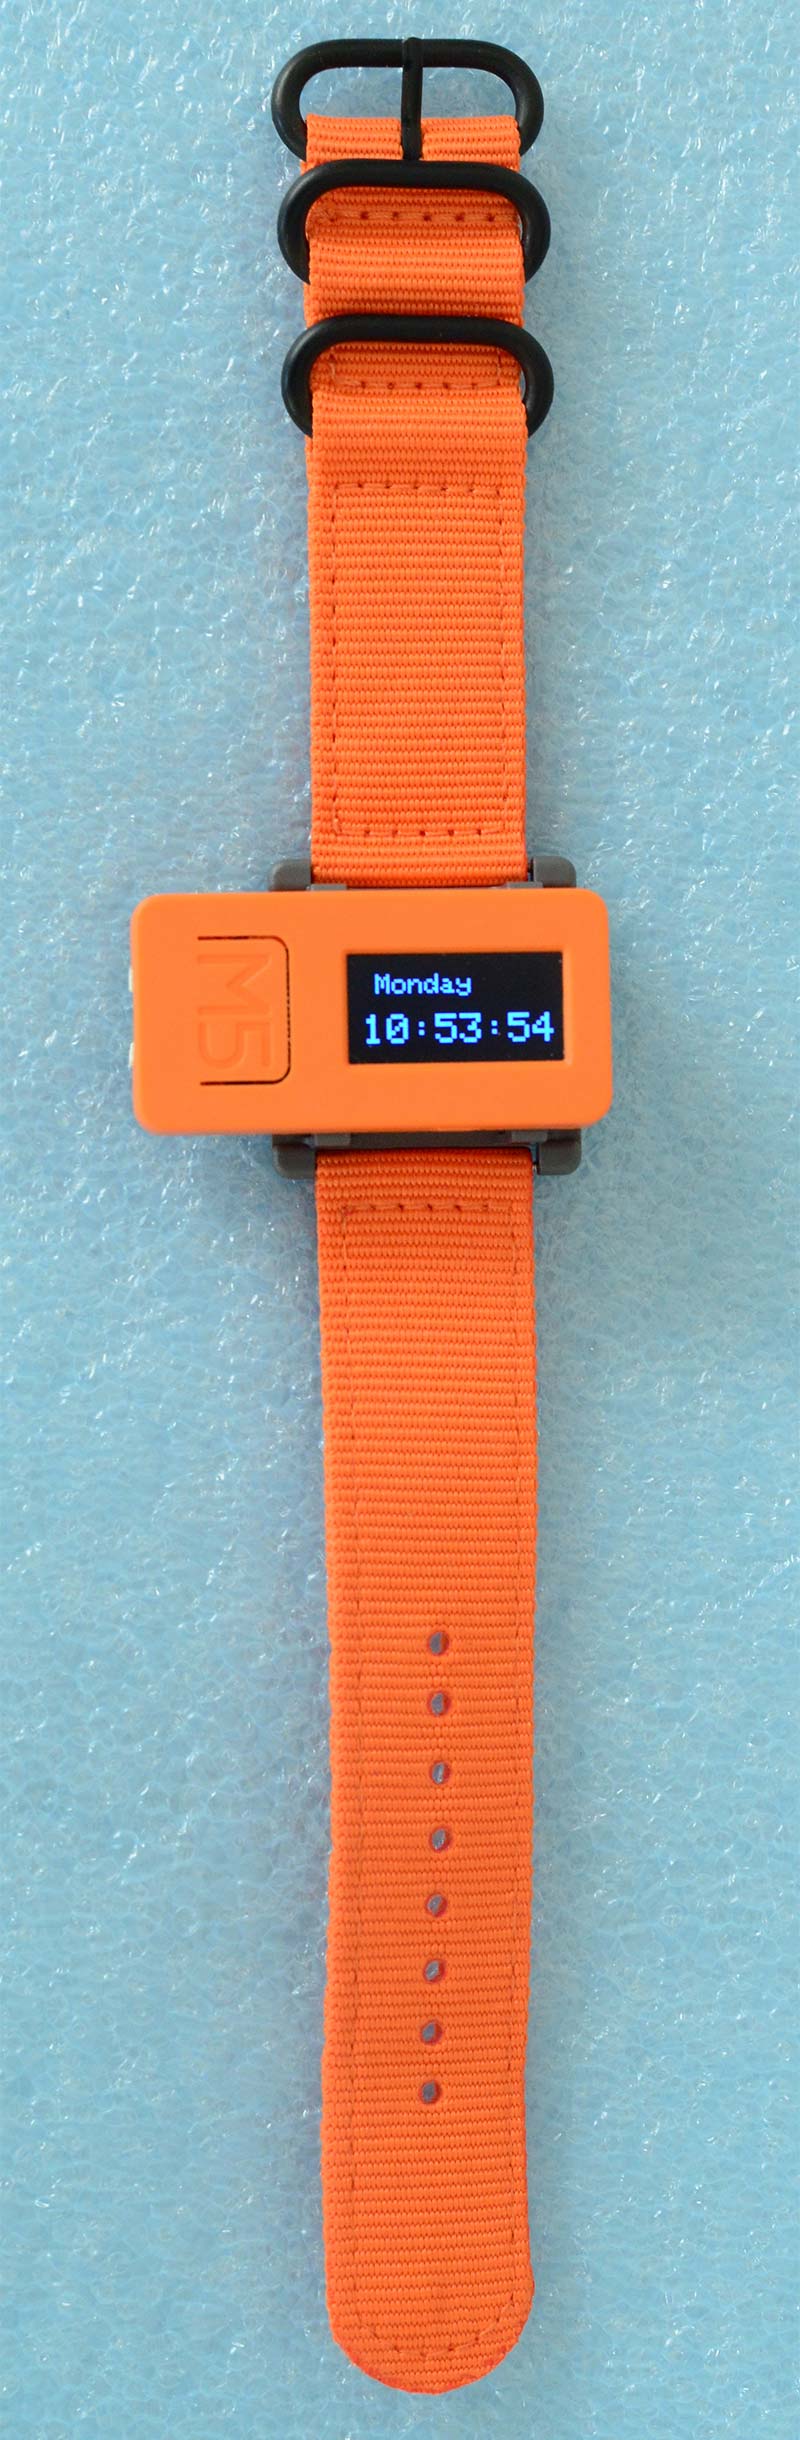
FIGURE 6. Watch showing weekday and time.
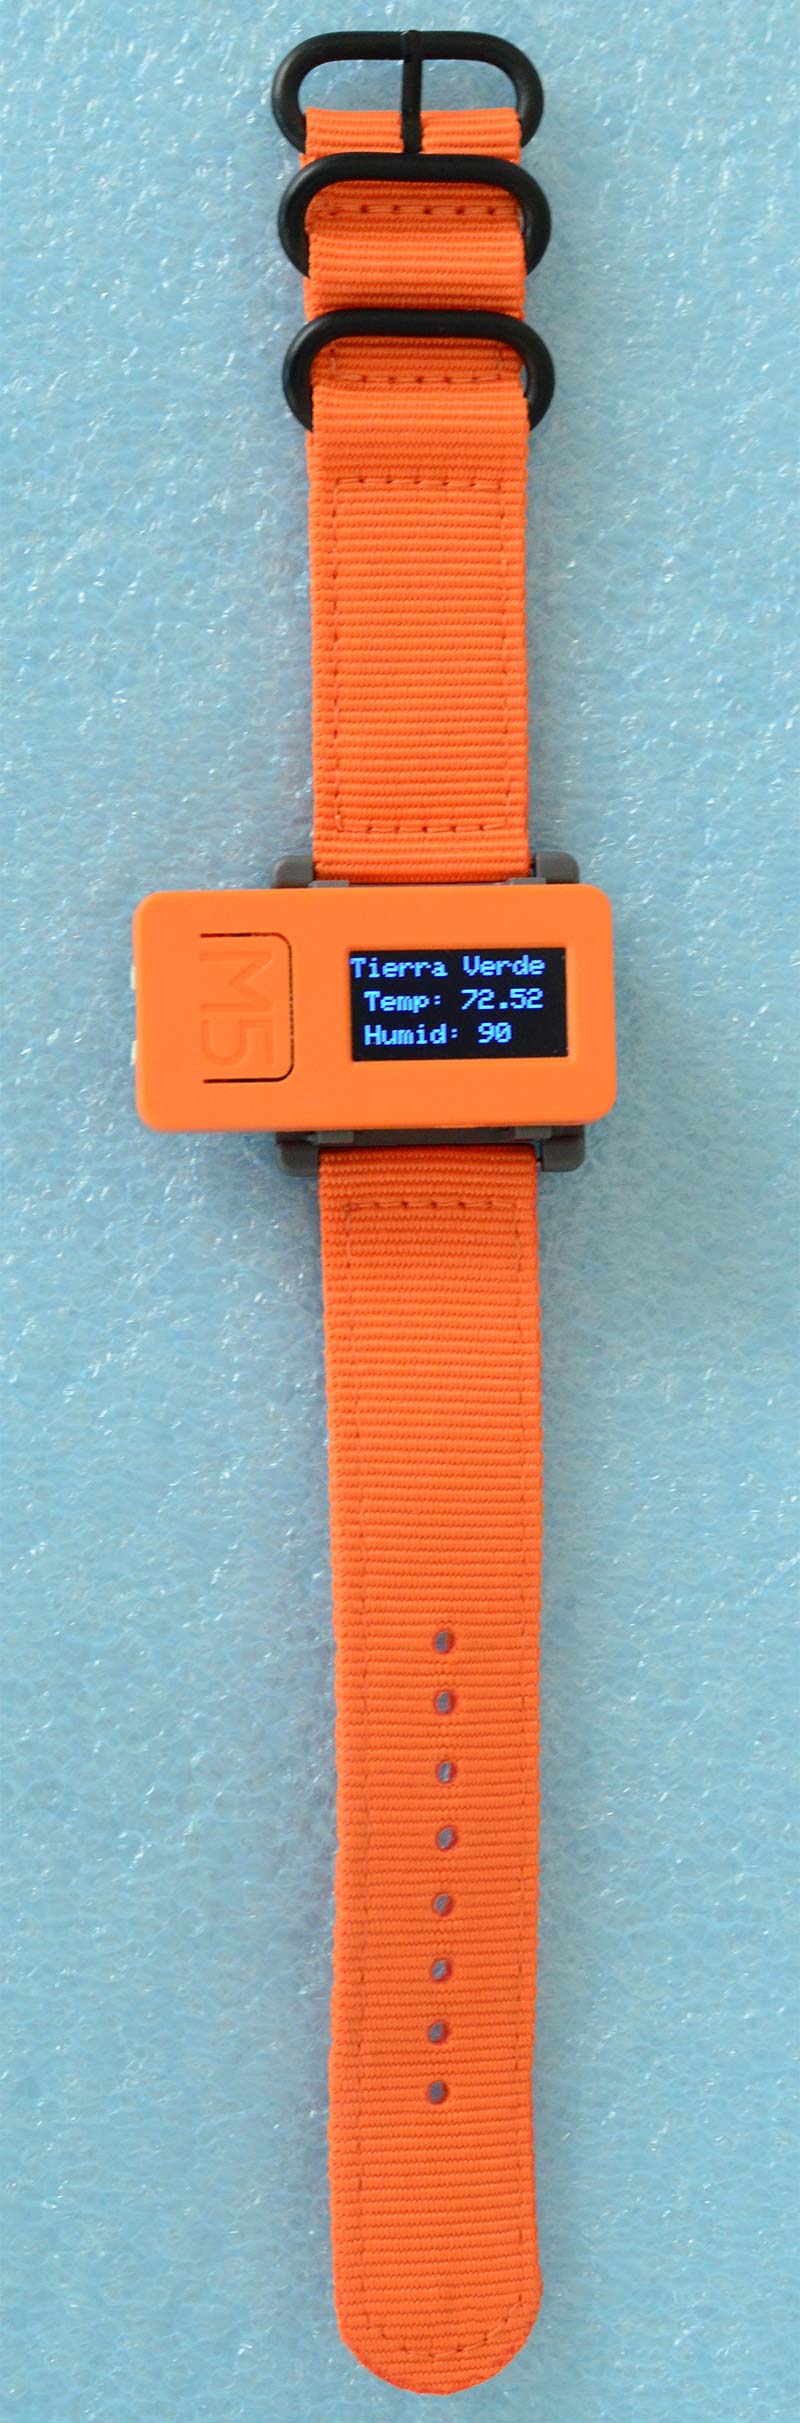
FIGURE 7. Watch showing minimal weather info.
I found reading the buttons a little different. When you use the M5.BtnB.isPressed() method, you must first call the M5.update() method. Pressing the large button A turns the LCD on and then gets the weather information.
Pressing button B fills the screen with the black background and then does a Wi-Fi connect. The main loop portion of the program mainly contains M5 method calls to software objects provided in the included M5Stack library, making it fairly easy to program.
The program works quite well but there are a couple of caveats. First, the 80 milliamp hour battery does not give you enough battery life. To get the watch through a day, you need to turn the LCD display off for most of the time when using it. When the seconds hits 1 or 31, the program turns off the display.
There’s a large amount of online discussion about lowering the power consumption of the M5StickC. I didn’t attempt to further reduce power consumption.
Second, the Internet connectivity goes through your local wireless router, so the program needs your SSID and password to access the router. Unlike your phone, this device does not have a cell connection to the Internet, so once you’re away from your router, it can’t connect to the Internet. When this happens, the program changes the display color from blue to red. Take a look at Figure 8.
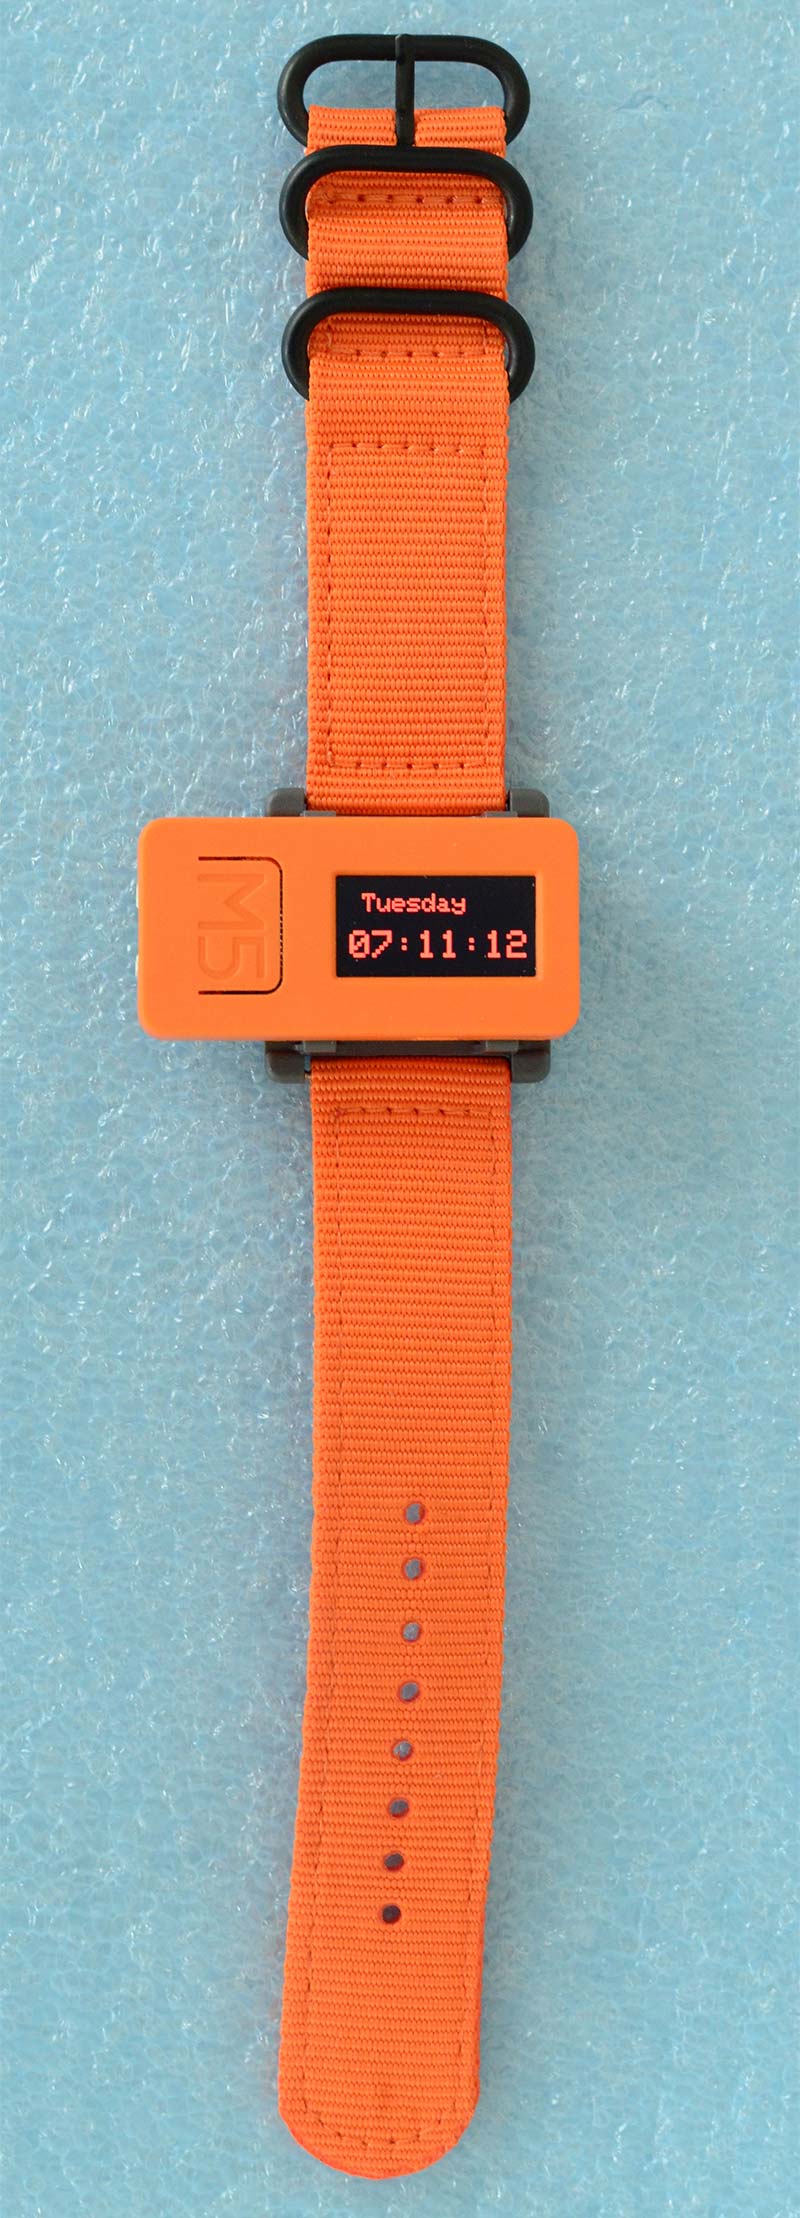
FIGURE 8. Red text showing no Internet connection.
Because there’s an embedded RTC in the M5StickC, it will continue to keep time even when the Internet connection is lost. In the setup portion of the program, the time is obtained from the Network Time Protocol server, but after that, it isn’t accessed again and the RTC takes over the timekeeping function.
When you attempt to get weather information with no Internet connection, it will return blank values.
My program only captures a minimal amount of information from the OpenWeather API; just the local temperature and humidity. A good bit of the total program involves getting and parsing the weather information. The Arduino compiler reports the program using 70% of available space but only 12% of dynamic memory.
My overall impression of the M5StickC is very positive. I see it as a useful component in robot construction or data acquisition and reporting. For long time use, it’s easy enough to add something like a five volt power supply through either the USB connection (probably the best way) or the header plug.
I spent some time experimenting with the IMU unit in the M5StickC and found it has some real potential for use in robotics. It does need calibration and the yaw values do drift quite a bit. Using just the pitch and roll values on something like a robotic arm will give information on its orientation in space.
The following is the example IMU program provided with the M5Stack library with additional output I added, so you can view its reaction on the serial plotter feature of the Arduino IDE:
// Testing IMU
#include <M5StickC.h>
float accX = 0.0F;
float accY = 0.0F;
float accZ = 0.0F;
float gyroX = 0.0F;
float gyroY = 0.0F;
float gyroZ = 0.0F;
float pitch = 0.0F;
float roll = 0.0F;
float yaw = 0.0F;
void setup() {
// put your setup code here, to run once:
M5.begin();
M5.IMU.Init();
M5.Lcd.setRotation(3);
M5.Lcd.fillScreen(BLACK);
M5.Lcd.setTextSize(1);
M5.Lcd.setCursor(40, 0);
M5.Lcd.println(“IMU TEST”);
M5.Lcd.setCursor(0, 10);
M5.Lcd.println(“ X Y Z”);
M5.Lcd.setCursor(0, 50);
M5.Lcd.println(“ Pitch Roll Yaw”);
Serial.begin(115200);
}
float temp = 0;
/*****************************************
M5.IMU.getGyroData(&gyroX,&gyroY,&gyroZ);
M5.IMU.getAccelData(&accX,&accY,&accZ);
M5.IMU.getAhrsData(&pitch,&roll,&yaw);
M5.IMU.getTempData(&temp);
*****************************************/
void loop() {
// put your main code here, to run repeatedly:
M5.IMU.getGyroData(&gyroX,&gyroY,&gyroZ);
M5.IMU.getAccelData(&accX,&accY,&accZ);
M5.IMU.getAhrsData(&pitch,&roll,&yaw);
M5.IMU.getTempData(&temp);
M5.Lcd.setCursor(0, 20);
M5.Lcd.printf(“%6.2f %6.2f %6.2f “, gyroX, gyroY, gyroZ);
M5.Lcd.setCursor(140, 20);
M5.Lcd.print(“o/s”);
M5.Lcd.setCursor(0, 30);
M5.Lcd.printf(“ %5.2f %5.2f %5.2f “, accX, accY, accZ);
M5.Lcd.setCursor(140, 30);
M5.Lcd.print(“G”);
M5.Lcd.setCursor(0, 60);
M5.Lcd.printf(“ %5.2f %5.2f %5.2f “, pitch, roll, yaw);
M5.Lcd.setCursor(0, 70);
M5.Lcd.printf(“Temperature : %.2f C”, temp);
Serial.print(int(pitch));
Serial.print(“ “);
Serial.println(int(roll));
delay(100);
}
The M5StickC is the most compact ESP32 platform around and, in addition, contains a respectable number of connected components already built in. If you haven’t used the ESP32 before, here’s an excellent way to begin experimenting. SV
Article Comments