Solar Astronomy: Visualization Technologies
This is the first in a series of articles on the robotics-relevant technologies used in amateur astronomy. Given the solar eclipse of 2024 will be here and gone before you know it, let’s kick off the series by considering the visualization technologies used in the field of solar amateur astronomy. I’ll provide a deeper dive into these and more general astronomy technologies in subsequent articles.
Introduction
What field of robotics is driving the limits of embedded AI, augmented reality, object tracking, semi-autonomous mechanical arm movement, low-noise, cooled sensors, and affordability? I’d say the title goes to astronomy, including amateur astronomy.
Take a look at what’s out there. For half the price of a decent robotics arm, you can buy a smart telescope that sets itself up using GPS and the stars, tracks an astronomical object of your choosing to within a few minutes, and spits out a digital, stacked, high-resolution composite image in minutes.
An afternoon of transporting and setting up a telescope is now a five-minute exercise, freeing astronomers to focus on the heavens, and minimizing the less stimulating aspects of the hobby.
As noted in my editorial — weather permitting — on April 8, 2024, a total eclipse of the sun will be visible on a track from Texas to New England. And make no mistake about it, whether a total solar eclipse is a time to deal with the wrath of the gods or not, it’s certainly a major financial event.
Manufacturers of specialized binoculars, telescopes, filters, cameras, intelligent telescope mounts, and power wireless systems the world over have been feverishly perfecting and marketing their technologies in preparation for the four-minute eclipse. It’s a rare, once in a lifetime event for some.
Barring extinction from a coronal mass discharge from the sun or a direct strike from a wandering asteroid, we’ll be able to enjoy another full solar eclipse visible from the contiguous United States in another 20 years.
There are several ways to experience astronomy, regardless of whether the focus is the sun (solar astronomy), the moon (lunar astronomy), or even deep-sky objects (deep-sky astronomy). In addition to the print and online magazines and books, there are online and app-based sky simulations which put most planetariums to shame. Familiarity with these resources will enable you to better understand and plan your first-hand experience in astronomy.
You can also join your local astronomy club, which likely supports public outreach with free access to hands-on astronomy experiences. If you’re affiliated with a university, then take advantage of the equipment and expertise in the campus observatory.
Finally, you could leave the relatively expensive, time-consuming data gathering component of astronomy to the professional astronomers. NASA’s terrestrial and space-based observatories and satellites generate more data than you could analyze in a lifetime.
To better appreciate some of the challenges associated with gathering meaningful solar data, let’s review some basic solar astronomy.
The Sun
The sun is a 1.9x1030kg sphere of ionized gas or plasma traveling in corkscrew fashion through the milky way galaxy. Not only is the sun’s path constantly changing, but the sun itself is under constant flux.
At any instant, a jet of magnetized solar plasma can shoot out toward the earth, wiping out all satellite communications or even life as we know it. We could do without the rings of Jupiter, but it’s the solar radiation interacting with the earth’s magnetic field that creates the Goldilocks Zone that makes life possible.
The most important of the sun’s specifications are the mean distance between the sun and earth — one astronomical unit (AU) or 150,000,000 km — and the irradiance or energy that makes it from the giant fusion reactor to the earth’s surface; about 1.4kW/m2. Assuming the sun progresses like similar stars, with time, the AU will decrease, and the irradiance will increase to the point that life can no longer exist on earth.
Also of note is that the sun has an average rotation period of 27 days, with rotational velocity higher across the equator than at the poles. That is, the rotation period is 24 days at the equator and 35 days near the polar regions. This rotation is about a tilt axis of 7.25 degrees from the axis of the earth’s orbit.
You can appreciate this tilt and the rotational speed differences by observing the motion of sunspots across the surface of the sun. Sunspots are areas of intense solar activity, first documented by Chinese astronomers over 2,500 years ago. These spots — typically 1-10 diameters of the earth — appear dark because they are slightly cooler than the surrounding plasma.
The well-known sunspot cycle is 11 years. The peak in activity (around four years into each cycle) is marked by a reversal in the sun’s magnetic field and by the most sunspot activity near the equator. It’ll take another seven years to hit minimum activity level, with most sunspots appearing near the poles. Then, the cycle repeats. That is, four years into the next sunspot cycle (the 26th cycle), there will be another solar magnetic field reversal.
Just as the earth has a mantle and a core, the sun has layers that can be distinguished by location and activity or function. The most relevant for visual astronomers are the plasma core, photosphere, and corona. The plasma core of the sun (which is invisible to us) is where nuclear fusion of hydrogen nuclei into helium occurs. The photosphere is where — as the name suggests — most of the light is generated.
Sunspots appear on the surface of the photosphere. Above the photosphere and the outermost part of the sun’s atmosphere is the corona, a cauldron of twisting, churning plasma. The corona is the source of the invisible solar wind, as well as spectacular prominences, filaments, spicules, and flares. Until the recent advent of special optical filters, the only time the granular corona could be visualized was during a total solar eclipse.
The sun, a yellow dwarf star, radiates over a wide spectrum — far beyond the visible range from deep Infra-red (IR) to high ultra-violet (UV). Various processes within the different layers of the sun contribute signals of different frequencies and amplitudes.
For example, the surface of the photosphere contributes primarily to UV radiation. The corona — where specific interactions between hydrogen protons occur — contributes radiation in the visible red spectrum.
As noted above, light from the corona, which is normally washed out by the much brighter photosphere, is visible during a total solar eclipse.
Figures 1-3 (courtesy of Lunt Solar Systems) illustrate the differences in solar radiation when viewed under different filter conditions.
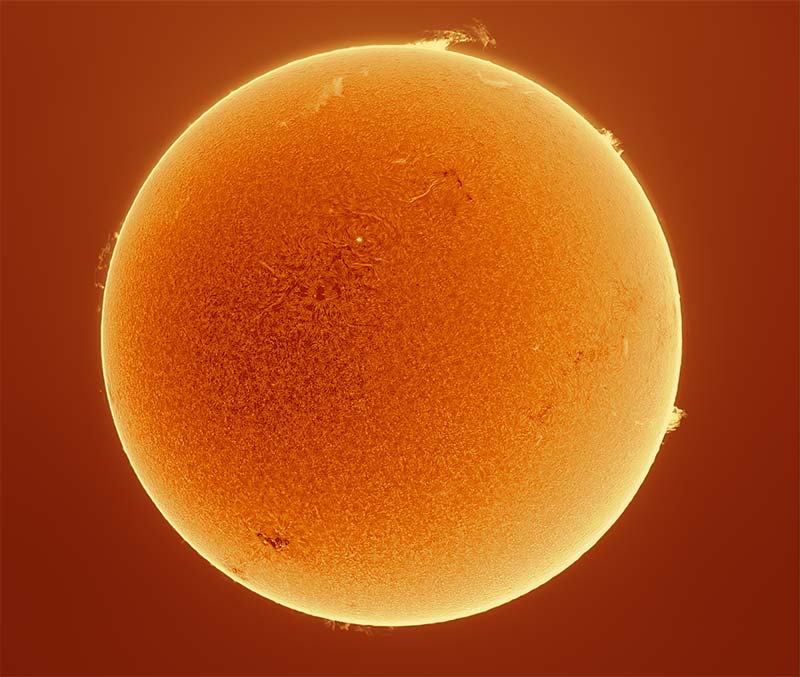
Figure 1. Sun viewed with H-alpha (IR) narrowband filter. ©Lunt Solar Systems. Used with permission.
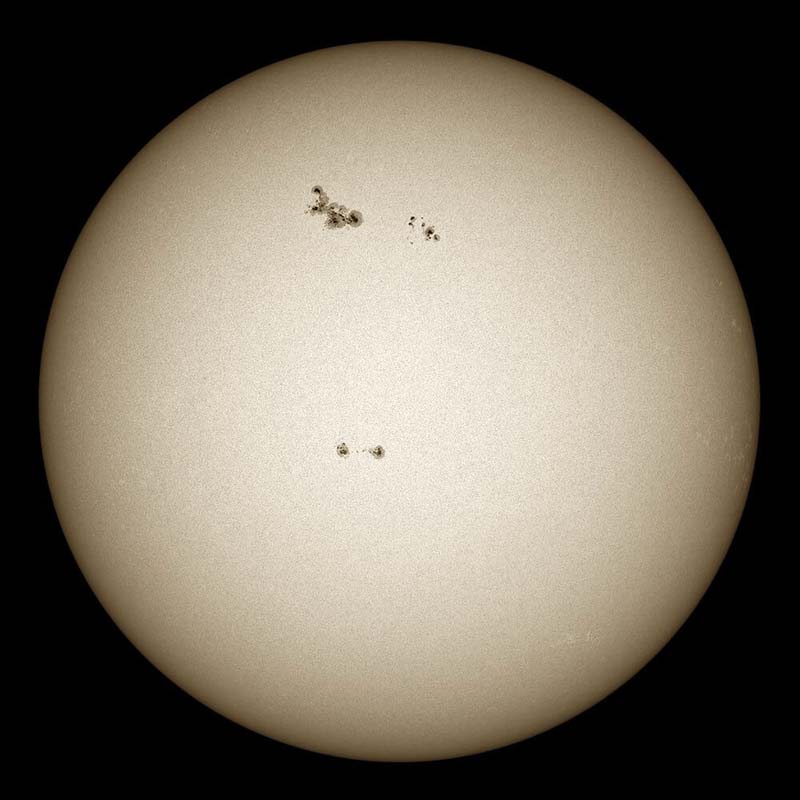
Figure 2. Sun viewed with a broadband white light (ND) filter. ©Lunt Solar Systems. Used with permission.
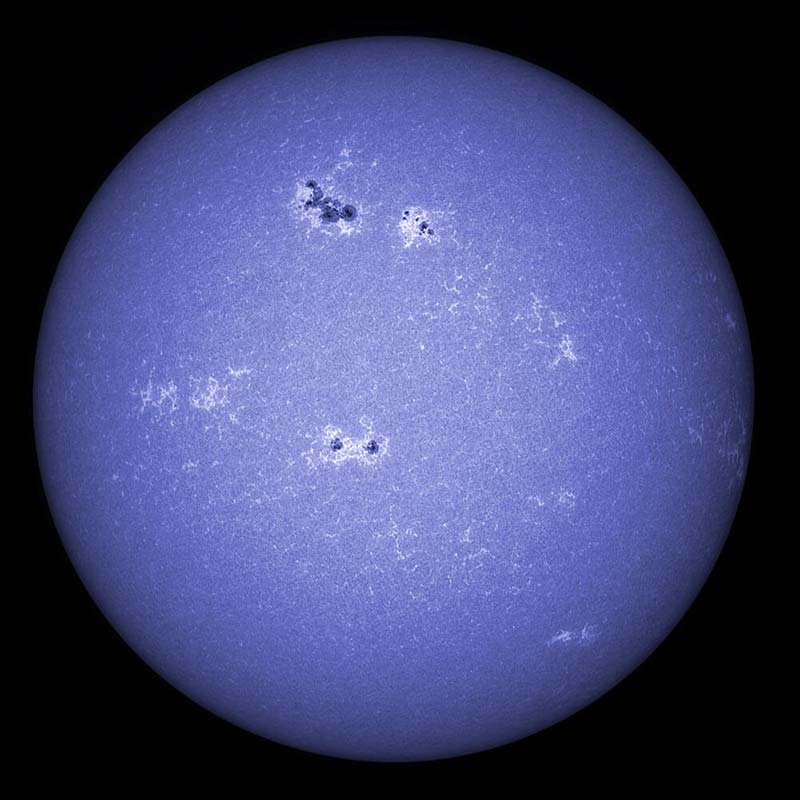
Figure 3. Sun viewed with a Calcium K (UV) narrowband filter. ©Lunt Solar Systems. Used with permission.
VIEWING THE SUN
Let’s now consider the technologies available for viewing the sun. By viewing, I mean the real-time viewing with the eyes, as opposed to primarily looking at a computer screen or LCD camera back.
Some amateur astronomers combine their artistic abilities with viewing technologies to create sketches of what they see, just as some naturalists sketch birds or other animals in real time. We’ll consider sketching as a component of viewing.
In visual astronomy, unless you’re observing constellations away from artificial lights with unaided eyes, you’ll need some sort of assistive viewing technology. Let’s call this technology an optical receiver, with obvious parallels to an RF receiver.
This optical receiver provides amplification/attenuation, magnification, selectivity, and resolving power, all while minimizing the amount of noise/distortion introduced into the signal or image.
You can think of amplification as the ability to increase or decrease the brightness of an object. A related ability (magnification) is the capacity to increase the apparent size of an object. Selectivity is the ability to preferentially increase the brightness or focus of one object over another.
Resolving power is the ability to display fine details such as the granular nature of the corona. Noise can range from geometrical distortion to unwanted coloration.
In general astronomy, the receiver of choice is typically a general-purpose telescope or binoculars attached to a motorized and computerized mount on a sturdy tripod. However, given the excessive brightness of the sun, specialized and often more expensive equipment is required.
As described next, there are also other viable, less expensive options for solar astronomers, including pinhole viewers, magnifying glasses, and sun-blocking DIY resin sheets. An intermediate solution is to use more expensive fitted sun-blocking endcaps on your nighttime telescope or ordinary binoculars.
Pinhole Viewer
My first solar viewer was a shoe box with a clean pinhole at one end and a moveable sheet of white paper held perpendicular to the path of light in the box. With the pinhole pointed toward the sun, an image of the sun is projected onto the white paper.
While not the most spectacular means of viewing a solar eclipse, it’s an affordable way to track sunspots.
Magnifying Glass
Another low-cost, relatively safe approach to visualizing the sun is to use a small handheld magnifying glass and focus the image of the sun onto a sheet of paper mounted perpendicular to the magnifying glass.
Of course, if you adjust the magnifying glass-to-paper distance so that the sun appears as small as possible, then you can use the pinpoint source to start a fire. If you focus on this point source, you can also damage your eyes.
Sun-Blocking DIY Resin Sheets
Sun-blocking DIY resin sheets made by Baader Planaterium and others can be cut with scissors and shaped to fit over the front of your night telescope or binoculars.
The resultant assembly can be secured with tape or rubber bands. You can also use the sheets to make your own disposable solar sun glasses.
Solar Sunglasses
Ubiquitous, disposable solar glasses constructed of paper and resin filter sheets are perhaps the least expensive means of viewing the sun.
Solar sunglasses with plastic frames look like ordinary sunglasses from a distance (see Figure 4).
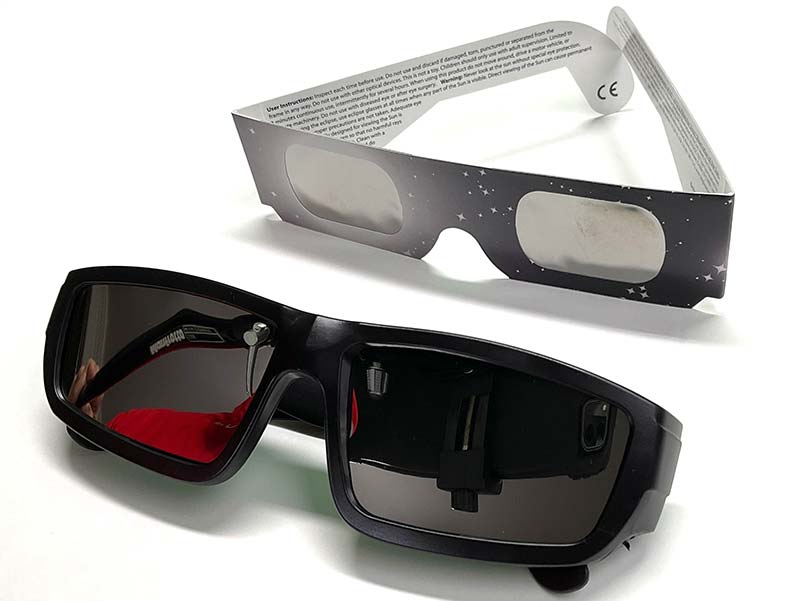
Figure 4. Solar sun glasses in paper (top) and plastic (bottom) frames.
As with solar resin sheets, you’ll be pressed to see any details in the coronal activity or accurately count sunspots because solar glasses lack magnification.
Fitted Glass Solar Filters
More permanent and expensive than resin sheets (which deteriorate with use), fitted glass solar filters are designed to fit over the front of a nighttime telescope or binoculars (see Figure 5).
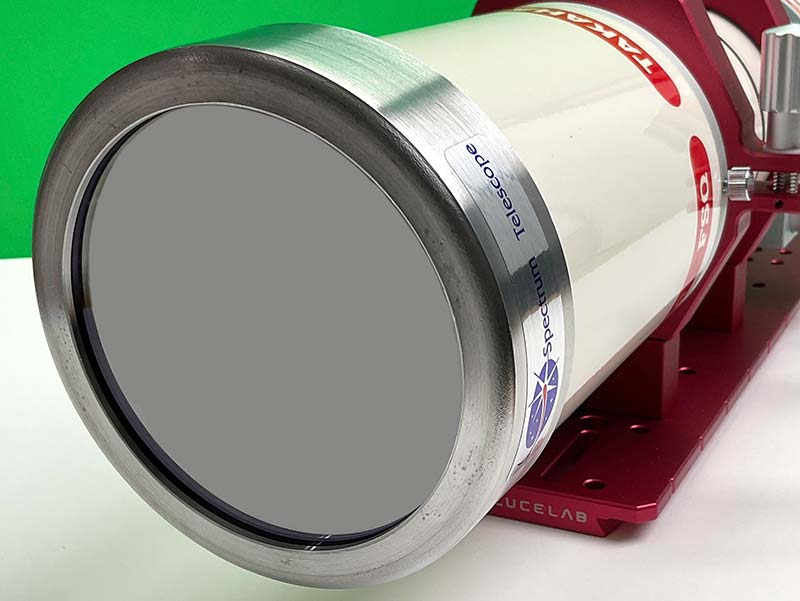
Figure 5. Fitted glass solar filter on a Takahashi 80 mm refractor.
These filters are designed to fit securely over specific size tubes with the aid of plastic set screws. I prefer fitted glass solar filters to DIY covers made with resin filters because they’re safer and last indefinitely with proper handling.
The downside is that you need a relatively expensive glass filter for every different size scope you want to use to observe the sun. For example, I have one glass solar filter for my 80 mm refractor and another for my 60 mm refractor.
General-Purpose Binoculars
As noted previously, both resin sheets and glass filters can be used on the front of general-purpose binoculars. This approach can be expensive if you use glass solar filters in that a pair of fitted glass solar filters can easily cost more than a good pair of binoculars. It’s possible — and tempting — to use inexpensive screw-on ND filters on the ocular side of general-purpose binoculars.
However, this configuration should never be used to view the sun. Excess heat buildup could vaporize the eyepiece filters at any instant, resulting in retinal damage and permanent blindness.
This isn’t to say that ocular filters should be avoided for general astronomy. I have a pair of 20x80 mm binoculars fitted with quality ND0.3 (transmission 50%) filters on the ocular side for viewing the moon. Not only is the unattenuated moon light uncomfortable to view for more than a few seconds, but the bright light will force you to wait several minutes for your eyes to re-adapt to darkness before you can see stars and other dim objects. And don’t even think about viewing the sun with general-purpose binoculars configured for moon viewing — at 50% transmission of radiation, your retina wouldn’t stand a chance.
Solar Binoculars
A relative newcomer to the solar viewing scene is solar binoculars. I use a pair of 10x42 mm solar binoculars almost daily to count sunspots (Figure 6).
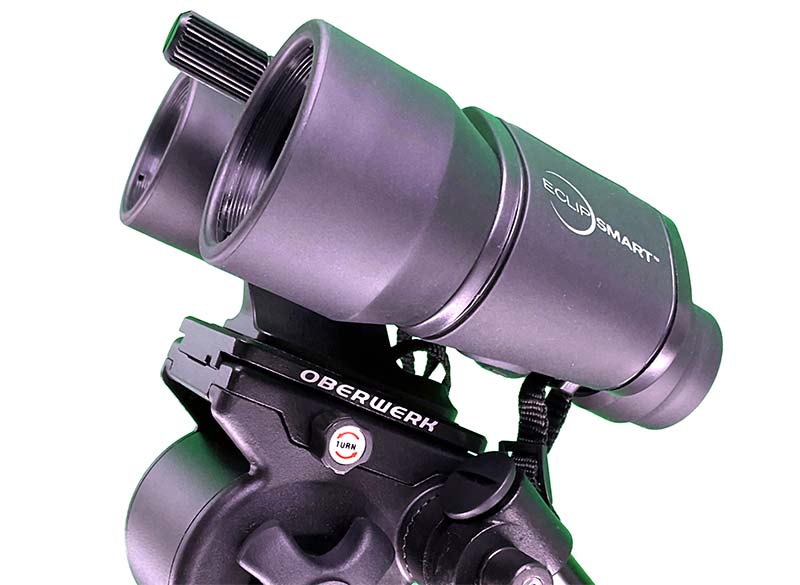
Figure 6. EclipSmart dedicated solar binoculars on a tripod mount.
The downside of solar binoculars is they are good for only one thing: viewing the sun. They can’t be used to view the planets, stars, or the moon.
However, if you’re into daily sunspot counting with zero setup time, they’re a great tool. Note that it’s the front or objective lenses of solar binoculars that attenuates light from the sun, not the rear or eye lenses.
Universal Telescopes
Now, let’s talk telescopes. When I refer to a telescope, at a minimum I mean an optical assembly in a tube, a manual or motorized telescope mount, and a tripod or other sturdy mounting structure. Common optional technologies include a finderscope or other aiming aid, a smart Wi-Fi controller, an auto tuner, and heater elements for dew control.
There are two basic categories of telescopes: reflectors, which tend to be shorter and rely on mirrors; and refractors, which tend to be longer and rely primarily on lenses. The typical aperture for a reflector telescope is 6-8 inches or more. In contrast, a refractor with an aperture greater than, say, 80-100 mm is too heavy and unwieldly for one person to handle safely.
Telescope mounts — whether German Equatorial or Azimuth — can be manual, electric/electronic, or semi-autonomous. Tripods are commonly made of wood, lightweight aluminum, titanium, or heavy steel. Clearly, there’s a lot to talk about here from a robotics perspective, especially regarding the telescope mount. For now, let’s focus on using a telescope to visualize the sun.
Just about any telescope that’s in good condition and properly configured can be used to view the sun. Many US companies excel at producing solar add-ons for standard telescopes, including Daystar Filters, Coronado (Mead Instruments), Thousand Oaks Optical, Lumicon Internal, Lunt, and Baader.
In a pinch, I have used my 80 mm Takahashi “Baby Q” refractor to view the sun, although I normally reserve the telescope for astrophotography. The basic setup is a glass sun filter that covers the objective or sun-facing lens. I combine this with a sun-blocking filter in a special diagonal: a Herschel Prism from Baader Planaterium (Figure 7).
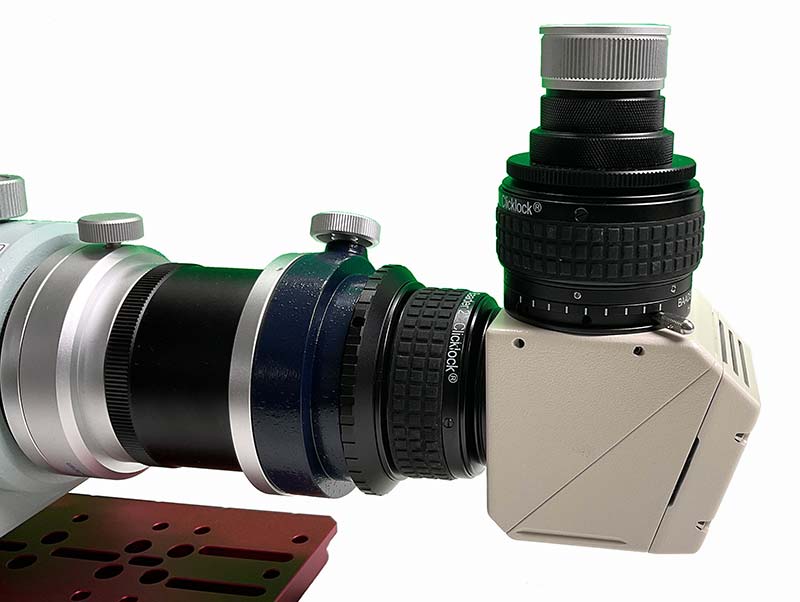
Figure 7. Fitted glass solar filter on a Takahashi 80 mm refractor.
Changing the filter(s) in the prism enables me to view or capture solar images in “white” or neutral density (for sunspots), UV light (for the photosphere), and IR light (for the corona) spectra.
My Herschel Prism is housed in a perforated ceramic housing designed to run hot — hot enough to use the prism without a glass solar filter over the objective lens. I’ve been cautioned by support staff at Takahashi America that the telescope wasn’t designed for solar use without the cover, and that my Herschel Prism shouldn’t be used for more than 10 minutes at a time to allow the telescope to cool.
All the above are viable options for solar viewing. Even so, for most of my solar astronomy work, I rely on solar telescopes designed to withstand the thermal rigors of solar viewing.
Solar Telescopes
Specialized solar telescopes have features that make setting up and viewing the sun easy and safe. These features include heat tolerant construction; built-in, high-selectivity filters; safe alignment scopes that don’t require you to look toward the sun; and relatively compact size. Many US companies excel at producing solar telescopes and related components, including Daystar Filters, Coronado (Mead Instruments), Thousand Oaks Optical, Lumicon Internal, and Lunt.
The Coronado Personal Solar Telescope (PST) is an excellent entry-level solar telescope with a built-in H2 alpha narrowband filter for viewing the corona (see Figure 8).
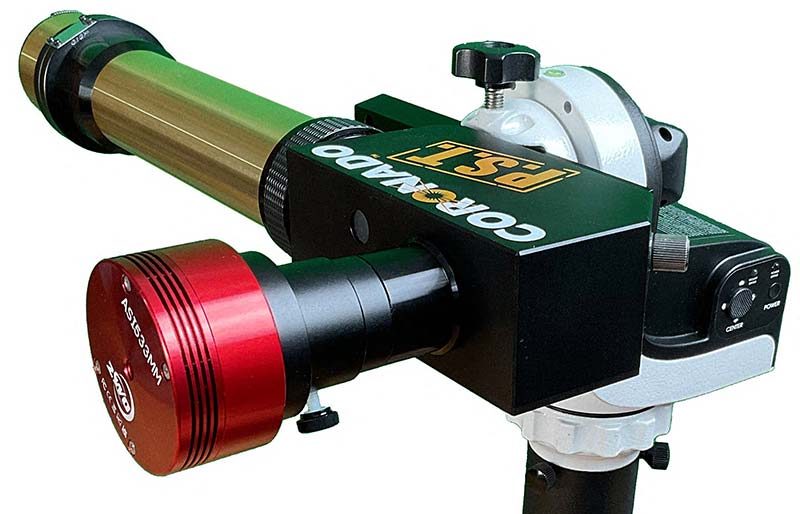
Figure 8. Coronado personal solar telescope on a Sky-Watcher dedicated solar mount.
With a 40 mm objective lens, it’s relatively small, lightweight, easy-to-use, and relatively difficult to misuse.
The unit is sealed so that the internal H2 alpha narrowband filter can’t be messed with. That said, filters can be added to the front of the unit. A second H2 alpha filter in this “stacked” configuration provides greater detail and contrast in images of the corona. I’ll review the special filter used in the PST and other telescopes (the etalons) in a future article.
In the standard configuration, the PST has a bandwidth of 0.7 angstroms centered at about 6562.8 angstroms or 656.28 nm — roughly the color of a standard red LED. With a second H2 alpha filter installed, the bandwidth is only about 0.4 angstroms.
The difference in image detail is significant, at the expense of image brightness.
Stacking optical filters is akin to connecting passive audio or RF filters in series. Properly designed and configured, the series passive R-C or R-L filters will provide narrower bandwidth at the expense of greater signal attenuation.
At the other end of the ease of use and expense spectrum are comprehensive solar-specific and universal telescopes by Lunt. For example, with the Lunt Universal 100 mm telescope, you aren’t limited to IR views of the corona. By removing the inline H2 Alpha filter (Figure 9) and adding a CaK blocking filter, you can view the shimmering surface of the photosphere at 393.4 nm.
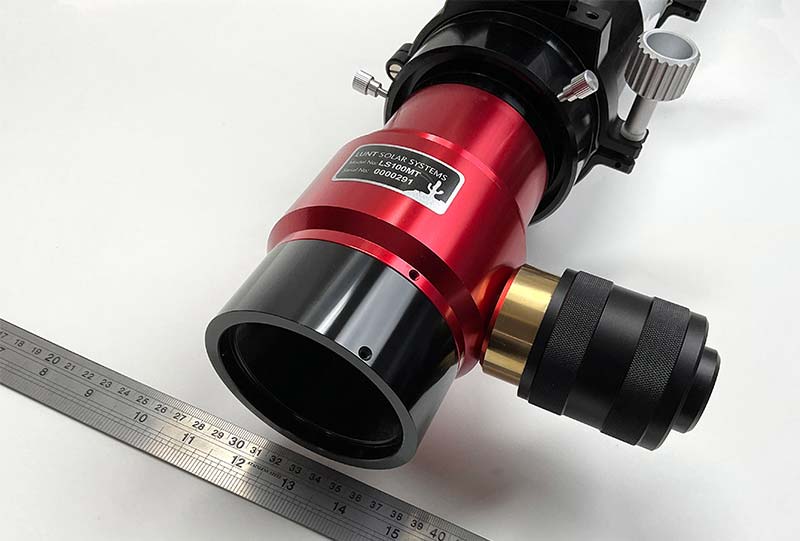
Figure 9. Lunt inline H2 hydrogen filter from a Lunt 100 Universal telescope.
Replace the CaK filter with a white blocking (i.e., neutral density) filter and you can start counting high-contrast sunspots. When I want the best picture possible, I’ll pull out my Lunt 100. When I only have a few minutes, I’ll use my Coronado PST.
Telescope Projection Screens
Both solar and general-purpose telescopes can be outfitted with a small projection screen positioned a few inches from the eyepiece to visualize the sun. An advantage of this approach to viewing the sun is that several onlookers can see the eclipse or sunspots simultaneously.
Otherwise, it’s a fight for the telescope during the four minutes or so of a solar eclipse. Obviously, the projection screen has to be out of direct sunlight.
Safety
Traditional astronomy is a contact sport that can involve the transport and setup of heavy, awkward telescopes; power packs; tripods; and a telescope mount. Aside from strained backs and pinched fingers, working with even relatively low-voltage DC can be problematic when power cables get caught up in the telescope mount and are severed or pinched together.
You can avoid having your expensive telescope tip over three hours into a photoshoot by leveling the tripod and ensuring that the entire assembly is balanced throughout the planned range of motion. Adjust balance by repositioning the counterweights on the counterweight rod. Minimize the risk of a telescope-tripod collision by adding a pier to your tripod to raise the mount (see Figure 10).
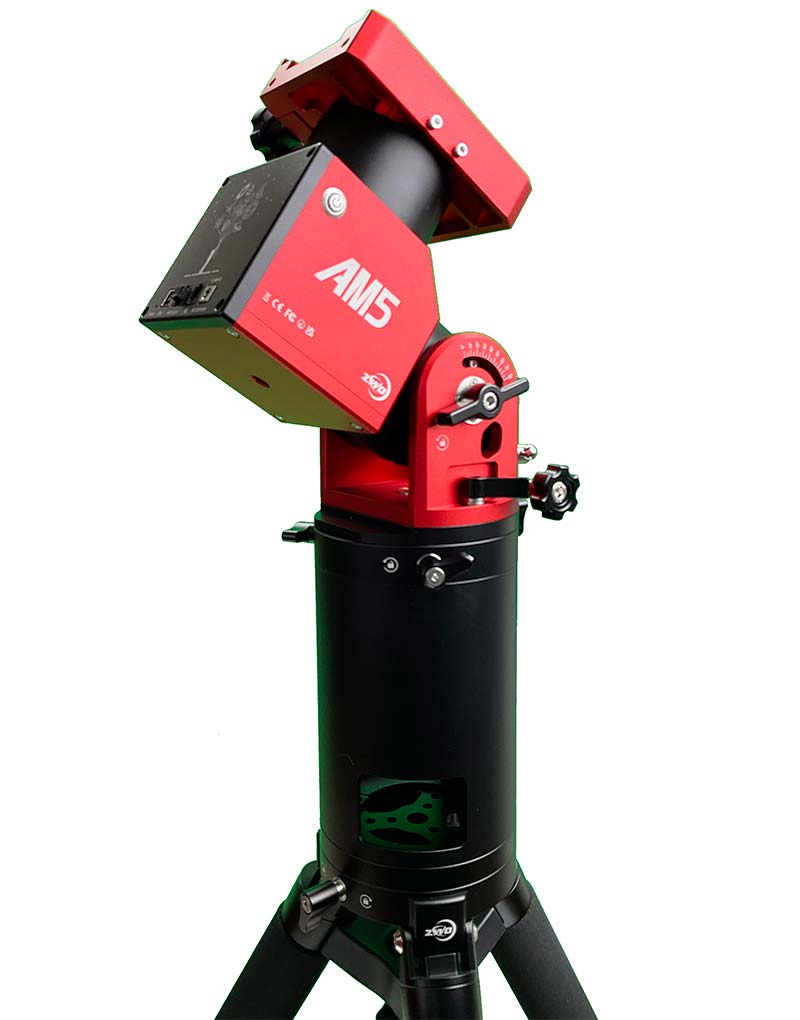
Figure 10. Tripod pier added to a ZW0 AM5 tripod mount to avoid telescope clashing with the base.
Regular maintenance of your telescope and accessories is essential. Filters crack with heat and age. Similarly, properly storing your telescope adds to safety. It doesn’t take much to dislodge or otherwise damage a homemade or even custom endcap solar filter, potentially leading to catastrophic failure of the scope when it’s pointed at the sun.
When viewing the sun, regular sunglasses — polarized or not — won’t work! The same goes for reflection ponds, either natural or those constructed to view the constellations more easily. Sunglasses will let too much radiation through, destroying the retinae. Reflection ponds reflect too much of the sun’s energy, again, destroying the retinae. Obviously, staring directly at the sun whether in eclipse or full can result in permanent blindness.
Another aspect of safety is to spend enough to avoid the junk out there. For example, don’t trust the cheapest filters and question the specifications sheets. That doesn’t mean that you must buy the most expensive of everything, but I do avoid the cheapest. Also make use of the Classified section of cloudynights.com for quality used equipment.
Finally, when it comes to using a telescope in daylight, the warning sticker on my vintage Edmond Science AstroScan telescope says it all (Figure 11).

Figure 11. Warning on an Edmund Science Astroscan telescope.
In short, never look into the eyepiece of a telescope that’s pointed at the sun or toward a mirror surface that could reflect the sun unless you’re 100% certain that the telescope is configured for solar viewing.
Finally, just because something can be done doesn’t mean th at you should do it. Consider, for example, a telescope equipped with a calcium-potassium blocking filter that will by design pass UV rays at 393.4 nm. According to the National Eye Institute, directly viewing UV rays can result in cataracts, cancers of the eyelid, and macular degeneration of the retinae.
As detailed in the next article in this series, let the CMOS sensor in your camera handle the UV light. Look at the optical data on your laptop or other eye-safe monitor.
FOR NOW
At this point, until the next installment, you could spend some time exploring astronomy on the web. The primary source, of course, is NASA (www.nasa.gov). If you’re more of a book person, then consider the short book The Sun: A Very Short introduction, by J. Judge, Oxford University Press, Oxford, 2020.
Look at some of the better online stores, such as highpointscientific.com, and read the technical articles on solar astronomy at Luntsolarsystems.com and www.meade.com/solar-telescopes.idx. As you’ll see, there are dangerously deep rabbit holes on optical filters and new motorized telescope mounts with amazing precision and repeatability.
UP NEXT
Next time, we’ll focus on the acquisition and subsequent image processing of solar data. As with this article, the goal is to introduce you to robotics-related technologies used in astronomy that may have direct bearing on your current robotics work.
Meanwhile, if you any questions or topic suggestions, please contact me at techedit-servo@yahoo.com. SV
Article Comments