Robotics: How to Get Started — Part 5: Real Robots
By John Blankenship View In Digital Edition
The previous installment of this series showed how to program a simulated robot so that it could autonomously navigate through a cluttered on-screen environment to find a specific goal. This article will discuss ways of using algorithms developed with the simulator to control real robots.
Hopefully, previous articles in this series have given you an overview of the hardware and software needed to build a robot. For many readers, using the simulator discussed in the last two installments is a great way to learn more about programming a robot without having to build or buy anything or even needing to understand the details involved with controlling motors and obtaining sensor data. Eventually though, most robot hobbyists will want to build a real robot.
Real Robots
When it comes to building a real robot, you’ll need to learn about I/O pins and how to use them to obtain sensor data and to control motors. To keep things manageable, this article will focus on motor control and explore the roles played by both hardware and software. It will also consider options that can make things easier for those new to robotics.
Ideally, having a basic understanding of how motors are controlled will make it easier for you to learn how to interface with sensors (which is a huge topic since there are many different types of sensors, each with their own needs and functionality). There are many articles in the SERVO archives that relate to a wide variety of sensors.
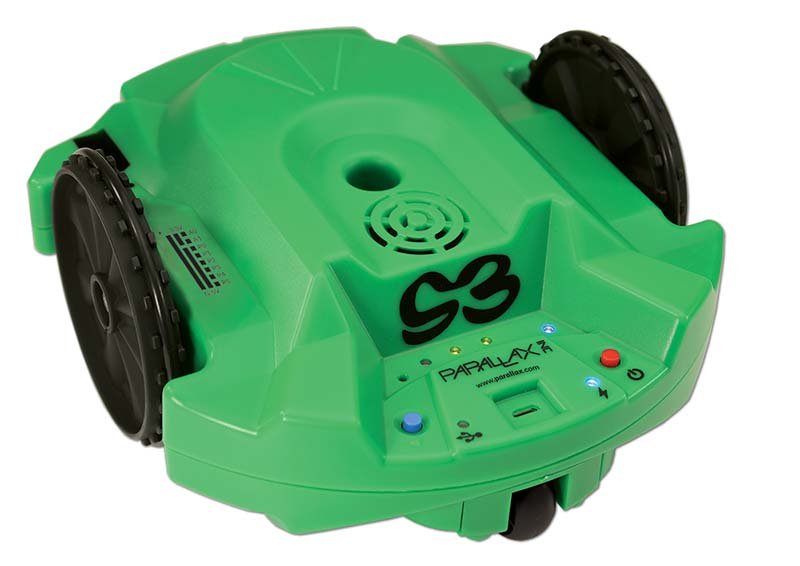
When it comes to movement, most robots use wheels instead of legs because that makes them much easier to program (no balancing, etc.). You could build a four-wheeled robot with one motor to drive the rear wheels and one to steer the front ones, but most hobby robots only have two wheels like the Parallax Scribbler S3 shown in Figure 1.

Figure 1.
As you can see, the S3 only has two main wheels and a small caster in the front to give it a stable base. You can move the robot forward (or backward) by turning both wheels in the same direction or rotate the robot around its center by turning the wheels in opposite directions.
Such a turning style makes the S3 (and similar robots) very agile, which is desirable for a robot roaming around in your home.
Motor Control
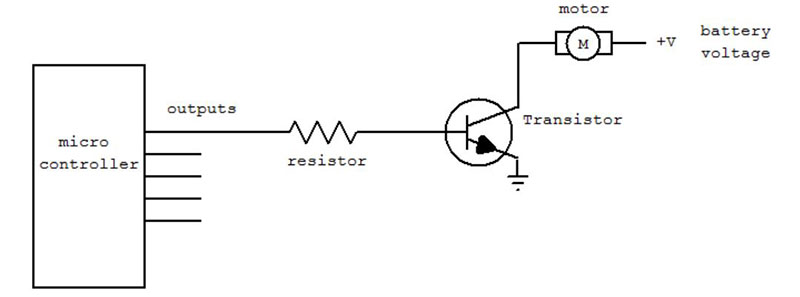
To control the movements of two-wheeled robots like the S3, you need to control the motor that powers each wheel independently. In general, this control must be performed using the output from one or more output pins from the microcontroller that serves as the brain of your robot. Figure 2 shows a basic circuit for performing this action.

Figure 2.
A motor might typically require an amp or more of current and the output pin on the microcontroller might be able to produce only 1/100 of that amount. One solution to that problem is using a transistor (a transistor allows a small current to control a larger one).
The output pin can either be ON or OFF, and when connected through a transistor can produce the same situation for the motor. Unfortunately, turning the motor ON and OFF this way would be like always pressing your car’s gas and brake pedals to the floor.
Obviously, it would be beneficial to control the motor’s speed so that the robot’s starts and stops can be slow and smooth. Trying to turn the transistor on halfway is not really an option because the transistor would easily overheat. The best method for controlling speed is with pulse-width modulation (PWM).
Pulse Width Modulation
The basis of PWM is to turn the output pin on and off very quickly using software. Figure 3 shows some examples.

Figure 3.
Look first at the top waveform. When the pulse is ON, the motor in Figure 2 will be running at full speed, but notice that the motor is on for a short time, then off for the same time period (in the top waveform).
If the software was creating one pulse per second, then the top waveform would cause the motor to be ON at full speed for a half second and then OFF for a half second, then back ON for a half second, etc. Obviously, this is not what we want.
However, if we created 100 pulses a second (or 500 or 1,000), then the motor would start to move with one pulse, then coast during the OFF time, and start again with the next ON pulse, etc.
Basically, the top waveform would tend to make the motor drive forward at an average speed of about half of full speed because the ON time of the wave is equal to the OFF time. As long as the number of pulses per second is high enough, the motor will move smoothly at the desired speed.
Look at the middle waveform in the figure. Notice that it’s only on about 20% of the time, causing the motor to run at a much slower rate. In the lower wave, the ON time is about 80%, which would make the motor run much faster. In general, software can control the motor’s speed by controlling the width of the ON time pulse.
This example helps emphasize that learning how to program is vital if you want to build robots. It also helps you see that most things in robotics are far more complicated than they seem on the surface. Even if you understand controlling speeds with pulse width modulation, there are more things to consider.
Most robots will also need the ability to turn their robot’s motors on in reverse. This can be handled with a four-transistor circuit called an H-bridge that would allow you to control one motor with two output pins (one to select forward or reverse and one to control the speed as previously discussed).
Many Options
You can certainly research H-bridges to find out how to build your own, or you could purchase one in the form of a motor-control module from places like Parallax.com or Pololu.com. Purchased units often have the advantage of free example software that can help you learn how to best utilize the purchased hardware. The software will generally be designed for a specific type of microprocessor such as an Arduino or a Parallax Propeller, so you’ll want to choose components based on the hardware you have, or at least the hardware you want to learn. Starting off with pre-built hardware and free example software is a great way to learn.
You also have the option of purchasing a pre-built robot such as the S3 in Figure 1, or other kits available from companies like Parallax, Pololu, and EZ-Robot. In most cases, the software for the kits and pre-built robots will include ready-to-use routines that make it easy to control the motors and interface with sensors.
Don’t expect such robots to be as easy as using the RobotBASIC simulator, but most companies provide documentation and examples that can help you get started.
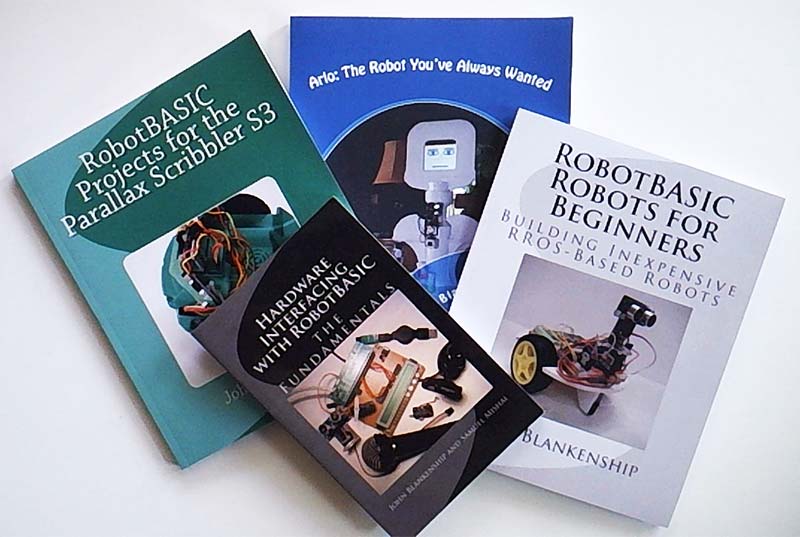
If you just want more general information, there are many books available on hobby robotics. You could even search Amazon for RobotBASIC, which will bring up many of my books such as those in Figure 4.

Figure 4.
The RobotBASIC Robot Operation System
If you really love how easy it was to control the RobotBASIC simulated robot in previous articles of this series, you have another option. I have developed a RobotBASIC Robot Operating System (RROS) and installed it on a Pololu Baby Orangutan chip that includes the H-bridge hardware for driving motors and many I/O pins for interfacing with sensors.
The RROS chip allows you to control real robots with the same RobotBASIC commands used to control the simulator (including the reading of sensors) over a Bluetooth radio link. I have a book that gives step-by-step instructions for building low-cost, easy-to-construct RROS-based robots (see Figure 4), but there’s also a free download of the RROS manual at RobotBASIC.org that provides all the information most people could ever want.
Furthermore, the entire source code for the RROS system is also free, so you can download it and program your own chips (if you don’t want to purchase preprogrammed chips). You might want to download the RROS source code and study it just to learn about controlling motors and obtaining data from a variety of sensor types. The code is large though, and complicated for beginners.
There’s even one more option for those of you that like the RobotBASIC simulation. I created a custom RROS for the Parallax Scribbler S3 (Figure 1) and have written a book (Figure 4) as well as numerous SERVO articles that show how the S3 can be programmed and controlled just like the RobotBASIC simulated robot. Read the SERVO articles online (www.servomagazine.com) and see if this approach is right for you.
Robotics is Hard
The important point is that building a robot is hard, but there are many options available to you. Start with simple projects like controlling the speed and direction of a single motor or interfacing a Parallax PING))) ranging sensor to learn how to detect and locate objects within its range. Concentrating on small projects like these can give you the knowledge and confidence needed to eventually build a complete robot.
Read SERVO — especially the older issues that are available online — because they can provide a wealth of information that can help you set intermediate goals and learn the fundamental principles of hobby robotics without getting overly frustrated.
Notice I said “without getting overly frustrated” because building robots is complicated and no matter how much you learn and how many robots you build, your next project will probably be bigger and better than your previous projects. So, it’s almost guaranteed to have some level of frustration.
The good news is that even with everything you have to learn and with all the frustration that will certainly be a part of the process, when your robot does what you expect it to do (or perhaps even surprises you with something you didn’t expect), it will all be worth it.
If you want more articles to help you get started with robotics, let SERVO know the topics that interest you the most and I will try to accommodate when possible. SV
Article Comments