Robot Vision for Everyone
By John Blankenship View In Digital Edition
Embedding functionality into robotic sensors makes them easier to use and far more powerful than similar items from even a few years ago. A camera from DFRobot provides vision capabilities many hobbyists have only dreamed of having.
If you have followed my SERVO articles over the years, you know I’ve written about many robots of all types. Figure 1 shows a basic robot I recommended for beginners back in January 2017.
![]()
FIGURE 1.
At the other end of the scale was Arlo: “The Robot You’ve Always Wanted.” He’s shown in Figure 2 and was featured in a series of articles that started way back in January 2015.
![]()
FIGURE 2.
I also enjoy experimenting with walking robots like the one in Figure 3 from my series that’s also been in this magazine.
![]()
FIGURE 3.
There have been many more, but these three certainly are representative of the diversity of my projects. Arlo was the only robot of this group that had any vision, and even though his capabilities were somewhat impressive for 2015, I have always wanted more.
The other robots could certainly have benefited from vision capabilities, but all the effort required for vision seemed like too much work.
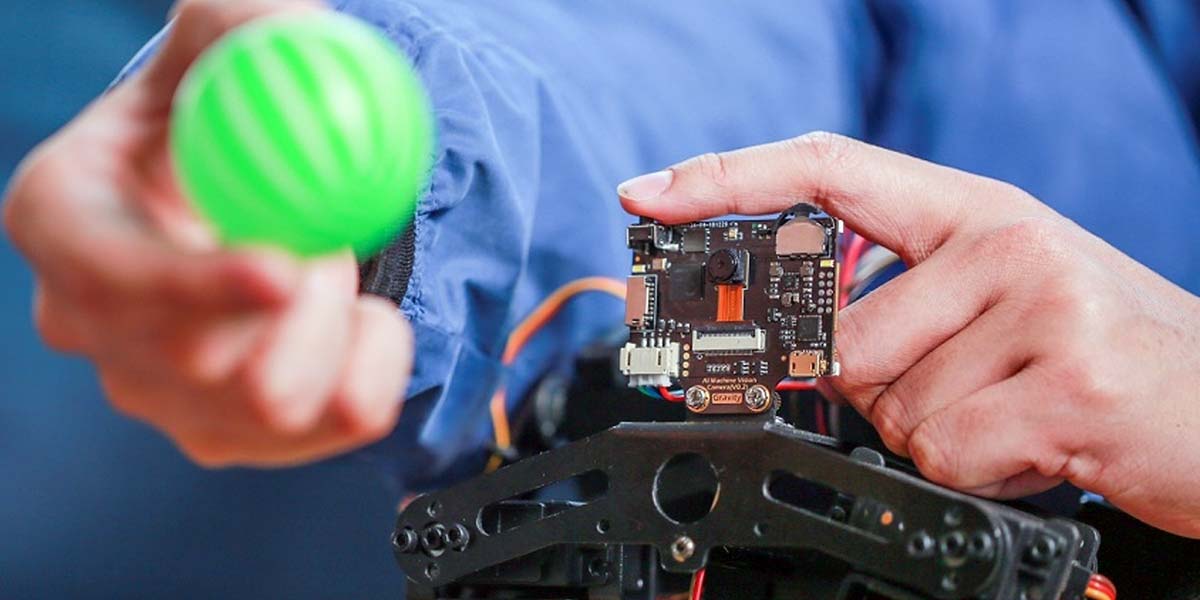
A while ago, I backed the HuskyLens camera project (see Figure 4) when it was on Kickstarter. It promised a low-cost camera with built-in capabilities that could make vision available for robots of all levels.
![]()
FIGURE 4.
Obtaining the final product took much longer than expected, but in the end it was well worth the wait. Let’s look at some of the features.
HuskyLens Features and Capabilities
The board is small (about two inches square) but it even has a screen that makes it easy to use. There are four buttons (the function button is actually three buttons: left, right, and press) to navigate through various menus and to learn new objects.
Yes! The camera can learn, recognize, and even track objects and colors all on its own. You can, for example, teach it to recognize different faces or different objects by navigating to the right place in the menus, centering the camera on the object to be learned, and pressing the learn button.
Each newly-learned object is assigned a numeric tag that can be used later for identification.
With the current firmware, you have to learn new objects manually, but that kind of makes sense since you need to make sure the right object is being viewed. DFRobot has already been upgrading the firmware periodically, so I expect future improvements and possible bug fixes.
Some identifications are built in. Without any training, the HuskyLens can identify persons, faces, and more (see Figures 5 and 6 for examples). Proper training is necessary for identifying specific people and objects.
![]()
FIGURE 5.
![]()
FIGURE 6.
HuskyLens even lets you train an object from different angles and distances to improve the detection accuracy.
HuskyLens can also be trained to recognize specific colors and tags. Imagine having your robot enter a room and after scanning and recognizing objects, know what room it’s in.
Consider how these vision capabilities might be valuable when a robot is navigating through your home.
It could decide to make turns when certain objects are seen at a predetermined distance. Knowing where two specific objects are in relationship to the robot could make it possible for the robot to use triangulation to determine its position in the room.
All these things would require some work, of course, but isn’t that half the fun of building and programming your own robot? The important thing is that the really hard work of recognizing objects is all handled by the camera itself.
Obtaining Camera Data
The real power is that it’s easy to obtain various information about objects that are recognized by the camera. Communication can be handled easily by either I2C or standard serial protocols. There is a library for Arduinos and a protocol document for those that want to create their own functions for other platforms.
I used the protocol information to create a simple demo program with RobotBASIC, but it should be easily duplicated with almost any other system. The program and its output are shown in Figure 7. It opens a serial port connected to the HuskyLens at 115200 baud.
![]()
FIGURE 7.
Figure 8 shows the command structure I used to request any blocks that were currently being viewed. Since I had pointed the camera at a person’s face before running the program, the only block information returned would be for that face.
![]()
FIGURE 8.
Examine the program to verify that the six characters sent to HuskyLens are the same as stated in Figure 8. The remaining statements in the program obtain the returned data as seen to the right of the program in Figure 7.
In order to understand this data, we also need to know the format of the header for returned data. It’s shown in Figure 9. The header precedes the actual data packets (one for each object seen).
![]()
FIGURE 9.
Deciphering the Returned Data
The formats for the other bytes in the returned data are also specified in the HuskyLens Protocol Document, but rather than take up space to list them, let’s just dissect the data ourselves. Figure 10 shows a breakdown of the data obtained (refer again to Figure 7) with comments indicating the functions of various items.
55 These five bytes are the return header, as specified in Figure 9
AA
11
0A
29
01 Represents the hex number 0001, stating there was only one block seen by the camera
00 (if more than one object was seen, that data would be added to this communication)
00 Represents the hex number 0000, stating there were zero pre-learned objects
00
74 This the frame number (hex 0874) that the camera used to see the object
08
00 Four bytes reserved for future use
00
00
00
C0 Checksum on the information data
55 Returning the bytes sent in the command of Figure 8
AA
11
0A Stating there are 10 bytes of data being returned (hex 0A = decimal 10)
2A Code indicating this is the returned data block for a recognized object
CE Represents the hex number 00CE specifying the X-coordinate of the block recognized
00
B6 Represents the hex number 00B6 specifying the Y-coordinate of the block recognized
00
1F Represents the hex number 001F specifying the width of the block recognized
00
2A Represents the hex number 002A specifying the height of the block recognized
00
00 If I had trained a face (or object) this 2-byte number would identify it
00
11 Checksum
FIGURE 10.
Conclusion
Even though my experimentation with the HuskyLens has been limited, I’m impressed with the quality and features. I’m looking forward to adding vision capabilities to some of my future projects. SV
Article Comments