Robot Control for the Blind
By John Blankenship View In Digital Edition
Most SERVO readers have used a remote control robot. This article tries to imagine how such a task could be handled by a blind person.
I was recently contacted by a friend, John Gutmann from 35 years ago. We had met through an Atlanta robotics club and he even produced and directed a couple local cable TV shows I hosted in Fulton County, GA. Unfortunately, he is going blind. However, that has prompted him to utilize some of his talents to aid others that are blind, deaf, and/or mute.
John has received some patents and is working on some braille-based devices that allow two-way communication from six buttons with various arrangements. During our discussion, he told me he was looking to license his ideas and wanted to expand how braille I/O could be used to make them more viable.
A Wheelchair for the Blind
My first thoughts were centered around the idea that a braille I/O device might be able to give a sightless person with limited mobility the option of moving throughout their home in a motorized wheelchair. I suggested that I could write a program that could demonstrate how a six-button braille I/O could control the RobotBASIC simulated robot with a variety of feedback provided to the operator. I knew that if the program demonstrated some viability for him, it would be easy to interface it directly to one of his braille I/O devices using a USB connection.
Demo for SERVO Readers
As I worked on the program, I developed some principles and ideas that I thought would interest SERVO readers. I also wanted to give the program various operational levels so sighted users could learn to appreciate how it could feel to control a robot with all the sensory information coming through six tactile switches.
Figure 1 shows how the program looks when you first start it.
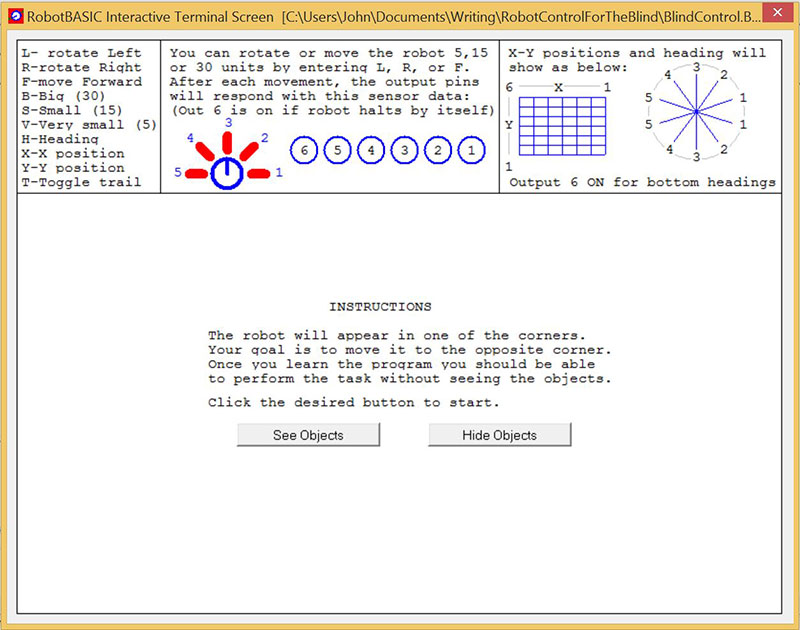
Figure 1.
The top portion of the screen shows a quick summary of the operational parameters. This version of the program uses standard ASCII keyboard input for the commands to make it easier to use for most people. In the blind version, the inputs could easily be changed to braille codes. The commands and feedback formats will be discussed in detail shortly.
The lower portion of the screen is where the simulated robot moves around. You are given the option of being able to see the obstacles that might block the robot’s movements. If you choose to see the objects by clicking the left button, you get the screen shown in Figure 2.
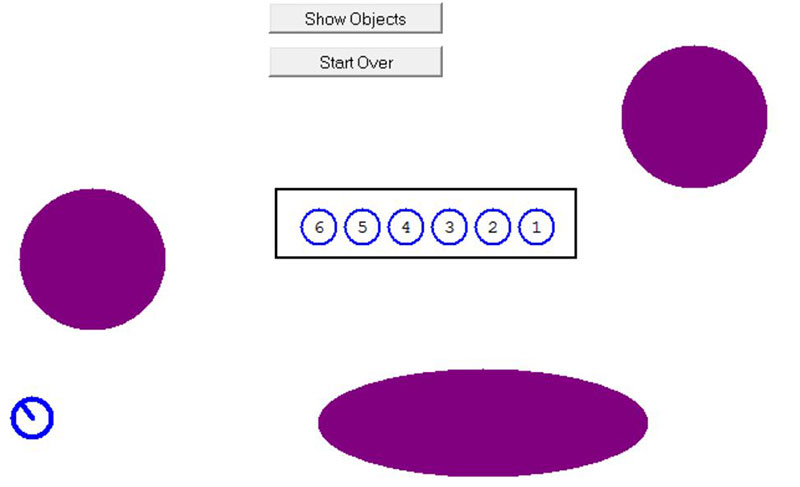
Figure 2.
Note, for this and subsequent screenshots, only portions of the full screen are shown.
The robot will always originate in one of the corners of the output screen. The exact location and heading, though, will be random. There are always three randomly sized and placed obstacles on the screen plus two standard buttons, as well as the six feedback outputs. The buttons and feedback outputs also serve as obstacles that might block the robot’s movements.
A sighted person could obviously see that the robot in this example is in the lower left corner of the screen. If you press the X key on the keyboard, button 6 (center of Figure 2) will light, indicating the robot is in the left-most column of the output screen (see the top right corner of Figure 1 for the grid numbering).
Pressing Y will light button 2 only, indicating that the robot is in the second row up from the bottom of the screen (again, refer to Figure 1).
This X-Y information is essentially the robot’s GPS coordinates for the current room. If the robot was an actual wheelchair, some form of local positioning system would have to supply this information. One possible option might utilize a tiny ceiling mounted camera to keep track of where the chair is currently located.
Moving the Robot
Before moving the robot, we can press T to cause the robot to leave a trail as it moves. This will show the robot’s path to aid future explanations. We’ll then move the robot forward by pressing the F key a couple of times. Figure 3 shows the robot moving toward the wall.
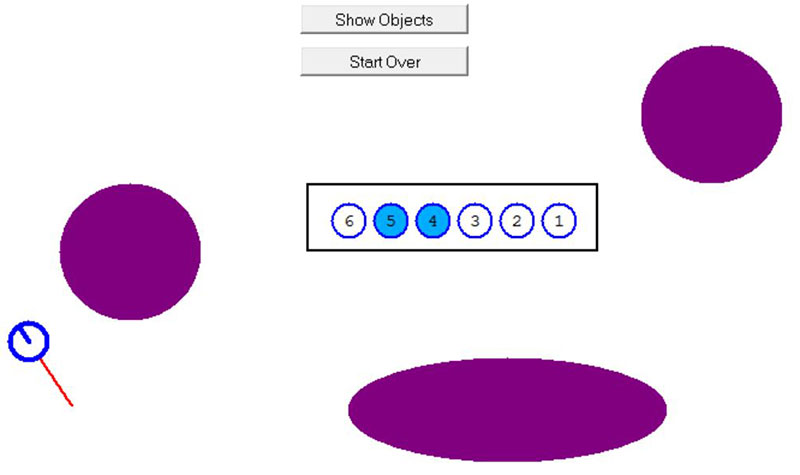
Figure 3.
Notice that buttons 4 and 5 are now on, representing sensors 4 and 5 (see the top of Figure 1).
If we press R, the robot will rotate to the right as shown in Figure 4.
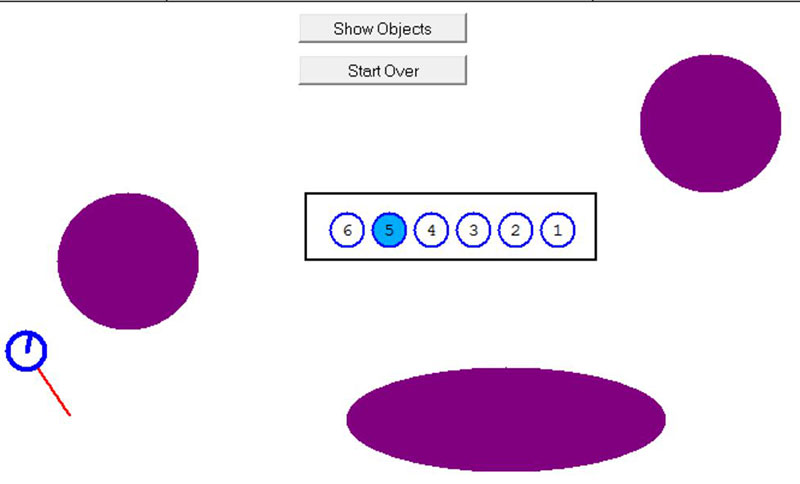
Figure 4.
Notice now that only the left-most perimeter sensor on the robot is triggered and shown by button 5. If we move the robot forward again, Figure 5 shows the result.
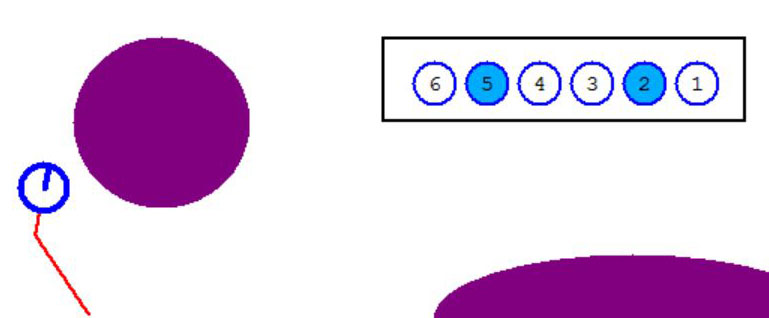
Figure 5.
Sensor 5 still sees the wall, but now sensor 2 is also triggered by the obstacle to the right of the robot
Figure 6 shows what happens if we try to move the robot forward again.
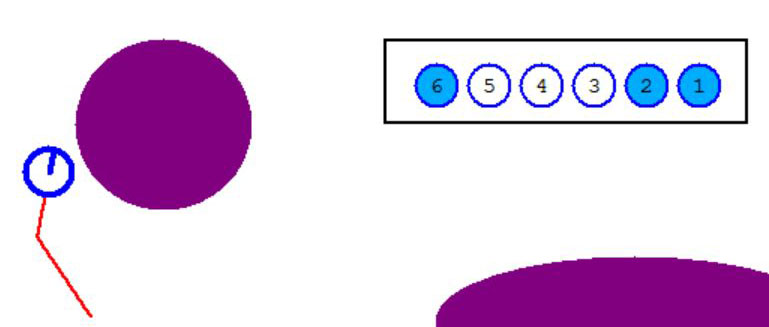
Figure 6.
Since it moves away from the wall, sensor 5 no longer sees the left wall, but now both sensors 1 and 2 detect the obstacle. At this point, the robot is very close to a collision.
When this happens, the program stops the robot and will refuse to move it forward as long as the collision is eminent. Button 6 comes on when this happens to notify the user that the robot has stopped moving to prevent a collision.
If we turn the robot away from the blocking obstacle, then we can move it forward again. Figure 7 shows what happens if the robot is turned slightly left and then moved forward.
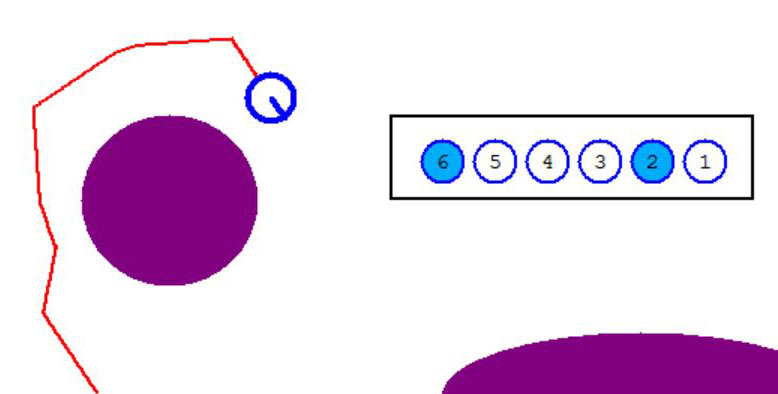
Figure 7.
In this example, the robot was moved forward till it detected the left wall, and then turned to the right to make its way around the obstacle.
At the robot’s final position in Figure 7, the key H was pressed. This causes the feedback buttons to show the robot’s approximate heading (see Figure 1 for heading values).
In Figure 7, the current heading is down and right, corresponding to direction 2 in the heading diagram in Figure 1. Notice that Figure 1 has five headings on the “north” side of the heading diagram, as well as five headings on the “south” side, both labeled 1 through 5. Feedback switch 6 comes on when the heading is on the “south” side as it does in Figure 7.
At this point, you could continue moving the robot (moving the robot will automatically cause the feedback buttons to show the robot’s perimeter sensors).
Moving the Robot with Invisible Objects
Now that you understand how to obtain the robot’s heading and position as well as the status of its perimeter sensors, let’s make things a little harder by restarting the program and choosing to hide the objects.
When I did this, the robot randomly positioned itself in the lower right corner. I used the feedback button information to determine when I encountered one of the hidden obstacles. Each time this happened, I turned away from the object and tried to go around it. These movements are shown in Figure 8.
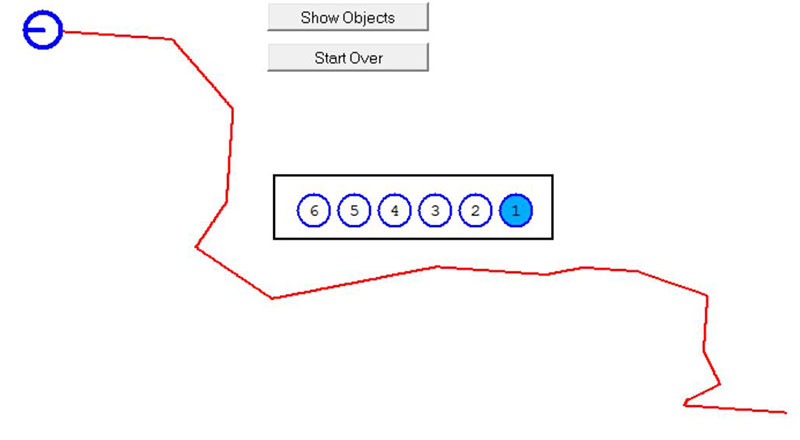
Figure 8.
After reaching the top left corner, I clicked the Show Objects button which produced Figure 9.
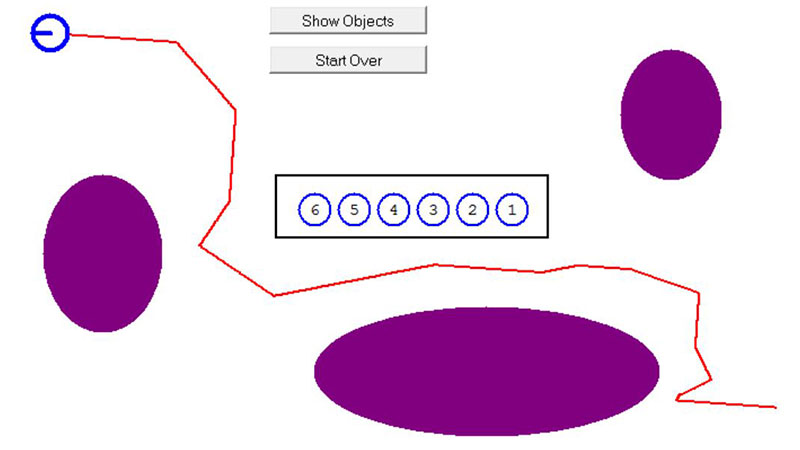
Figure 9.
Comparing Figures 8 and 9 can help you see how the sensory information can allow you to avoid objects even if they can’t be seen.
Blind Mode
Once you’ve practiced moving the robot with both visible and invisible objects, you should be ready to try moving the robot as if you were actually blind. To prepare for this mode, I cut a proper sized hole in a piece of heavy paper and placed it in front of my laptop’s screen as shown in Figure 10.
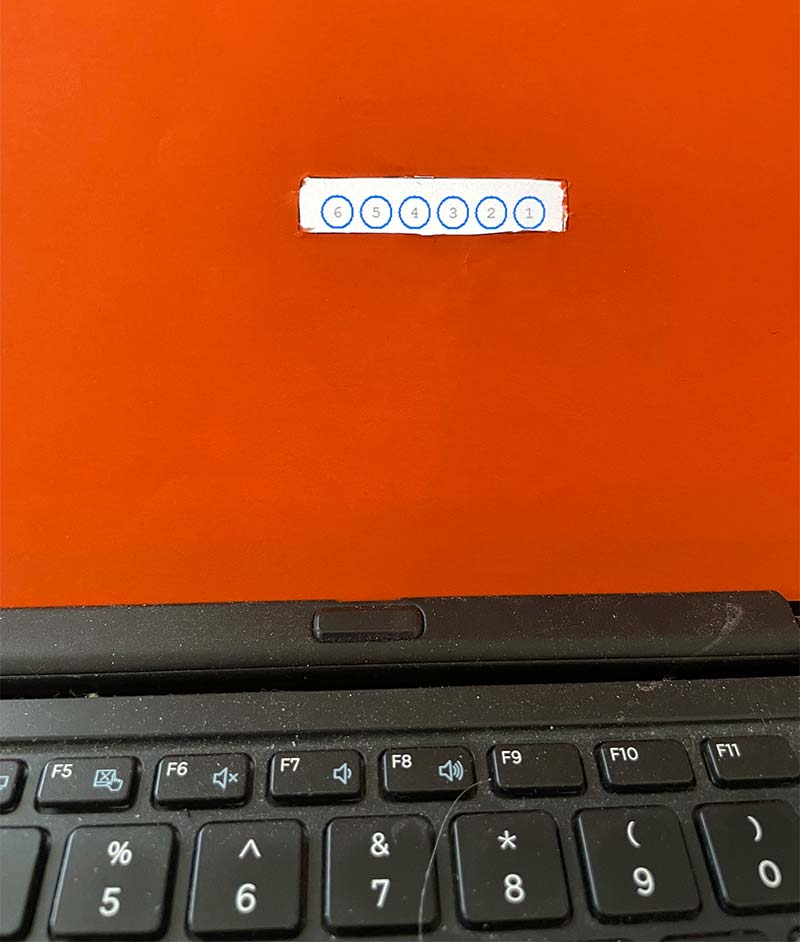
Figure 10.
In this mode, the only thing you can see is the feedback buttons. You’ll need to use the X and Y commands to determine where the robot is, and the H command to determine its heading. You’ll probably need to use these commands periodically as you move the robot around because it’s easy to become confused about the robot’s position and orientation.
Of course, as you move the robot, you’ll need to use the perimeter sensor information to detect objects and find your way around them. Sometimes — because the obstacles are randomly sized — you may not be able to get around one and have to try a totally different route.
You may even find that the first few times you try this exercise that you’ll have to peek at the screen. Eventually though, you should be able to move the robot to a desired corner with minimal trouble.
Figure 11 shows some movements I made in the blind mode.
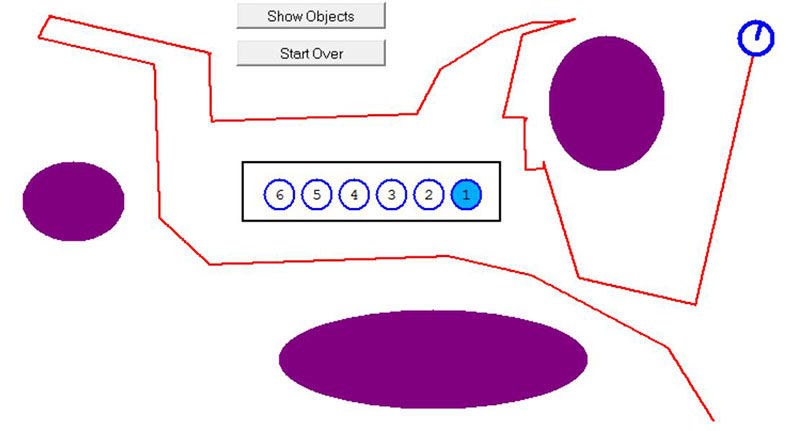
Figure 11.
When I discovered that the robot was originally in the lower right corner of the screen, I moved it to the upper left corner with amazing ease.
Since it was so easy, I decided to continue moving the robot to the upper right corner. As you can see, the original path taken to the right corner was too small for the robot to fit, and I had to find my way around the obstacle while avoiding the feedback buttons. Eventually, I found my way to the desired corner.
Try It Yourself
This program was more interesting to write and certainly more interesting to use than I had expected. You can download the full source code from the article link and test your skills in various modes. After studying the program, you might want to add some features of your own or change where the objects are placed.
Remember, to run the source code, you need to download your free copy of RobotBASIC from www.RobotBASIC.org. SV
Article Comments