Reconsidering the BeagleBone Blue
By James Louis View In Digital Edition
Starting Off On the Wrong Paw
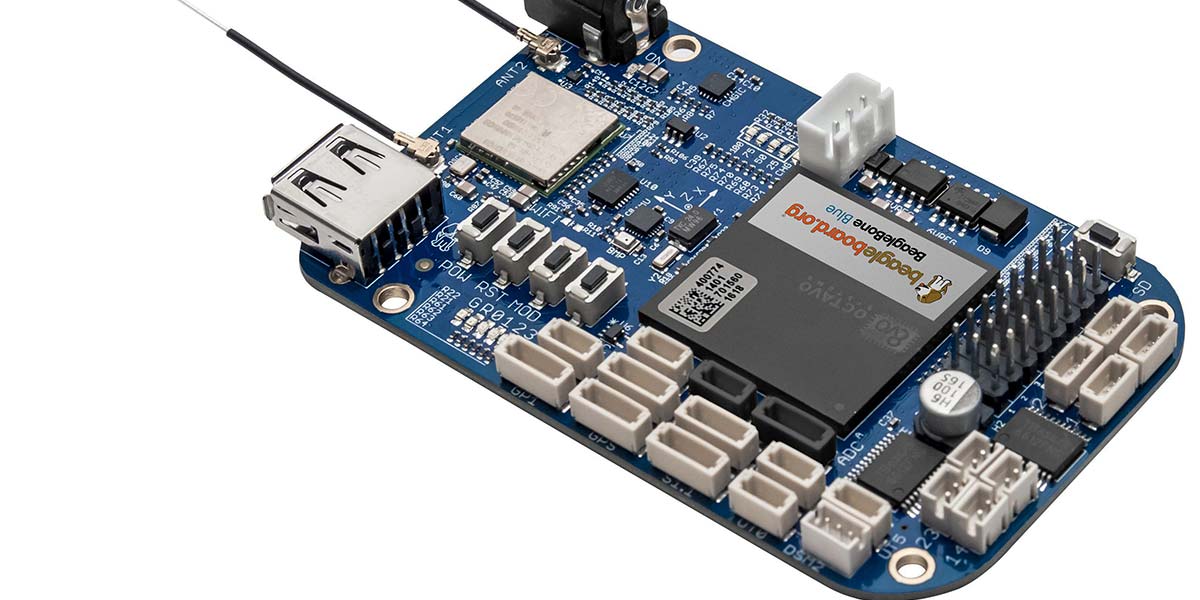
Underdog was one of my favorite cartoons when I was a little boy. He was an unassuming and modest dog but was also a superhero every bit as capable as more famous characters. The BeagleBone Blue microcontroller reminds me of that superhero dog from years ago. It too is not as popular as some other boards — especially among robot builders — but it’s powerful just like Underdog.
The BeagleBone Blue has many features, including EIGHT servo motor channels! This lack of popularity is not a complete mystery, however. It had three things working against it right from the beginning: no large selection of plug and play sensors; only one book (Figure 1) that explains its capabilities; and worst of all, its flagship product — the cute little balancing robot called EduMIP (Figure 2) — actually scared the bejesus out of everybody. Why? You needed to be a PhD level controls engineer to understand it.

Figure 1. The book.
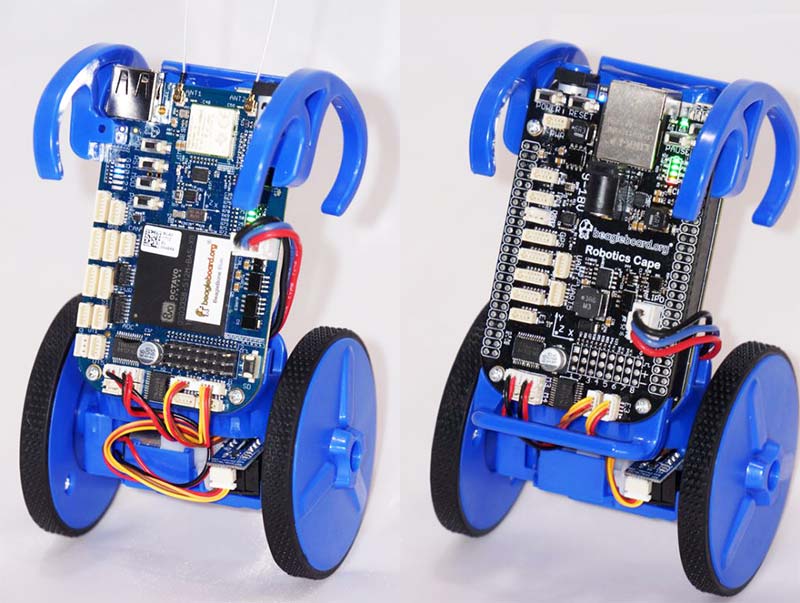
Figure 2. The fearsome EduMIP.
This cute little “toy” is actually a monster. It uses two ordinary differential equations to model its linearized motion; a cascade lead lag controller in the Z domain; and a C++ program that’s over 12 feet long when printed out on 8-1/2 x 11 paper! It was — and still is — terrifying. Although I look up to PhDs in controls engineering, I prefer being introduced to a new microcontroller in a more “Hello World” kind of way. In my opinion, this toy scared many robot builders away from using the BeagleBone Blue (BBBlue). Hopefully, that is changing.
In this article, I’m going to make the case for reconsidering this under-appreciated board. I’ll discuss only the low-cost options for programming it; a common error; and I’ll point out sources for accessories. I promise to keep everything simple. If I leave anything or anyone out, please allow me to apologize in advance. I am by no means an expert in this microcontroller, nor am I a “coder.” However, I’ll explain the minimum steps to go from out of the box to sweeping a servo. That’s the purpose of this article.
An Abridged History
First, let’s take a quick history lesson via the true PhD superheroes that made BBBlue what it is. It all began with the BeagleBone Black from the open source company BeagleBoard. The University of California San Diego’s Coordinated Robotics Lab under Doctor Thomas Bewley began development of that fearsome little balancing robot called EduMIP around 2017.
One of their brilliant PhD students, James Strawson, developed a daughterboard for the BBBlack called the Robotics Cape. The accompanying website — the Robot Control Library (Figure 3) — is a powerhouse of code examples that I’ll return to later.
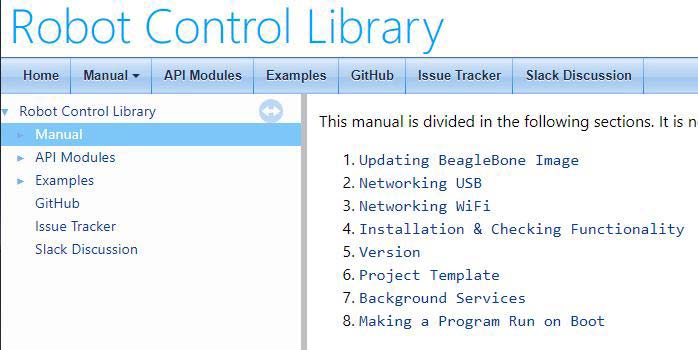
Figure 3. The website.
The BBBlack + Robotics Cape were eventually fused into one board to become the BBBlue. Another superhero PhD student, Kurt Talke, partnered with Mathworks to create a coder support package that made programming the BBBlue very easy, albeit at a cost most hobbyist robot enthusiasts couldn’t afford (I won’t be discussing Matlab Simulink here).
As I’ve mentioned, the kind of friendly documentation that I prefer to use when building a robot can only be found in one book: BeagleBone Robotic Projects - Second Edition, published by Packt. The academics mentioned above have apparently all moved on to better things, and us hobbyist robot builders are left with this amazing little controller just waiting to plug sensors and actuators into its large array of four- and six-pin JST SH style connectors.
Where to Buy the BBBlue
The best starting point is the BeagleBoard website itself (Figure 4).
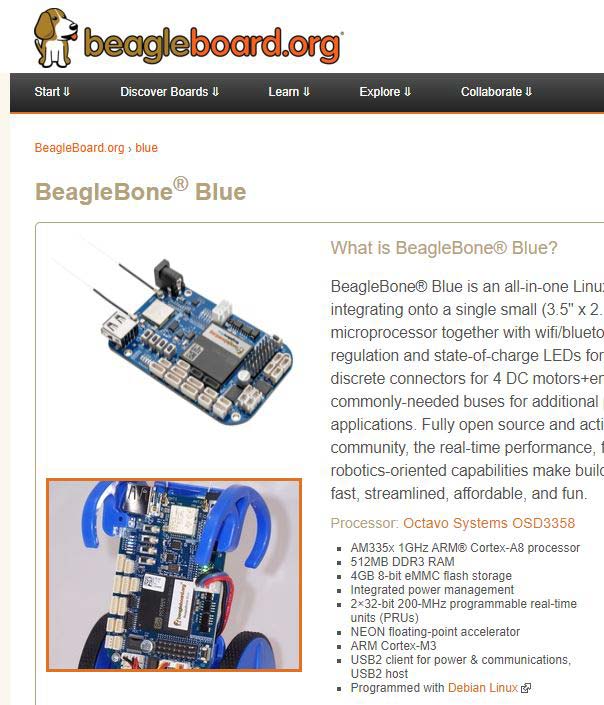
Figure 4. One of many boards from beagleboard.org.
They can point you to many resources you may need, and to the GitHub pages where you can download the schematic and code for the book. Figure 5 shows some of the commercial websites that stock the BBBlue.
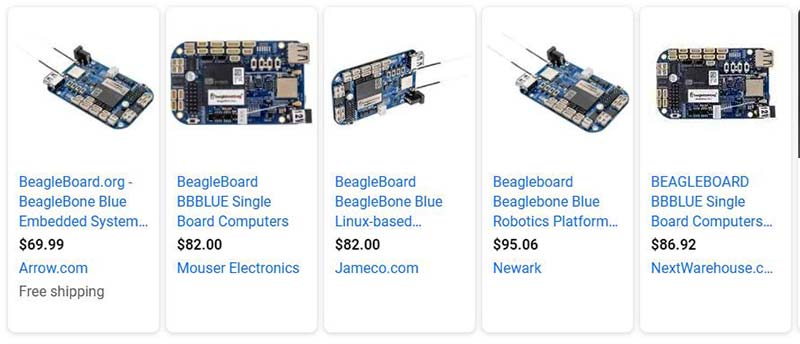
Figure 5. Some commercial vendors.
The original webstore created by Professor Bewley is Renaissance Robotics (Figure 6) where you can purchase this board as well as its predecessor, the Robotics Cape.
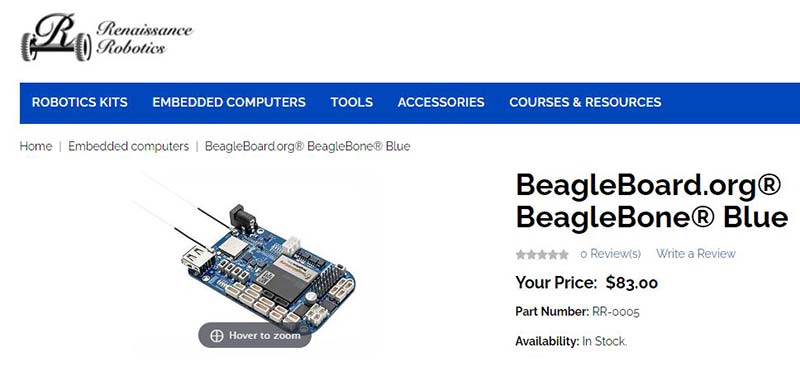
Figure 6. The academic vendor that started it all.
Things You’ll Need in Addition to the BBBlue
Hardware:
- Blank micro SD Card (at least 4 GB)
- LiPo Batteries from Horizon Hobby (Figure 7 and Figure 8)
- Four-pin and Six-pin JST SH Style Cables (Figure 9 and Figure 10)
- A 12 VDC 3A Power Supply with this Connector (Figure 11)
- Ethernet-to-USB Adapter (Figure 12)
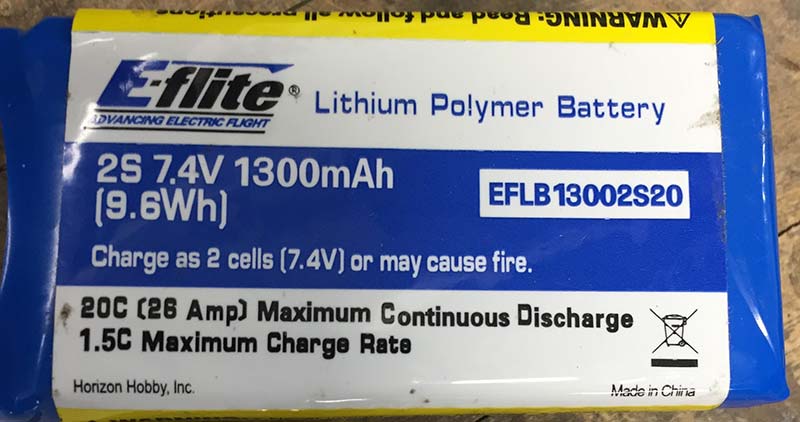
Figure 7. A 1,300 mAh LiPo for BBBlue.
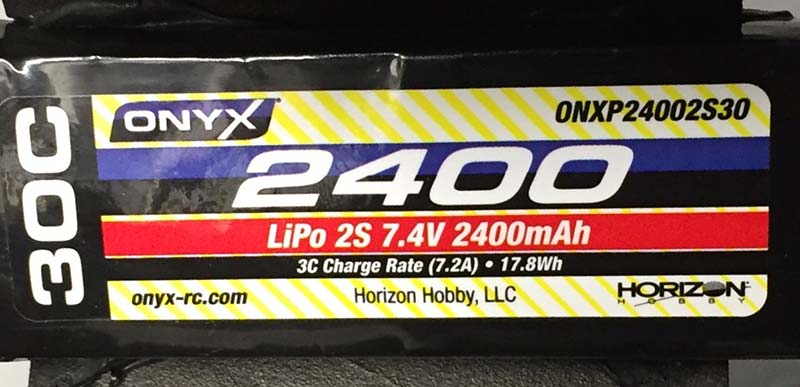
Figure 8. A 2,400 mAh LiPo for BBBlue.
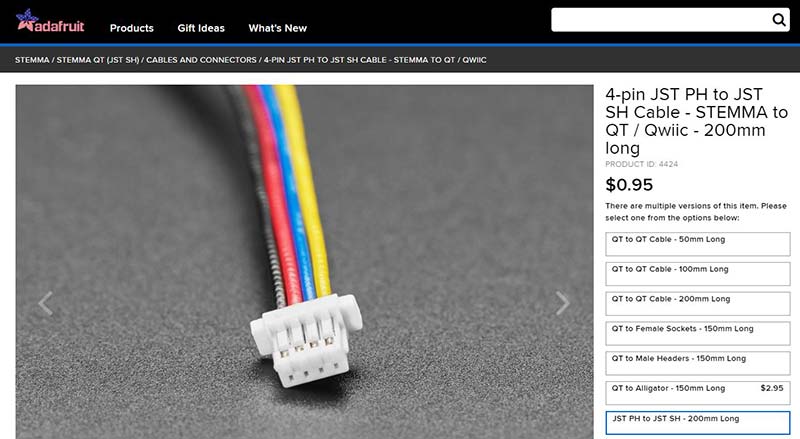
Figure 9. A four-pin JST SH cable from Adafruit.
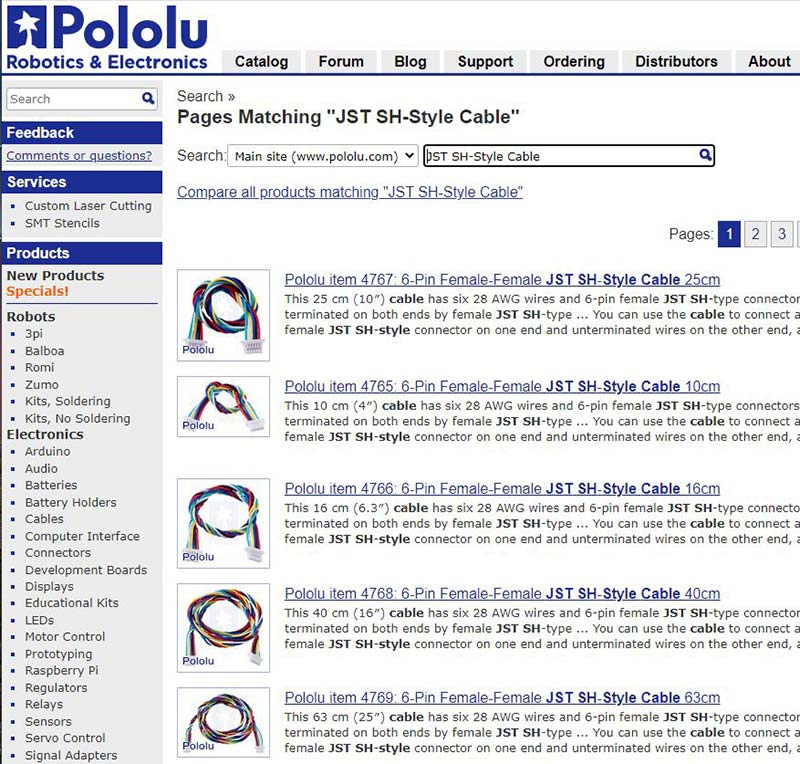
Figure 10. A six-pin JST SH cable from Pololu.

Figure 11. The business end of your 12 VDC PS.
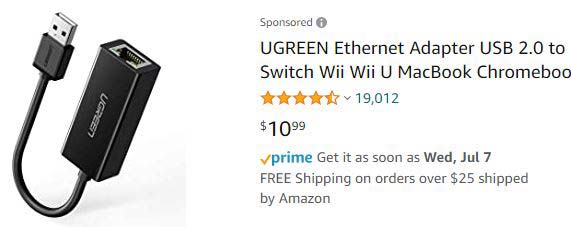
Figure 12. Cable to clear clock skew error.
Software:
The software we’ll be using includes: balenaEtcher (https://www.balena.io/etcher); PuTTY (https://putty.en.softonic.com); and an SD Card Formatter (check here: https://www.sdcard.org/downloads/formatter); see Figure 13.
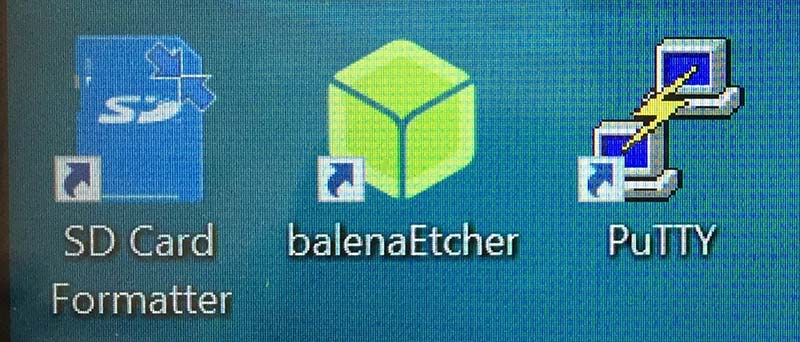
Figure 13. Three Windows apps you’ll need.
Other:
- I’m using a 64-bit Windows 10 Pro PC.
- The website Robot Control Library (https://beagleboard.org/static/librobotcontrol/installation.html).
- The book BeagleBone Robotic Projects - Second Edition.
- You’ll need your Wi-Fi password.
- Your favorite hobby servo.
One Road of Many Other Possible Roads
In the interest of my promised simplicity, I’m only going to take one road to programming this board. Keep in mind that there are many roads; some may be more suitable to your needs and budget. As I’ve said, I’ll be using a Windows computer and will communicate with the BeagleBone Blue over Wi-Fi. I’ll also be using the board’s built-in Linux editor called Pico to write programs in C++. Sorry Python fans.
First, go to Strawson Design Robot Control Library > Getting Started for detailed instructions on how to Flash the board (see Resources). Begin by using the SD Card Formatter and balenaEtcher software programs on your Windows PC to create the micro SD card which is used to write an image onto the BBBlue.
When balena is done, remove the micro SD card from your PC. With the BBBlue off, insert the micro SD card into its slot. While holding down the button on the lower-left of the BBBlue (Figure 14), plug in the power supply and then the battery.
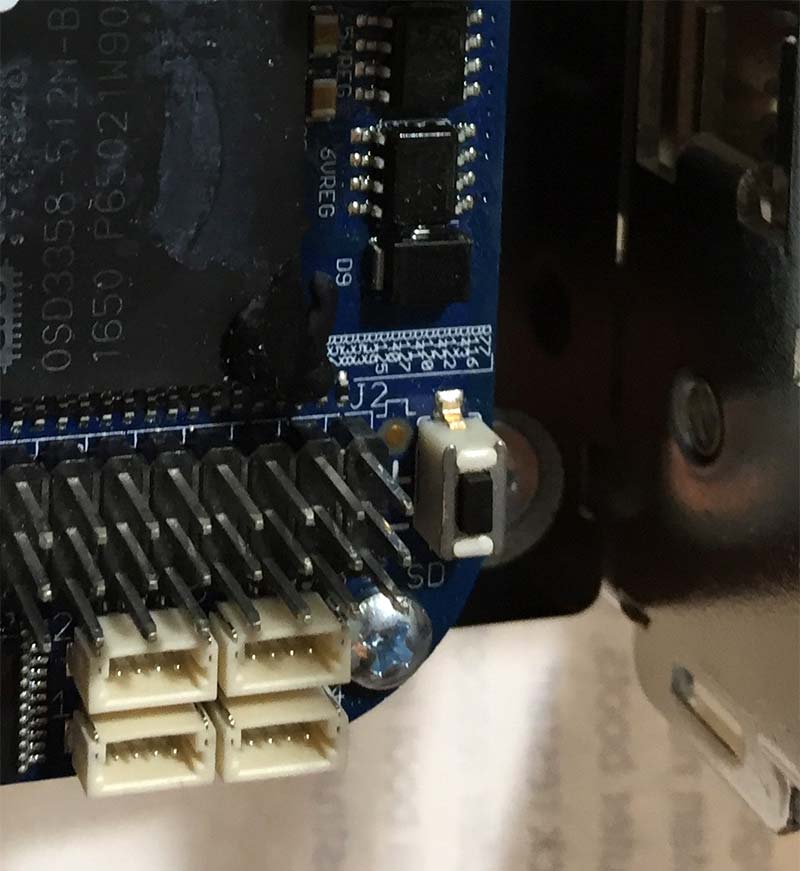
Figure 14. The button you hold to initiate flashing.
Once you see a beautiful “ping pong” pattern on the upper row of LEDs, you can release the button. Enjoy watching the LED race and wait for the board to power itself off. Next, unplug the power and battery, and remove your micro SD card. Keep it for future projects.
Second, grab a copy of the book BeagleBone Robotic Projects and follow the sections about connecting to the BBBlue. (You can also find a lot of help/tutorials online for what we discuss here if you don’t have the book. However, I’ll be referencing the book a lot in this article.) Here, you’ll use a micro USB cable plugged into the underside of the board (don’t use the BBBlue bigger USB port) and the third software on your PC called Putty.
Once connected, a terminal window will open and you will log in as “debian” and enter the password “temppwd.” Now, follow the section in the book that enables Wi-Fi. Here is where you’ll need your Wi-Fi password. It’s pretty involved, but the book is very clearly written.
You can confirm that you have been successful by seeing that beautiful little green LED come on steady (Figure 15) that signifies the BBBlue Wi-Fi is working.
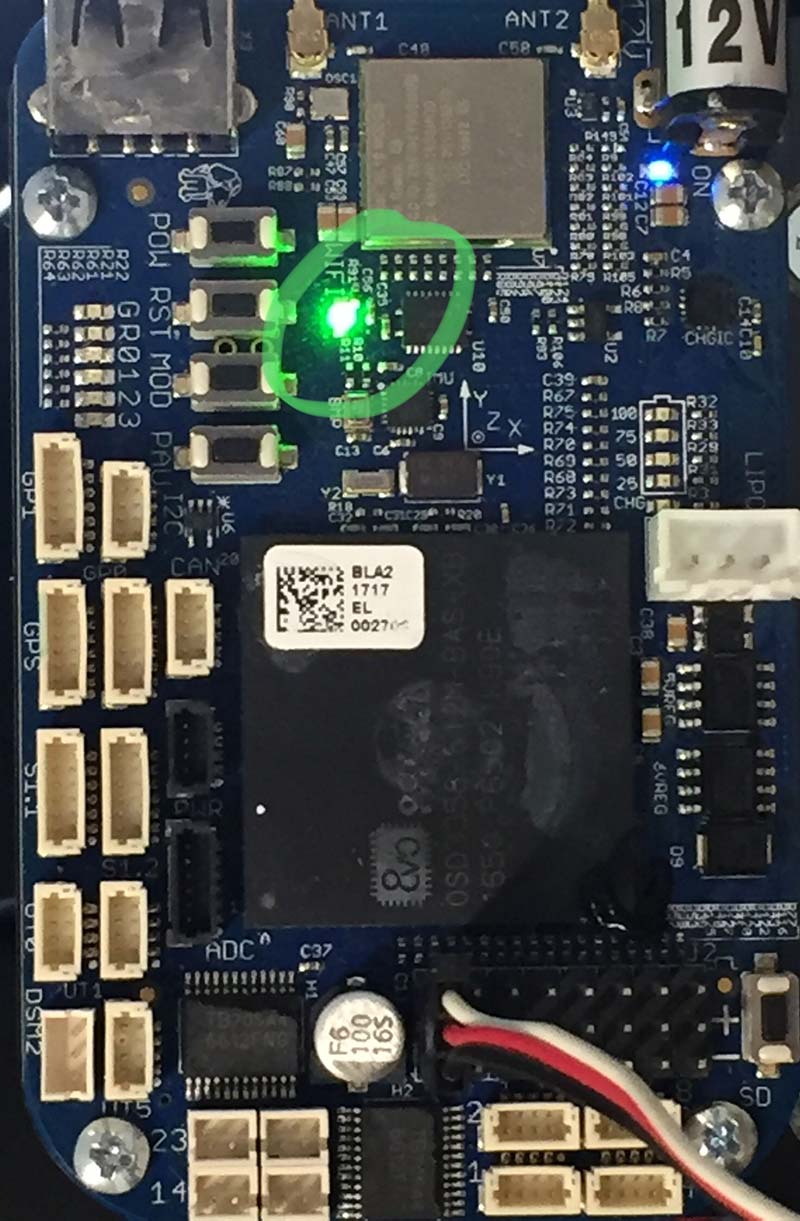
Figure 15. The green LED that shows Wi-Fi is working.
You can now store the micro USB cable with your micro SD card because you won’t use it again. Now, every time you want to communicate with your BBBlue, you can just connect to it using Wi-Fi from your Windows PC (Figure 16) using “BeagleBone” for the network security key.
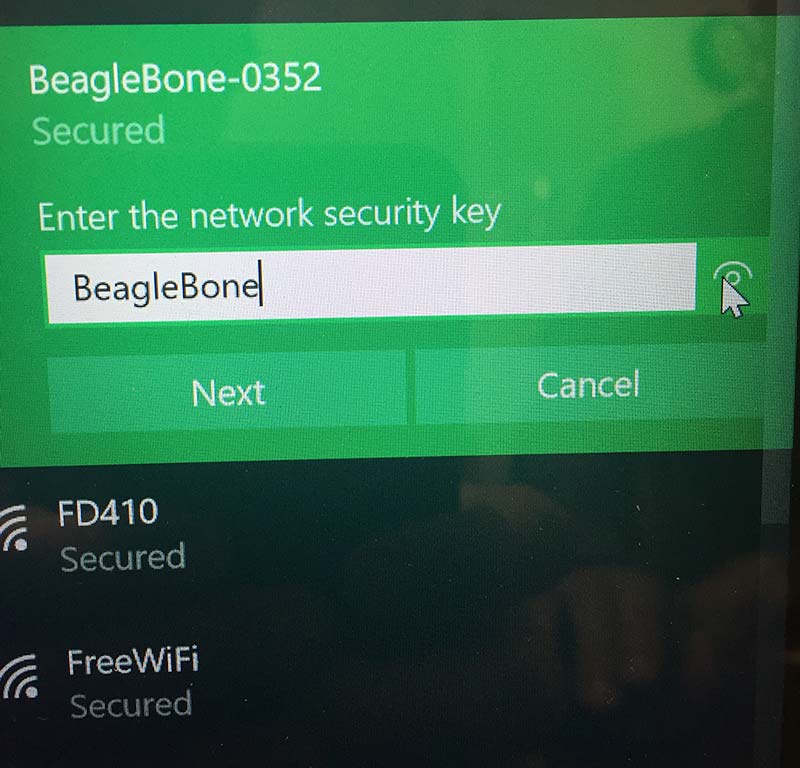
Figure 16. Using Wi-Fi between Windows and the BBBlue.
For our task at hand, you can put the book away now too.
Unfortunately, there is very little overlap between “the book” and “the website” Robot Control Library. Returning to the website, go to step 8 and follow the instructions for what you want to run upon boot (Figure 17).
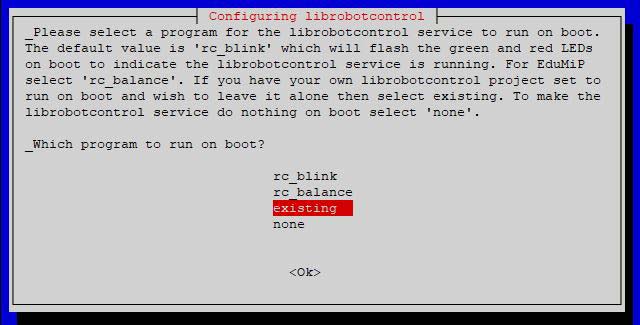
Figure 17. Choosing what program to run at boot.
Initially, you might want “none” since our goal is to sweep a hobby servo motor. As you develop and save programs, you could change that preference.
So, at this point, by bouncing between the website and book, your BBBlue should be easy to power up and communicate with using PuTTY with the terminal window of your Windows PC. If you do a “list” command, you should only see the “bin” directory. This is where some knowledge of basic Linux commands and the built-in editor called Pico will be useful.
Hello Servo
With simplicity in mind once again, I’m going to discuss only one example command from the Robot Control Library: sudo rc_test_servos -c 1 -s 1.0. If you plug everything back into your board — including your favorite servo into the left hand three-pin header (channel 1) — you can power up and use Wi-Fi to log in. Now, just type in that command, press enter, and you should see and hear something even more beautiful that an LED lighting up (Figure 18): your servo sweeping!
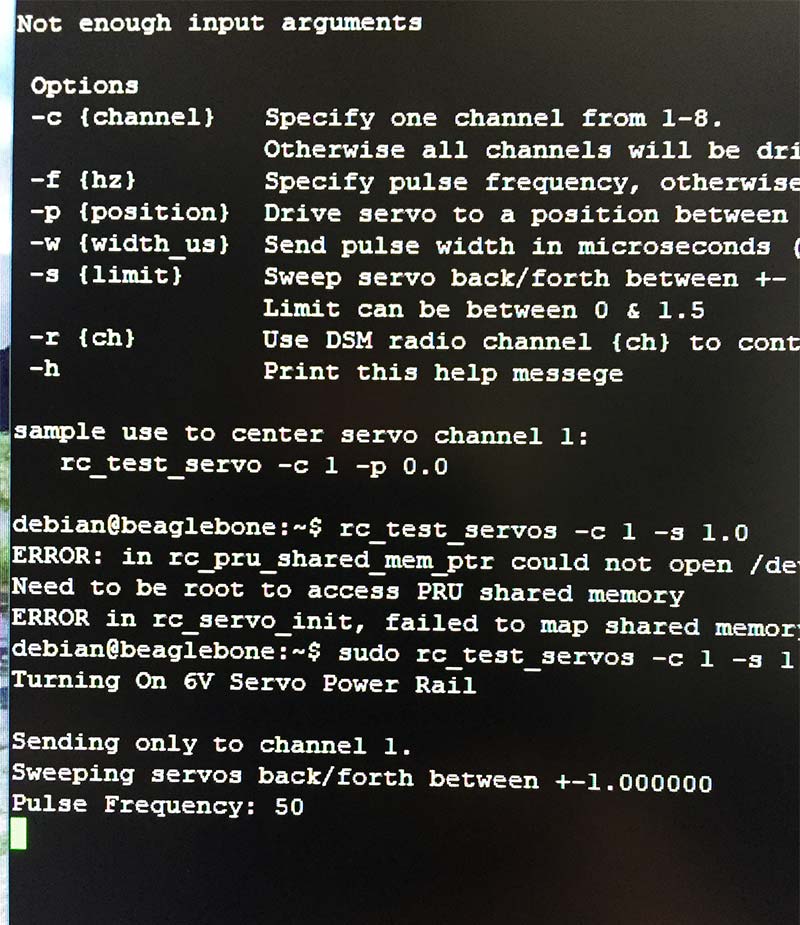
Figure 18. The goal of this article: sweeping a servo.
To stop it, just press the second button down on your BBBlue, or better yet, press Ctrl + C on your keyboard.
The actual path location of these examples as well as the super valuable rc_project_template can be seen in Figure 19.
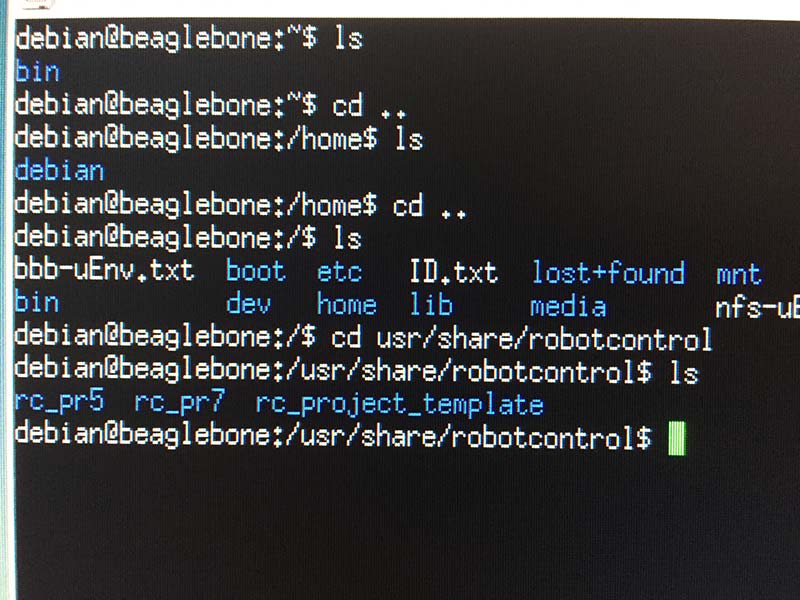
Figure 19. Moving between directories in Linux.
There are many on-line resources for learning the Linux and Pico editor commands that you might want to use moving forward, and a good description of the “make” command is in the Robot Control Library.
This article’s goal of taking one simple road to go from out of the box to sweeping a servo has hopefully been trouble-free for you. My experience in using any type of controller — from my PLC days up to now — however, always has included setbacks or worse, smoke. So, here is one error I’ve encountered that has a simple solution.
An Error You May Encounter
Being a superhero, Underdog fears nothing, including checksum errors. I too am no longer afraid of ugly looking errors posted by the BBBlue containing phrases like “Clock Skew” or “Checksum Error.” These have something to do with the on-board clock during those periods where your board is being used as a stand-alone controller without access to Wi-Fi. Here’s a quick solution.
Just plug that Ethernet-to-USB adapter into the bigger USB port of the BBBlue and connect the Ethernet port to a live CAT5 cable for a few minutes. Problem solved!
Wrap-Up
One of the drawbacks of the BeagleBone Blue not being as popular as it could be is the lack of cool aluminum enclosures and mounting options. My favorite DIN rail mounting option for this board — especially during programming — is Winford Engineering’s BeagleBone DIN Rail Mounting Plate (https://www.winford.com). It’s well made and perfect for control panels with DIN rail. Also, check out my YouTube video 15 on Structural Metals for more information; search “jimmyservo toolschool.”
It’s always nice when something works like it’s supposed to. Looking at Figure 20, you can see all the capabilities of this underdog of microcontrollers.
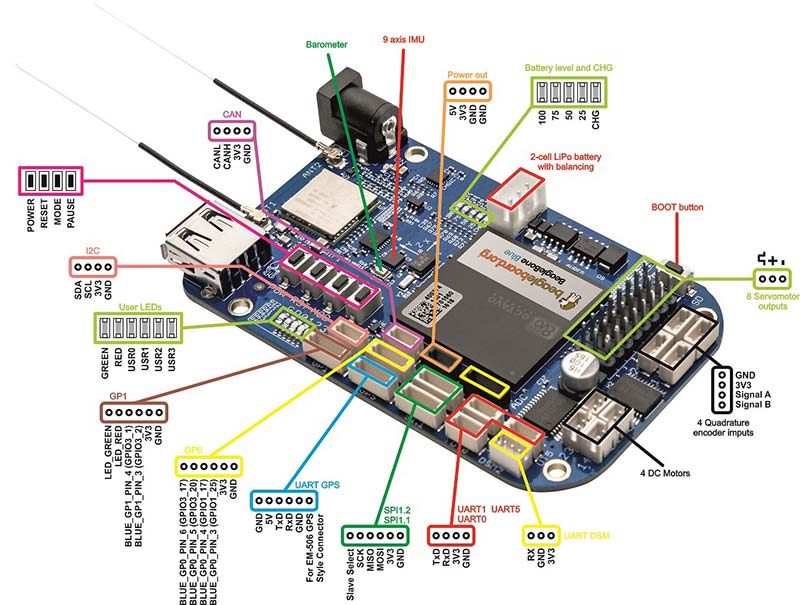
Figure 20. The power of this underdog.
Just imagine all the robotics projects you could build! Start simple and stay calm. I hope this article was helpful! SV
Resources
https://www.packtpub.com/product/beaglebone-robotic-projects-second-edition/9781788293136
www.strawsondesign.com/docs/librobotcontrol/index.html
https://www.renaissancerobotics.com
https://www.ucsdrobotics.org/beaglebone-blue
https://www.youtube.com/watch?v=-luNFDzTI0A
Article Comments