Neato + ROS = Robot Navigation
By Camp Peavy View In Digital Edition
I learned about ROS (Robot Operating System; www.ros.org) shortly after it began way back in late 2006. Folks in the HomeBrew Robotics Club (www.hbrobotics.org; a group that I’m heavily involved with) were early adopters, plus some members actually worked at Willow Garage (developers of ROS).
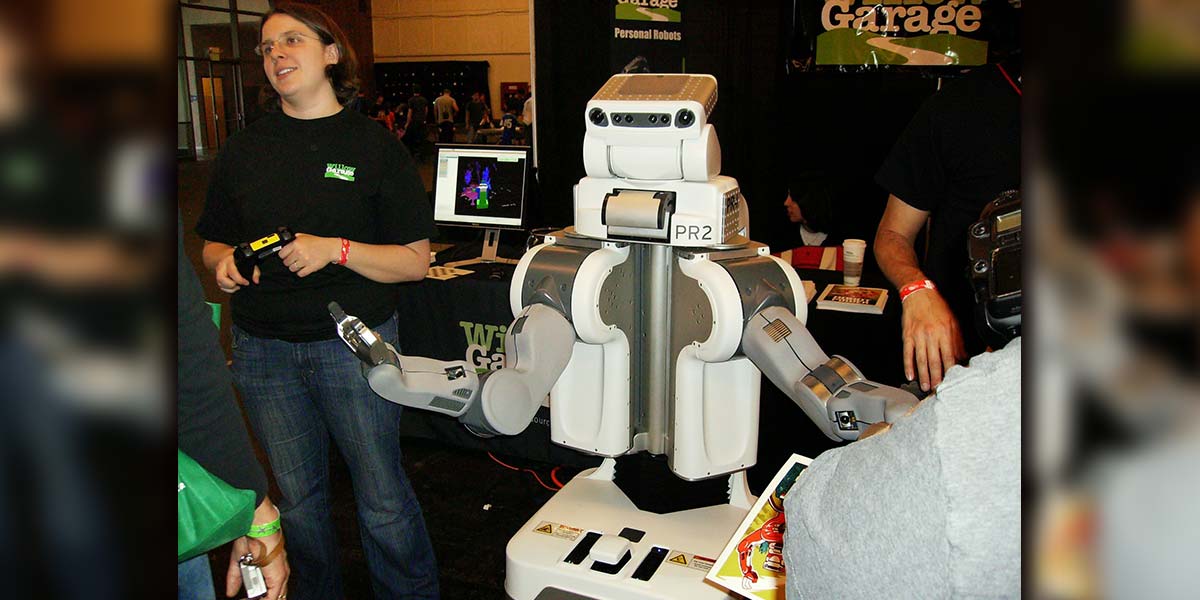
I didn’t really fall for ROS until the “Neato” package put together by Mike Ferguson came out back in 2010 http://wiki.ros.org/neato_robot. As you may or may not know, ROS was developed on a $400,000 robot called the PR2 (Personal Robot 2). PR2’s claims to fame were that it could plug itself in (an important feature for a mobile robot); it could fetch a beer from the refrigerator (the holy grail of mobile robotics); and it could also fold clothes (20 minutes per towel, but by the end of the day the laundry was folded).

Author Camp Peavy with three configurations of the Neato and ROS robot. Note the ultrasonic sensors on taller units to keep the robots from going under beds, couches, and coffee tables when navigating.
One of the many cool things about ROS (which is more of an architectural framework than an operating system) is that it scales. That is, you change the wheel parameters and the track width, and now software developed for a $400,000 robot works on your $400 robot vacuum cleaner (Neato). This includes a mapping routine (gmapping); a navigation stack (move base [path planning] and amcl [localization]); a visualization tool (Rviz); standardized messaging (publish and subscribe); logging (bag files); and distribution (GitHub). Oh, and it’s open source. Yep, the original source code is made freely available and may be redistributed, modified, and potentially commercialized.
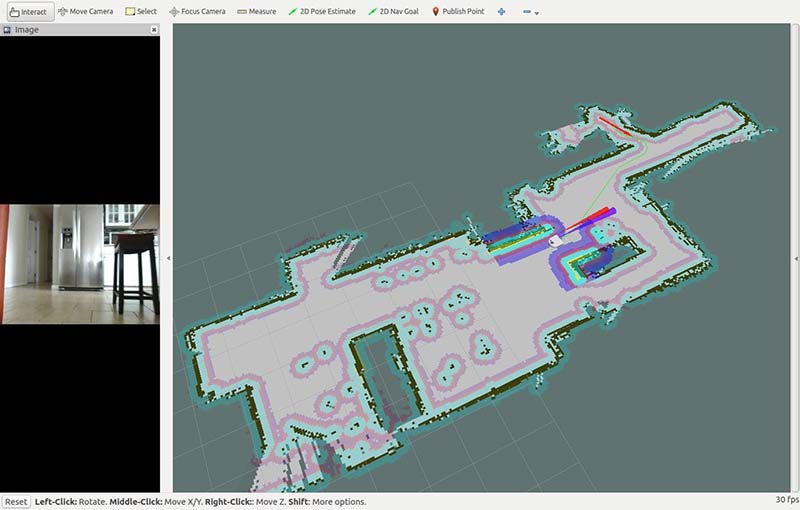
This is a map created with Rviz (ROS visualizer). Note the video panel and ultrasonic cones (protruding from Botvac model). You basically select a goal anywhere on the map and the robot will autonomously navigate there.
Before you jump headlong into ROS, a word of warning: ROS is hard! ROS doesn’t have a learning curve. It has a learning cliff!
It assumes a high level of expertise in Linux among other things, and it’s so all-encompassing one can easily get discouraged without your robot even moving a single inch. If you’re a beginner, it would be better to have some fun and build something easier with an Arduino and hobby RC servos first to get familiar with the basics. I don’t want to dishearten anyone, but rather prepare you for a big, long-term commitment before starting.
That having been said, building ROS-based robots can make your homebrewed bot considerably more versatile and even (dare I say it?) useful.
For one thing, ROS makes your robot capable of navigation. The ability to “navigate” or to know where you are in an environment and reliably get from one place to another is the base (pun intended) on which the rest of the robotics revolution will be built. You see, the ability to navigate gives your robot the power to deliver.
Neato and ROS
The Neato as a robot vacuum cleaner delivers a brush and vacuum to every square inch of a house. Telepresence robots deliver a camera, so the user can see what the robot “sees.” This is useful for communications, entertainment, and security. Modern industrial robots deliver parts and products by navigating through offices, hospitals, factories, and warehouses. Given a compartment or a shallow table, you could put anything into that space and have a generic delivery system that could bring “whatever” to “wherever.”
You might say the first job of mobile robotics is conveyance. ROS with the Neato robot can allow you to do just that. These devices will eventually develop arms and grippers for pick-move-and-place, and legs if for no other reason than to maneuver stairs (but let’s not get ahead of ourselves ... one step at a time, literally!). I can’t help but mention ROS also provides packages for arms and grippers.
What helped me understand ROS was a two-pronged approach; that is, learning the theory and details while deploying a relatively sophisticated physical manifestation (mapping and navigating with the Neato robot). Otherwise, you’ll find yourself on this endless scenic journey around the ROS universe and never get anything moving around.
The Botvac package (an update of the original Neato package) was created for the latest generation Neato known as the “Botvac” (big surprise), although it could still be used on the original Neato XV series. The program can be executed on either a laptop computer or Raspberry Pi2 or Pi3 (https://github.com/SV-ROS/intro_to_ros). The intro_to_ros repository contains the Botvac package (an update by Ralph Gnauck). It’s maintained by the SV-ROS group with support by Ubiquity Robotics.
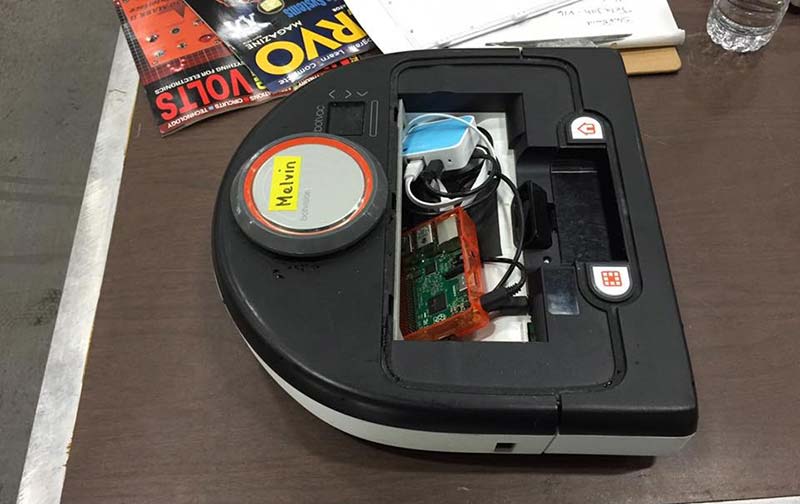
I've found it better to use a portable phone charger to power the Pi. That way, you can put in or remove the whole system without permanently modifying the robot. Here, I’ve plugged into a local Wi-Fi router rather than depend on whatever Wi-Fi might be available. The “bin” can be pried off the lid with a wide flat-head screwdriver so you can keep the robot covered. Extra bins can be found on eBay so you still have a vacuum cleaner. Be sure and specify “XV” or “Botvac.”
Basically, Neato robots have a USB port that allows you to talk to the robot through a laptop or a RaspPi. The Neato Programmer’s Manual can be found in the downloads at the end of this article. You can drive the wheels, read the encoders, and read the LIDAR scanner.
The LIDAR scanner is the key to ROS creating maps and navigating. It’s a 2D unit that spins at 5 Hz and takes 360 readings per revolution. This allows the robot to sense obstacles in 360°; it’s a top-down view of the world from 4” high.
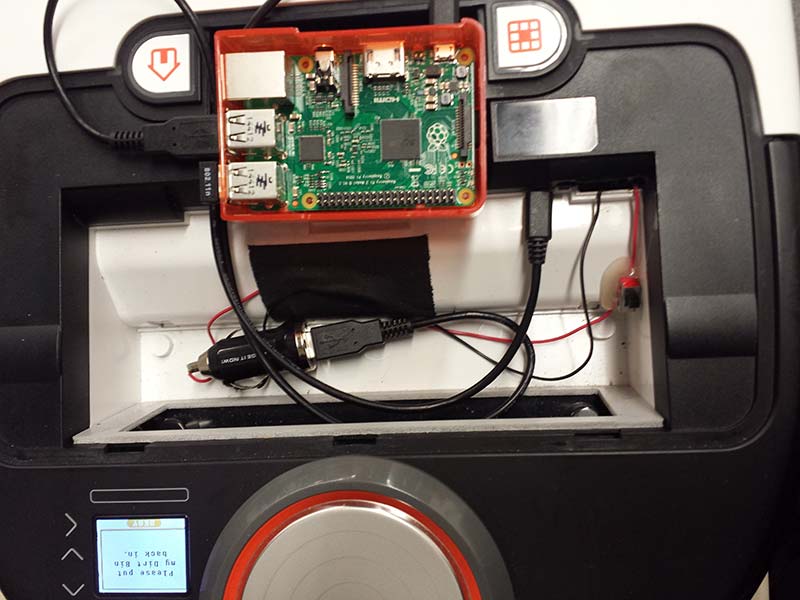
This is a configuration where I tapped into the Botvac's battery and am using a Wi-Fi dongle.
The new Botvac package features launch files that (you guessed it) “launch” multiple nodes at once, and allow one to run mapping or navigation on either the robot or a remote workstation. Even as one ventures into mapping and navigating with ROS on the Neato, it’s worthwhile to understand the low-level structure of ROS.
For that, go through the tutorials featured on the ROS Wiki page at http://wiki.ros.org/ROS/Tutorials and/or in what I found to be the best book: A Gentle Introduction to ROS, which is available online for free at https://cse.sc.edu/~jokane/agitr.
I would suggest starting with a laptop (most any old one will do) and formatting it with Ubuntu. Install ROS and install the Botvac package. Go through the ROS tutorials and also the tutorials from A Gentle Introduction. Eventually, create the micro SD card as described in the intro_to_ros repository. This will be used to boot and run the same stack on a RaspPi (I’m currently using the RP2). The exercises you have been going through on the laptop (turtlesim, in particular) can now be applied to a physical robot.
First, you’ll be driving the robot around with either the keyboard or joystick; mapping or creating a drawing of the room. I prefer the keyboard since the goal will be to get a map on the screen, and the last thing you need is another device of which to keep track of (the joystick).
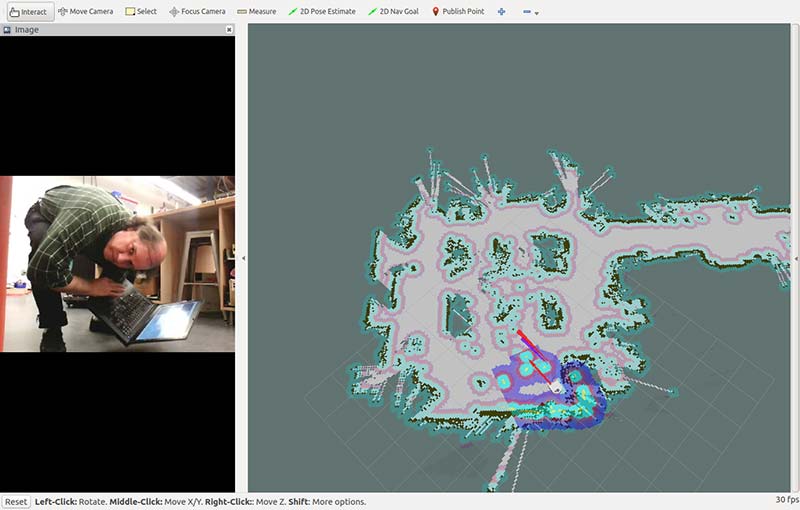
This is a map of the shop with me looking into the camera. You can see where the robot is positioned in the map with the URDF (Unified Robot Description Format) model.
The goal simply is to get a good chart on the screen. Once you’ve got your map, stop! While it’s better to end up where you started (i.e., close the loop), you can always “set” the pose when you run the navigation stack.
The reason it’s best to close the loop and be facing the same way (pose) is because this is the navigation stack’s starting point. The robot will be “pre-localized.” The reason I say stop when you get a good enough map is from personal experience, where many a “good enough” version got ruined by going for a perfect one.
The goal should be to chart out the perimeter of the room. If it’s too large or parts are not navigable, map out a corner or side of the room and just navigate back and forth in that area.
The real core of the package is the neato.py and neato_driver.py Python files that you can find at https://github.com/SV-ROS/intro_to_ros/blob/master/bv80bot/neato_robot/neato_node/nodes/neato.py and https://github.com/SV-ROS/intro_to_ros/blob/master/bv80bot/neato_robot/neato_driver/src/neato_driver/neato_driver.py.
The driver (neato_driver.py) has the Neato API commands; the ROS wrapper node (neato.py) presents this information as ROS topics, correlating LIDAR scans with wheels; optometry creates maps in ROS gmapping. The map is then saved, and the grid-mapping package is killed.
Finally, launch the Navigation stack (which consists of move_base and amcl). At this point, the system will load the map you just saved with global costmaps (inflation barriers around obstacles and walls) and local costmaps (active readings by the LIDAR which also feature inflation barriers around active walls and obstacles).
The way I like to do it is as follows: (This is a checklist or cheat sheet for mapping and navigating with ROS and the Neato robot. I’m using my IP addresses. The robot is 192.168.43.51 and the remote “Host” computer is 192.168.43.20, so you’ll have to change the IP addresses to match your system):
- Ping the Pi (or computer) in (or on) the robot with your remote “host” to verify connection and speed. If you have problems, check back to make sure your robot and remote workstation are still talking, and the latency isn’t too great (>100 ms). ROS depends on IP connectivity.
- ssh to the robot and sudo ntpdate 192.168.43.20 to synchronize the remote computer and Pi. There’s no mention of this on GitHub, but I find it necessary. Steps 2, 3, and 4 are run from the robot terminal. The IP address is that of your remote workstation. Others use “chrony.”
- sudo chmod 666 /dev/ttyACM0 gives rights to attach to the robot.
- roslaunch bv80bot_node bv80bot_base_only.launch ... launch base_only ... run gmapping and nav stack on remote computer.*
- On the remote workstation, open a terminal session <ctl,alt,t> and run roslaunch bv80bot_node bv80bot_map_gui.launch. This is the grid-mapping routine (gmapping).
- Open another terminal session on the remote workstation and launch rosrun teleop_twist_keyboard teleop_twist_keyboard.py. This is the teleoperation node for the keyboard. There is more than one configuration of this. I prefer the one designed for the Turtlebot.
- At this point, with teleop_twist in the foreground and Rviz (should have launched with bv80bot_map_gui.launch) one level below, you should be able to drive the robot around with the i, m, j, l, and k keys. On the screen, you will see a map emerge that will look like the floorplan of your room. When you have completed your map (as mentioned, try to end where you started), you’ll want to change directories and save the map with the following commands: roscd neato_2dnav/maps and rosrun map_server map_saver.
- AFTER saving your map, you can kill the gmapping routine (ctl,c) and launch the navigation stack roslaunch bv80bot_node bv80bot_nav_gui.launch. This will load the map you saved and allow you to navigate autonomously from point to point by clicking on a goal.
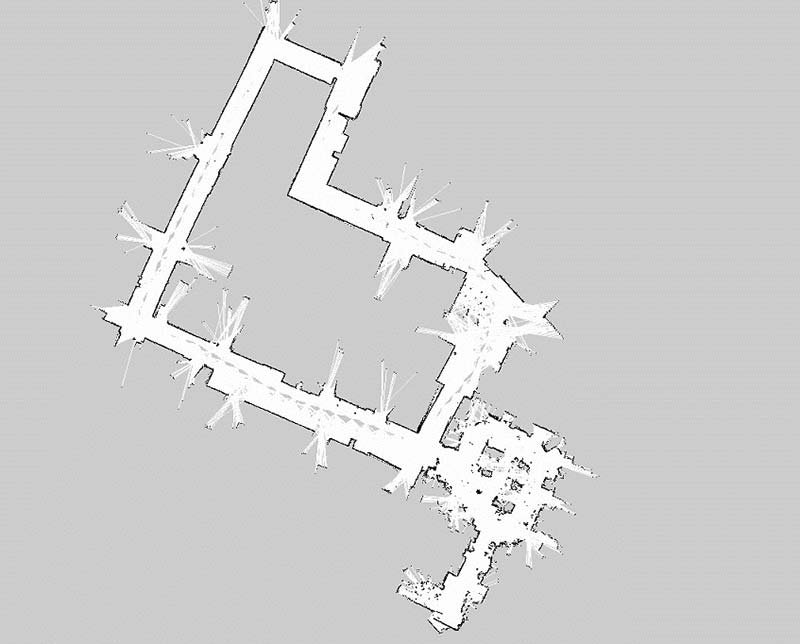
This is a map of about 10,000 square feet of office space. You can “click” anywhere on the map and the robot will autonomously navigate to that spot.
Final Directions
In summary, I want to say that as difficult as it is, it has never been easier to build robots that navigate. I want to emphasize the importance of this milestone. The ability to navigate gives a robot the capability of delivery, and as I mentioned previously, delivery is the basis of all mobile robot applications. It is the starting point for your robot doing something useful.
These devices will eventually develop arms and legs, but for now, good luck and enjoy navigating! SV
*If you have a lot of trouble with ROS communication between the robot and the remote computer, it could be environmental variables or the “./bashrc” file (http://wiki.ros.org/ROS/NetworkSetup).
**** notes about .bashrc ****
# example entry for “master”
export ROS_MASTER_URI=192.168.43.51
export ROS_HOST=192.168.43.51
# example entry for “host”
export ROS_MASTER_URI=192.168.43.51
export ROS_HOST=192.168.43.20
*****************************
Article Comments