Maximizing Strength for Printing Combat Robots with a 3D Printer
By Ryan Clingman View In Digital Edition
The rise of affordable 3D printers has made it easy for builders to come up with a design for an Insectweight bot and have the frame printed in one simple operation. However, the materials typically used by 3D printing hobbyists seldom fare well when matched against steel or titanium spinning at high speed.
Budget 3D printers can be used to print some remarkably durable parts which can withstand the trials of robot combat, but it takes some care in the selection of the materials, print settings, and overall design to make a printed chassis as durable as possible.
One of the most obvious places to start is with the printing material itself. Nylon is one of the toughest plastics printable on budget 3D printers and tends to bend and deform rather than break when it’s hit. The downsides for nylon are that it has a tendency to warp even more than ABS and it’s not a very stiff plastic by itself.
Nylon also absorbs water from the air around it, which then turns to steam when it gets heated in the nozzle, and results in a print that is not as strong or solid as it’s meant to be. Because of this, nylon must be dried with an oven or a food dehydrator and then stored in an airtight dry container to keep it in a usable state.
Nylon composite filaments with carbon fiber mixed into the plastic are a new development, resulting in a material that is stronger, stiffer, and less prone to warping while printing. These CF-nylon filaments can create some very rigid and durable parts, but they have a few significant downsides in that they cost about 6x as much as a standard PLA filament and they are quite abrasive to the print nozzle, wearing out brass nozzles or requiring a hardened steel nozzle to withstand the constant grinding.
As a final word on the plastic itself, there is one more thing that you can do with your printed part to make it stronger: annealing.
Annealing involves placing a printed part into the oven and heating it just enough that the polymer chains in the plastic can relax a bit from the stresses of uneven cooling during printing, but not enough for the part to deform.
Then, after a few hours, allow the parts to slowly cool down to room temperature (rigid.ink has a nice guide on this). The result is a part that is a bit stronger than one straight out of the printer.
One of the most important things to recognize about the strength of 3D printed parts is that they are stronger in some directions and weaker in others; the trick is minimizing these weaknesses and making the best use of the strengths. Printed plastic is generally strongest in the direction that a line is printed, while being weakest at the interface between layers and between adjacent lines.
The first — and simplest — recommendation is to ensure that your extrusion settings are properly calibrated for the filament you’re using.
A printed part that has every extruded line nicely touching and bonded to the adjacent line is going to be much stronger than a part that has a small gap of air left between the lines. Because the layer lines are often the weakest area of a printed part, we want them as strong as possible.
Printing thinner layers at a lower speed and at the high end of the material’s temperature range allows more heat to transfer from the extruder nozzle to heat the previous layer which, in turn, allows the new layer to form a stronger bond with the previous layer.
Decreasing the layer height also makes the extruded lines flatter and less round, leaving less space for air between adjacent lines and increasing the contact area between layers. This results in better bonding.
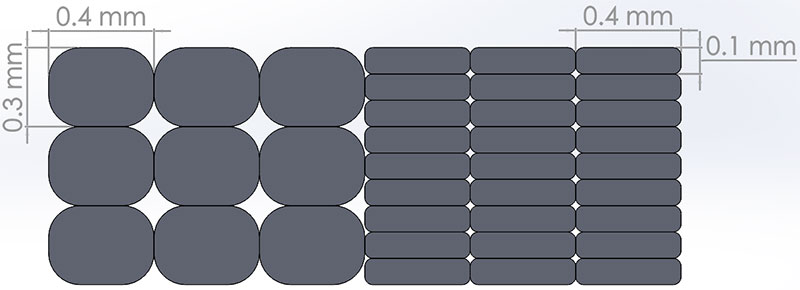
Comparison of the gaps left in 3D printed material based on the layer height-nozzle width ratio.
Because of this, you want to have your layer height as low as possible, and always have the layer height below 50% of the nozzle width. While printing with a lower layer height is good for layer bonding strength, higher layer height is good for tensile strength in the direction of the extruded lines.
These two factors wind up working against each other, and the simplest way to find a happy medium for strength is to go to a larger diameter nozzle.
While it isn’t the best for fine details, a larger nozzle diameter allows you to print at a higher layer height while still maintaining a low height-width ratio. This helps maximize the strength in both directions
A larger nozzle also reduces the risk of having the nozzle clog which can be a more common occurrence when printing with composite filaments.
A common misconception about 3D printing is that in order to increase the strength of a printed part, you simply need to increase the infill percentage, but the relationship between infill percentage and strength is not linear.
Increasing the infill on a part from 25% to 50% will give you just a 25% increase in strength, and increasing from 50% to 75% will only add 10% to the strength of the part.
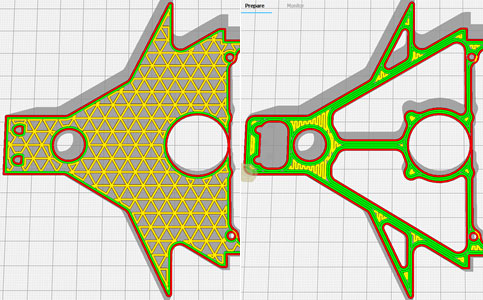
Comparison of the infill required for a solid part versus the same part with strategically placed voids.
Rather than increasing infill, what tends to give more strength to a part is increasing the number of outer walls that are printed with each layer. If your design has large areas that would require infill, a good option to increase the strength could be to add strategically placed pockets or trusses.
By combining these two techniques, you can wind up with designs that have solid trusses that are both more durable and lighter than a solid part with infill.
Where you still do need infill, plain old rectangular and triangular infill patterns tend to be the strongest choice instead of some of the fancier infill options that are now available.
While making a 3D printed bot that can stand up to blows from opponents can be challenging enough, trying to print a bot with a spinning weapon can make it equally challenging to withstand the force of your own weapon.
For printing holes that will be seeing impact loads (for example, holes supporting a weapon axle or motor), the orientation of the part in the printer matters a LOT. If the hole is printed horizontally, it gets all of the weaknesses of the multiple layer lines to concentrate the stresses and increase the likelihood of breaking.
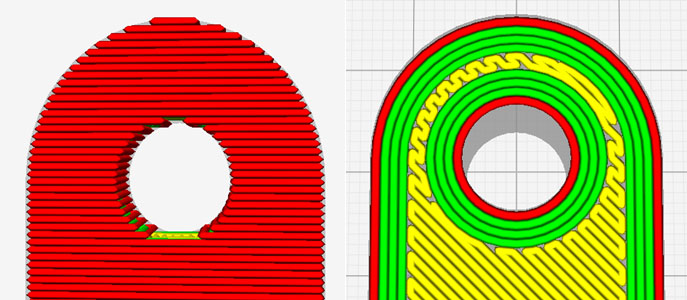
Comparison of a horizontally printed hole and a vertically printed hole. The layer lines make the horizontally printed hole weaker.
If the same part is printed with the hole pointing up, it’s much stronger due to being able to have solid lines of plastic surrounding the hole and more evenly distributing the forces.
Another complementary strategy for strongly supporting your weapon axle is to add a bushing to support it instead of simply relying on the plastic frame alone, spreading the force of impacts out over a larger area and decreasing the likelihood of ripping your own weapon off.
The same idea can be applied defensively by including armor to take the worst of an impact and spreading it out over your 3D printed frame.
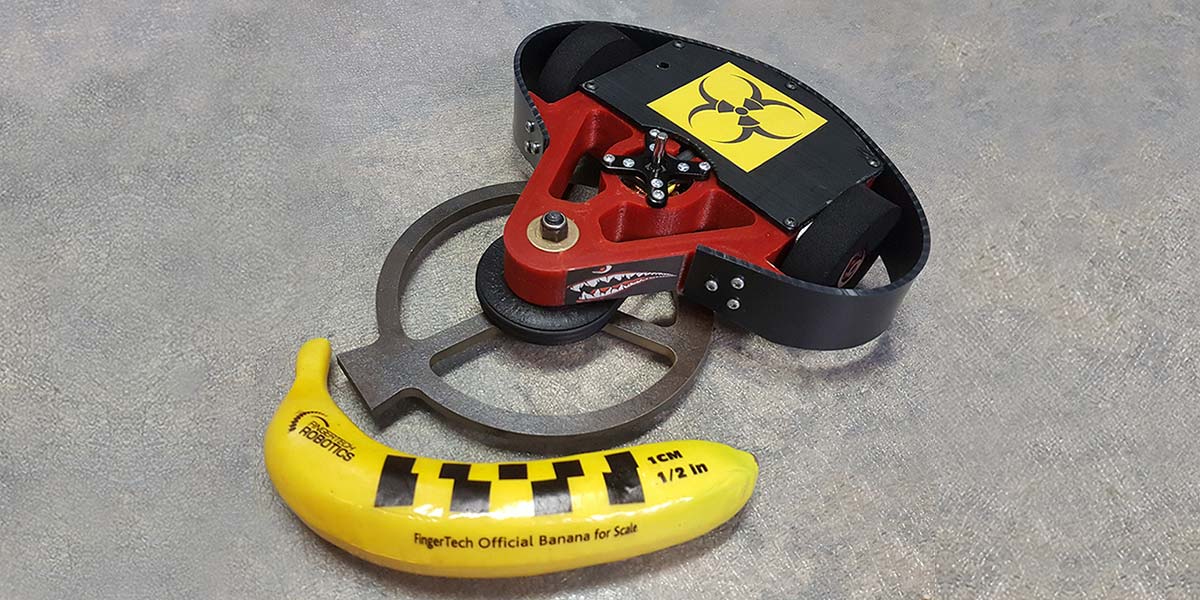
My 3D printed Beetleweight bot, Mostly Harmless, has a strip of UHMW armor that wraps around the back of the bot because that is where the frame is most likely to suffer a direct strike from an opponent.
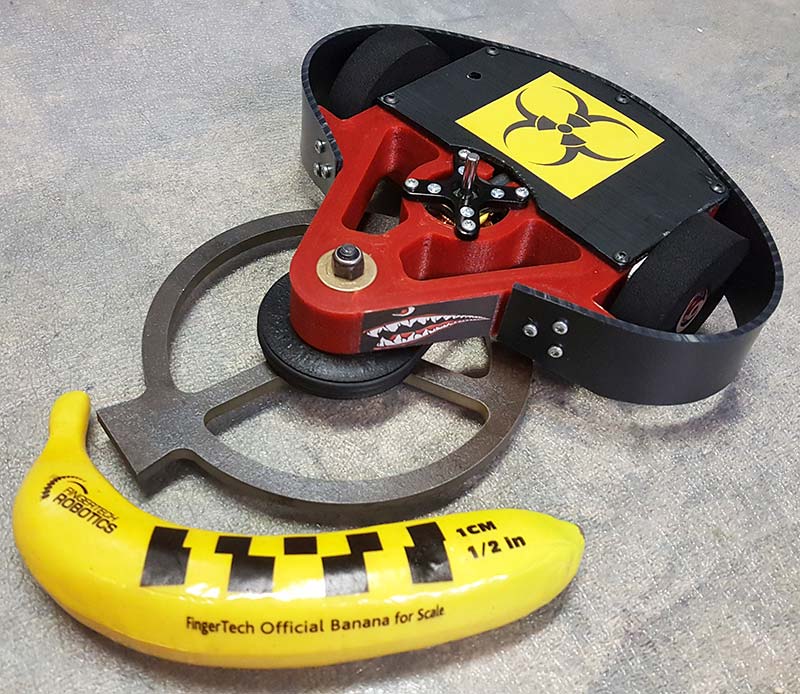
Mostly Harmless is my 3D printed Beetleweight bot made using the principles laid out in this guide.
By just putting a little extra consideration into your process for designing and printing your parts, you can print bots that are more than capable of withstanding the trials of combat, even with a budget level printer. SV
Article Comments