Fun with Subroutines
By Scott Supeck View In Digital Edition
Let’s face it, when it comes to designing and building a cool microcontroller project, coding is rarely on top of the “fun part” list. This article introduces the coding concept of subroutines to programmers and makers looking for creative ways of dealing with programming their microcontrollers. It’s a very useful technique for servo control, animation, or any program that requires multiple actions to be called upon at various times within the loop.
Most of my Arduino sketches involve real time control of outputs like servos, sound FX, and relays. I usually accomplish this using either remote control “model airplane” style controllers or variable resistance joysticks like repurposed video game controllers. Those sketches involve pretty straightforward “if-then” type programming.
I recently finished an animatronic project where a different functionality was desired: a self- running program that — while still a loop — gave the appearance of random actions. It was during the programming process that I really began to take advantage of the subroutine.
In computer programming, a subroutine is a sequence of program instructions that performs a specific task, packaged as a unit. This unit can then be used in programs wherever that particular task should be performed.
Subroutines may be defined within programs, or separately in libraries that can be used by many programs.
A subroutine is often coded so that it can be started several times and from several places during one execution of the program, including from other subroutines, and then branch back (return) to the next instruction after the call, once the subroutine’s task is done.
The Project
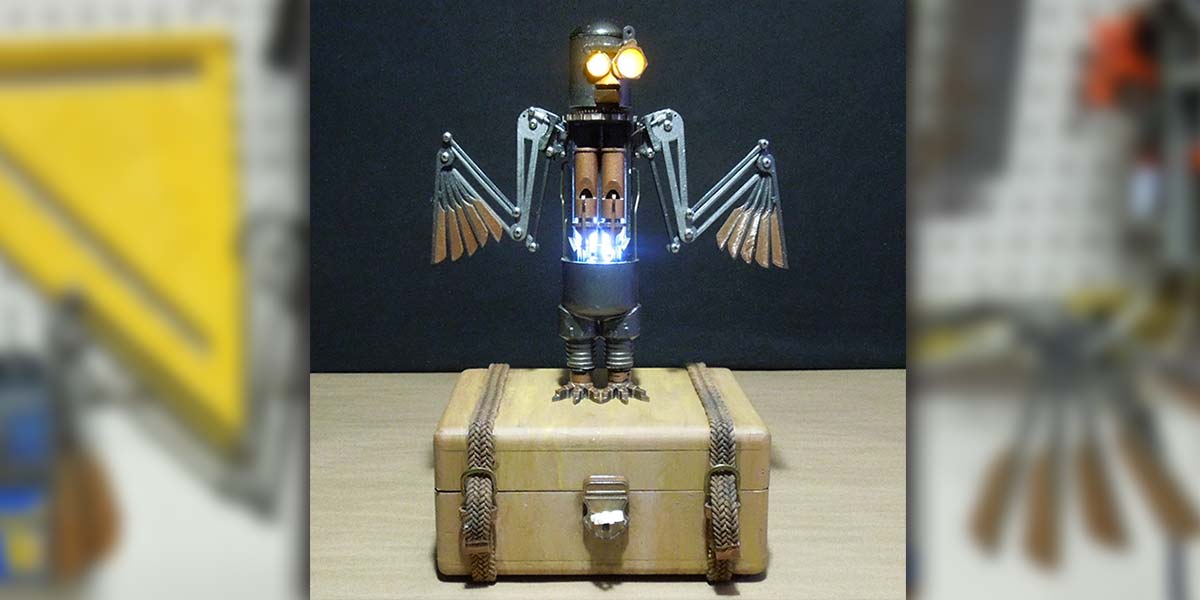
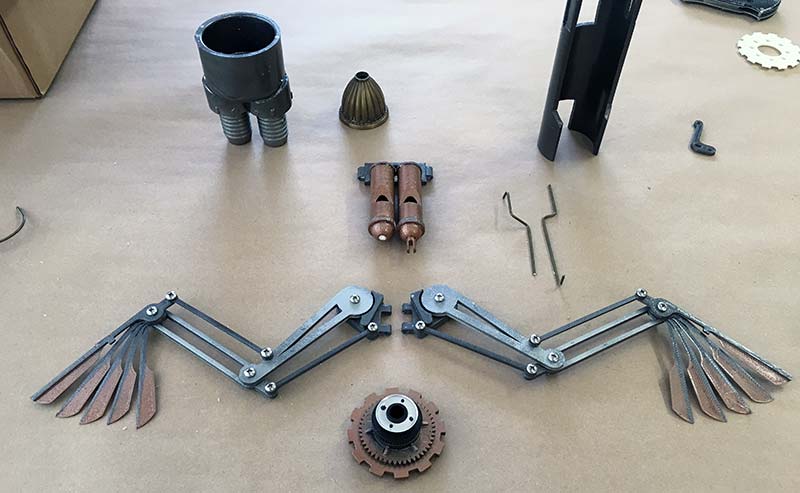
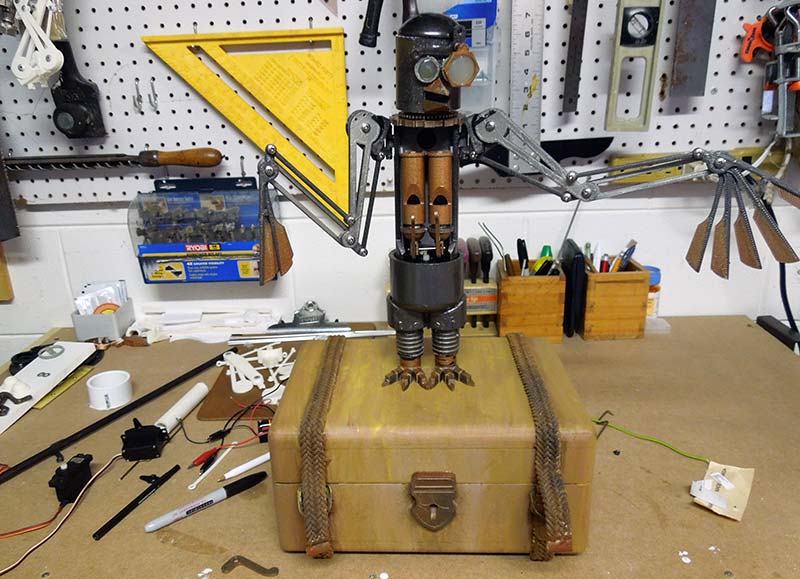
The project that led me to this programming style was a three-dimensional desk-top sized animatronic bird. I have designed and built several animatronic characters and have been wanting to attempt something like this for a while.
Originally, it was to be a realistic looking bird — feathers and all. I soon realized that the “skeleton” and mechanics were really the interesting parts to me and decided to go with a robot bird concept inspired by the steampunk style. I have included several photos of the robot for reference. However, this article is not meant to focus on the design and mechanics.
The Idea
The idea was not to control it like a puppet, but to have the robot mimic lifelike motions on its own when activated. There are two key programming techniques that allow this action: random delays and subroutines.
In the Arduino programming language — as in C++ — a subroutine is just another function. Because the function does not have any return information, it’s known as a void function. The syntax for a void function is:
void routinename () {
action to be taken
}
These pieces of code are then called to action by the loop function. The concept is simple: Write a bit of code that creates a portion of the program that will be repeated in the loop. In this case, that would be anything from a head turn to a wing flap or eye blink.
These subroutines are then called one by one by the loop with any necessary delays or other directions in between to form a complete show. My subroutines for the bird project were used mostly to control servo movements, although some just controlled LEDs.
The Tricky Part
The tricky part in calling subroutines for servo movements is making sure the servos are in the positions that are referenced in the subroutine at the time it is called. To help explain that, let’s look at a subroutine from my bird project that moves the head to the right 20 degrees:
void headright3(){
for (pos = 90; pos > 70; pos -=1) {
headservo.write(pos);
delay (5);
}
For this movement to appear smooth, the head servo needs to be at the 90 degree position at the time the routine is called. In order to keep track of the head servo position, I came up with a system where the left and right head turns are divided into four movements or subroutines each. I devised the diagram in Figure 1 as my reference when writing the loop.
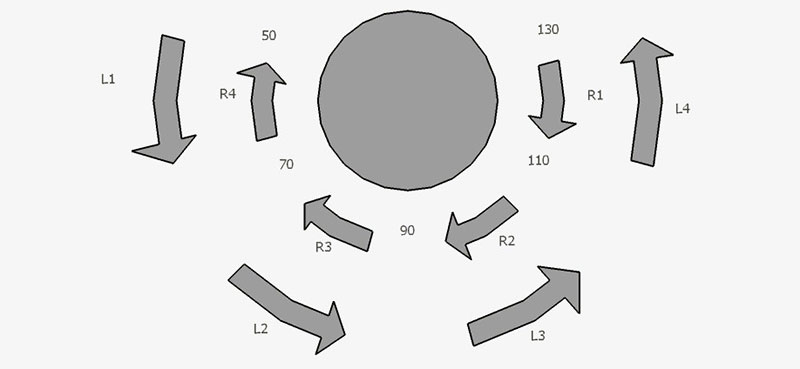
Figure 1. Head movement chart.
Figure 1 shows the eight subroutines and the servo positions for each. The letter/number combination under each arrow refers to the name of the subroutine that moves the bird’s head over that distance/position. The numbers in between are the degree used by the servo to hold that position.
So, for instance, if the head is turned to the left 20 degrees, it would be at the 110 degree position (90 being straight on). To write a turn to the right 20 degrees from there, the subroutine would read:
void headright2(){
for (pos = 110; pos > 90; pos -=1) {
headservo.write(pos);
delay (5);
}
These subroutines live in the sketch right below the main loop. They are written as little bits of code and listed in no particular order, waiting to be called by the main loop. They become the building blocks of the loop and when used in conjunction with random delays in between, can give the appearance of random actions — which is exactly what I was after for my robot bird’s performance.
I ended up writing 17 different routines: eight for the head turns; two for wing flaps; two for wing extension; four for steam pipe valve/whistle SFX; and one for eye blink. In the process of writing these subroutines, I found it very useful to create a completely different sketch for testing their timing and positions.
This test sketch was completely identical to the one I would use for the final code except that the loop was blank. This allowed me to put in just one routine (the one I was working on at the time) followed by a delay.
When I loaded and ran the test code, the loop would run a particular routine over and over while I would stop, tweak the routine, and retest until I was happy with the results. Once all of the subroutines were tested and adjusted this way, I was ready to program the show!
The Show
The show consists of a loop that calls the subroutine actions in some order with delays in between each action. Think of it as the storyboard of actions used to create a realistic performance for the animatronic.
I had been looking forward to this part of the process. After all the designing, building, painting, and troubleshooting, it was going to be very rewarding to sit down with the finished robot bird and make it come alive. That process — it turns out — required almost as much trial and error as the rest of the project up till this point.
Putting the subroutines together in a way that was fun and entertaining to watch was more of a challenge than I thought. At times, I found myself acting out the movements and analyzing the order and timing of my performance to translate to the loop.
It was a lot of fun, but what made it so enjoyable was the fact that I could focus on the performance because the work of programming the actions had been done. Be sure and check out my code in the article downloads.
Think of subroutines as a helpful tool to free up your programs; to allow creativity without getting bogged down in the technical aspects of programming servos. That’s the real advantage of the subroutine.
Happy programming! SV
Animatronic Steampunk Bird
This is an Arduino controlled animatronic bird done in a steampunk style. It’s the first animatronic I’ve built that runs without control input. In other words, once you turn it on, it runs a loop of movements with variable delay times to produce a lifelike animation.
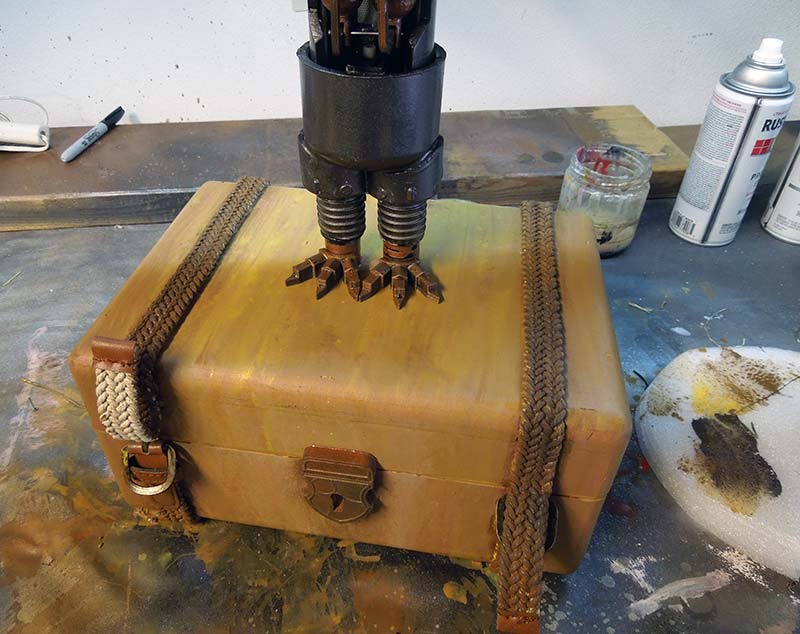
Plywood box with faux “old suitcase” paint job.
My original idea was to do a realistic bird of some type as a companion to a 5’ animatronic tiki pole I made last year. As I began designing and fabricating the skeleton for it, I began to realize that, for me, the inner structure and linkages were really the interesting thing to see and shouldn’t be covered up with feathers, etc.
Assembling the painted body parts.
3D printed parts with final paint.
I had also always been interested in trying something in the steampunk style, so this was going to be the project!
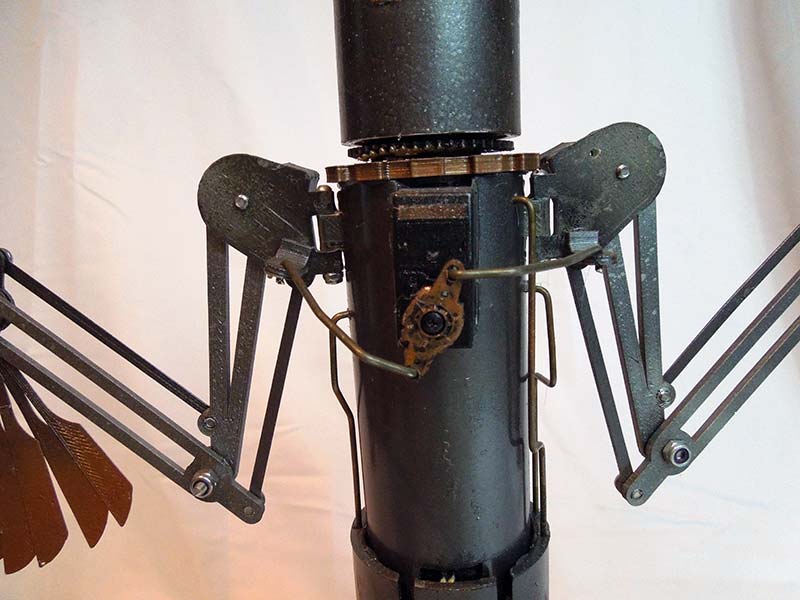
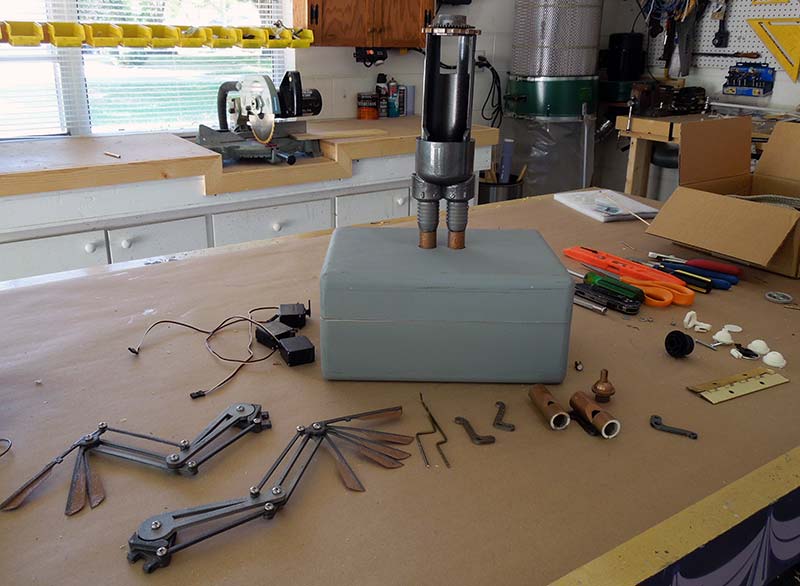
Rear servo with coat hanger linkages for wing in/out movement.
SketchUp has been my go-to modeling program for many years. It was a painless transition to start using it to design parts for 3D printing. The powerful combination of 3D modeling and printing has opened many doors in my shop and certainly in my animatronics endeavors.
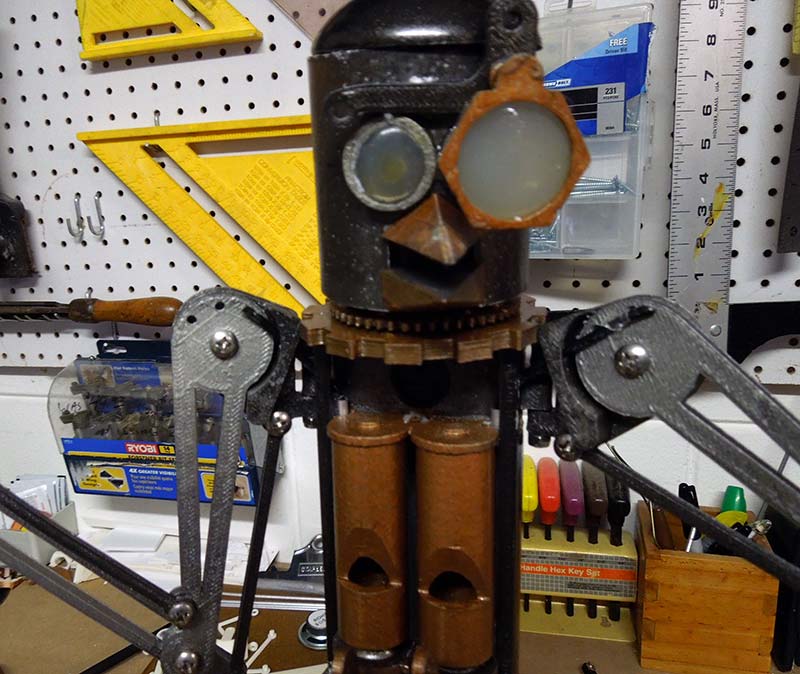
Monocle is 3D printed with hot melt glue for lens.
This bird project uses many 3D printed parts (pretty much anything I struck out on in the plumbing isle at Home Depot). I also tend to use whatever odds and ends I have on hand for my one-off projects and this build was no exception. Coat hangers, plumbing parts, old fabric belts, and even a ball point pen tube all made their way into this one.
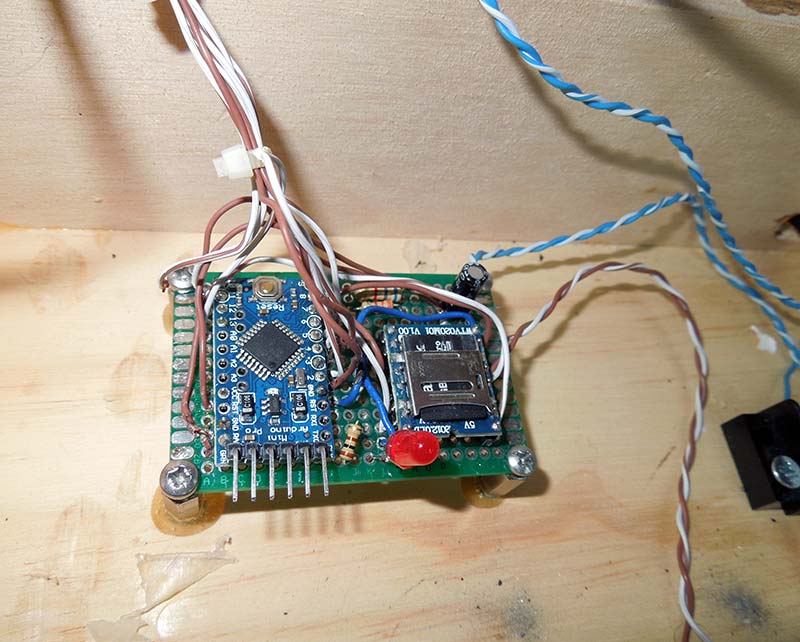
Proto board used for mounting and wiring Arduino and sound module.
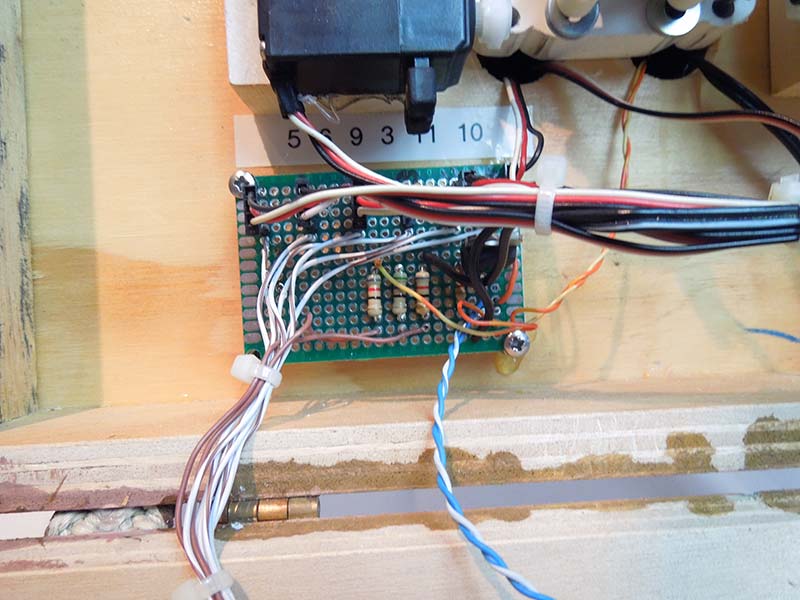
Custom breakout board used to attach servos to the Arduino Pro Mini.
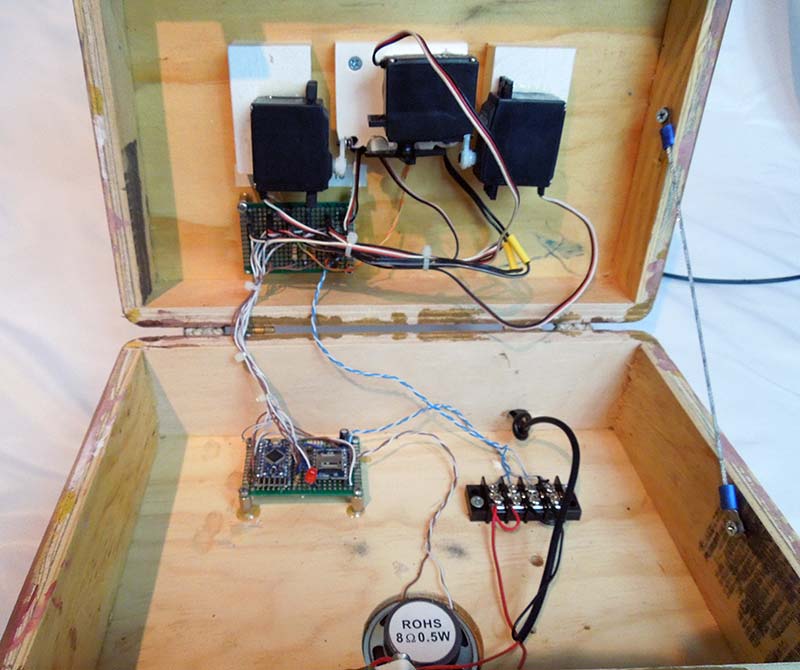
Final hookup. Speaker is powered straight from the sound module.
I used an Arduino Pro Mini to program the animation and eyes. I used the Mini because it’s cheap, small, and had more than enough outputs for this project. The process of programming was made simpler with the use of subroutines.
Testing the movement range after final assembly.
The main article goes into what those are, how I used them, and how you can implement them to free yourself up a little when programming your own creative projects.
Bird Parts List
1 Arduino Pro Mini
1 WTV020M01 sound module
5 Futaba FP5148 5V hobby servo (or similar)
1 2” 8 ohm/.5W speaker
1 Micro switch
1 TIP22 transistor (for powering eye LEDs)
1 10 µF capacitor (for audio smoothing)
2 5 mm LEDs (eyes)
1 White LED backlight module (Adafruit)
2 100 ohm resistors
Scott Supeck is an artist and maker from Clermont, FL. When he’s not maintaining the world class attractions at the Walt Disney World Resort, he is busy in his home shop creating projects that combine his many interests.
Article Comments