
Drawing with Lights Using a Flashing LED to Draw with Your Scribbler 3
By Carol Hazlett View In Digital Edition
The Scribbler 3 from Parallax is more than just a graphics drawing robot. It has a whole suite of onboard sensors to use for many different behaviors. There are infrared sensors for obstacle detection, line following sensors, light sensors, wheel encoders, and a hacker port for adding more equipment to it. It can be programmed in C, SPIN, or Parallax’s new BlocklyProp. It also has a pen port for use in drawing graphics. That will be the main theme of this article.
There is a lot of information about the Scribbler 3 on Parallax’s website (parallax.com), and loads of tutorials and projects for it on the Parallax Learn website (learn.parallax.com).
For this article, I am going to talk about its graphing capability using BlocklyProp to program it and also how to jazz it up with light.
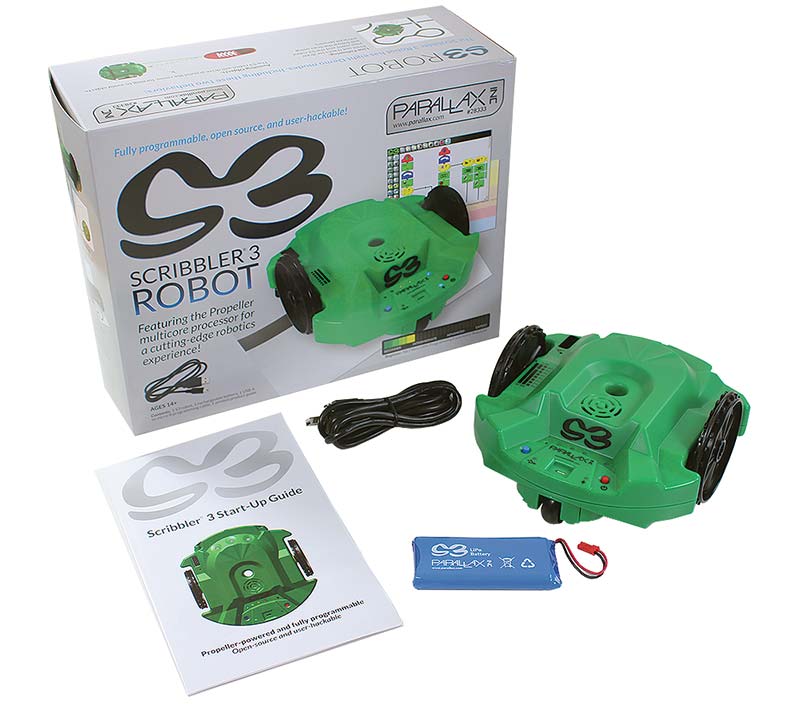
S3 kit.
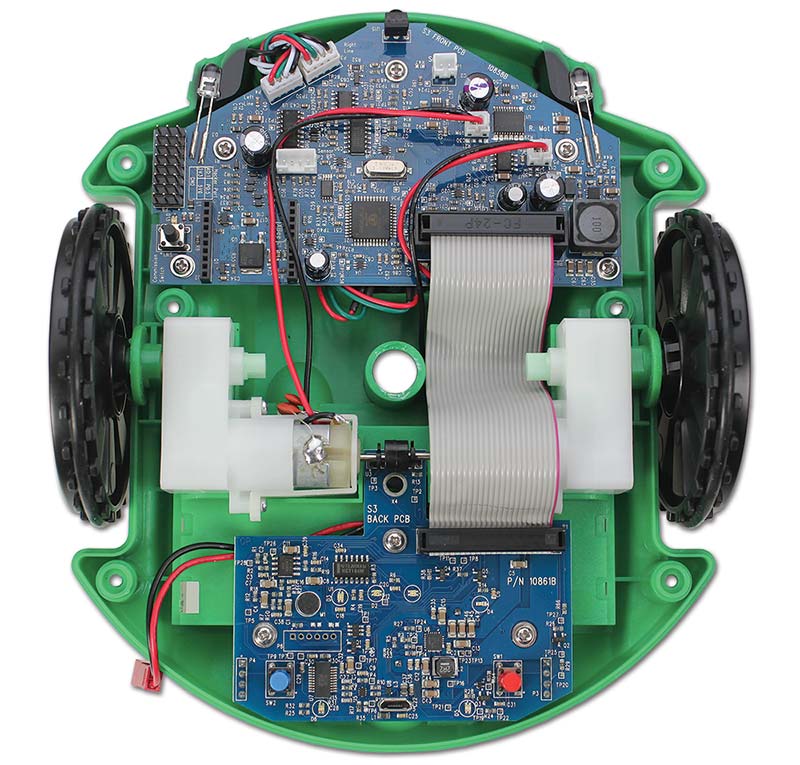
Interior of S3.
Propeller and BlocklyProp
I am not a very good programmer. I have played with many different microcontrollers and languages, but never got to the point of proficiency in any one of them. Basic and C is where most of my knowledge is, but I’m not very good at them either.
I can usually accomplish almost any project over time, but I must literally program a piece of it, test it, research what is in the books, look on the Internet for what others have done, and rewrite and retest every line and function until I finally get it right, or close to right.
My biggest programming skill is a determination to finish a project no matter how long it takes. A well-known roboticist, Red Whittaker, said it best, “In the birthing of any machine, there is that moment when it actually works. It is always fresh and astounding for me.”
When the Parallax Propeller first came out, it had its own language called SPIN. I hesitated to do much with it because I did not want to have to try and learn all the ins and outs of another language.
I knew it would be a better platform for a lot of robotics because of its multicore feature. I did do several projects in SPIN, but tended to go with what I was better at (which was C).
Now, Parallax has introduced a new graphic based programming environment called BlocklyProp for the Propeller boards and I have fallen in love with it! It is fun, intuitive, and has power.
BlocklyProp makes programming the Propeller simple, and it is easy to see what you are doing in a very logical way without all the hassles of syntax errors. It's based on the C language and you can switch to a screen which shows you the background C code if you want to see it.
Using the Propeller’s multicore feature is made very easy with BlocklyProp, and it uses the same structure and functions as C without having to count brackets or remember semicolons.
There are premade blocks for different sensors and functions which also makes the programming easier. Plus, Parallax is introducing new blocks all the time.
Of course — as with all Parallax products — there are many tutorials and projects on their Learn website as I mentioned previously. For educators, there are a lot of course outlines and tutorials available as well. Parallax has regular webinars and seminars which can be found on the News link of the company website.
I enjoy this new language so much I converted several of my robots to Propeller boards and a couple to Parallax’s new chip called the FLiP. One of the really nice things is BlocklyProp is backwards compatible to the older Propellers too.
In the rest of this article, I will show the code I used to make these designs so you can see how easy it is to use.
The Designs
There are four designs I did for this article using some of the features available in BlocklyProp. All are very simple to do with this graphic language and the S3.
One of the features of the robot is you can use several methods to encode your wheels for whatever level of accuracy you are looking for; of course, you can use inches or centimeters or the resolution of the wheel encoders. I went the easy way and just used inches.
For each design, I have provided annotated BlocklyProp code, a picture of the paper version of the design, and a picture of it with the flashing LED.
Cepheid Star.
Cepheid star in BlocklyProp code.
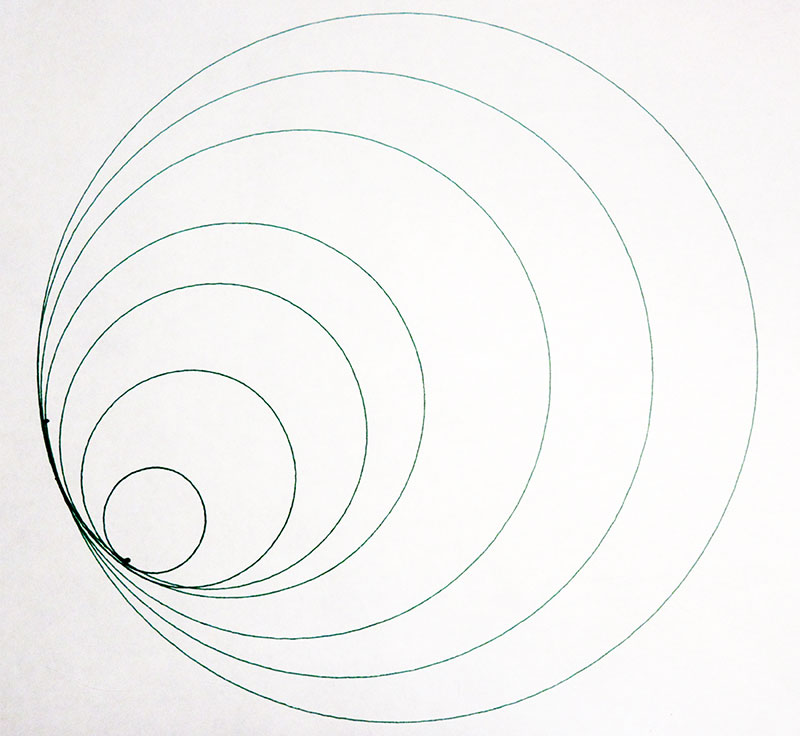
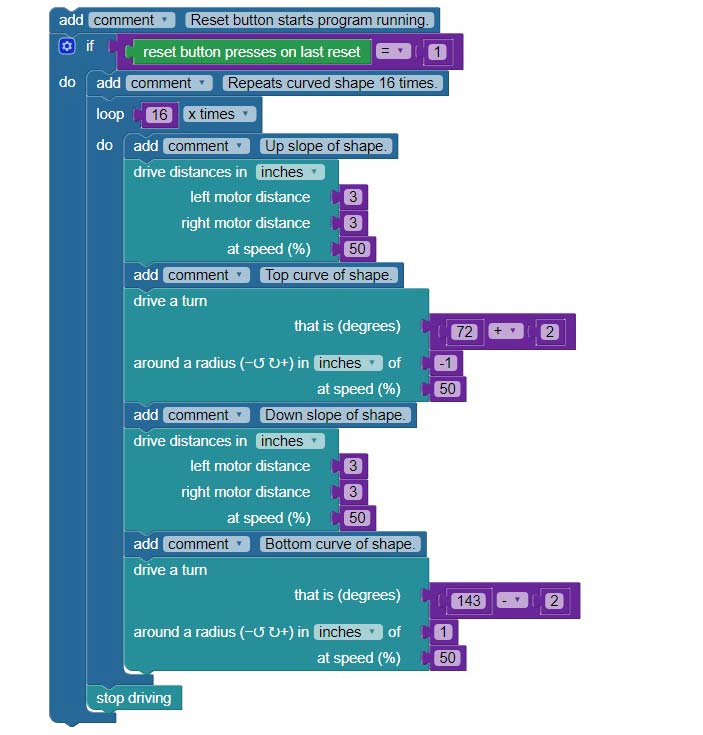
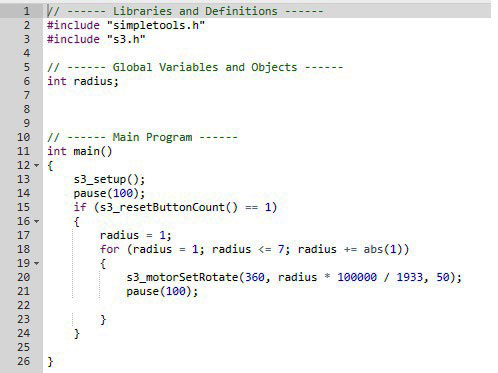
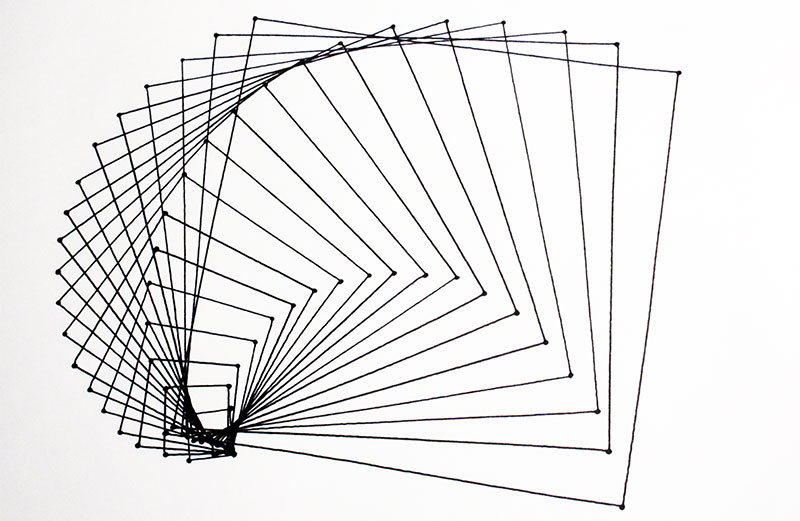
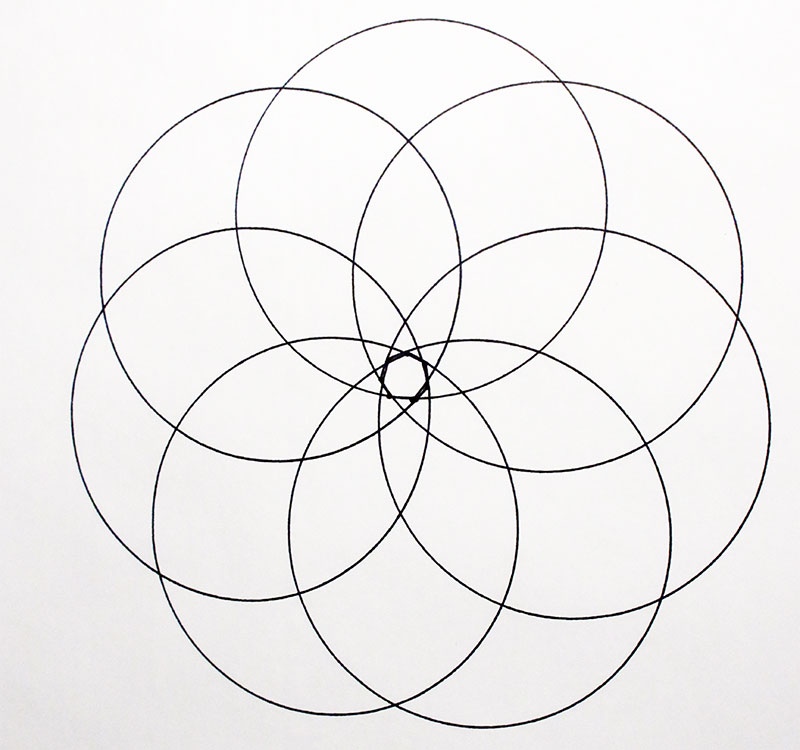
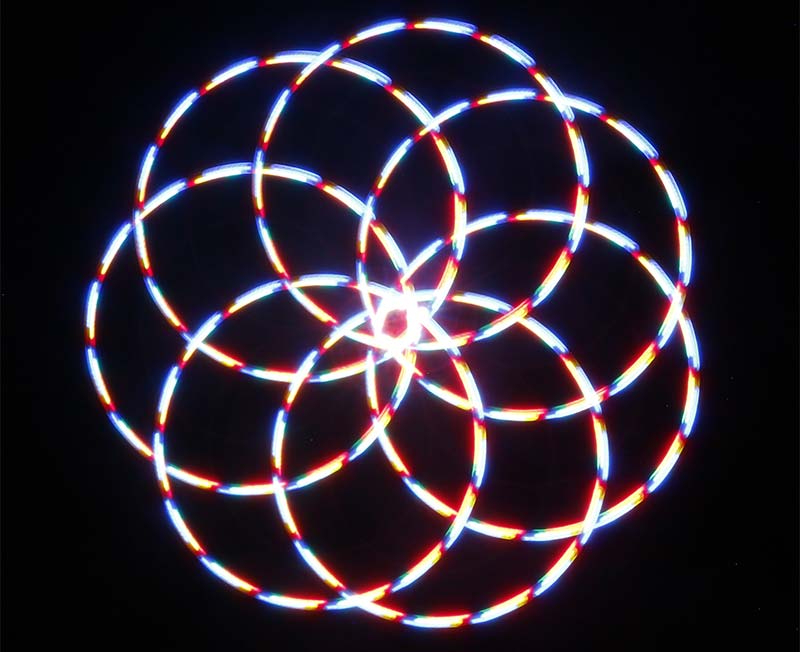
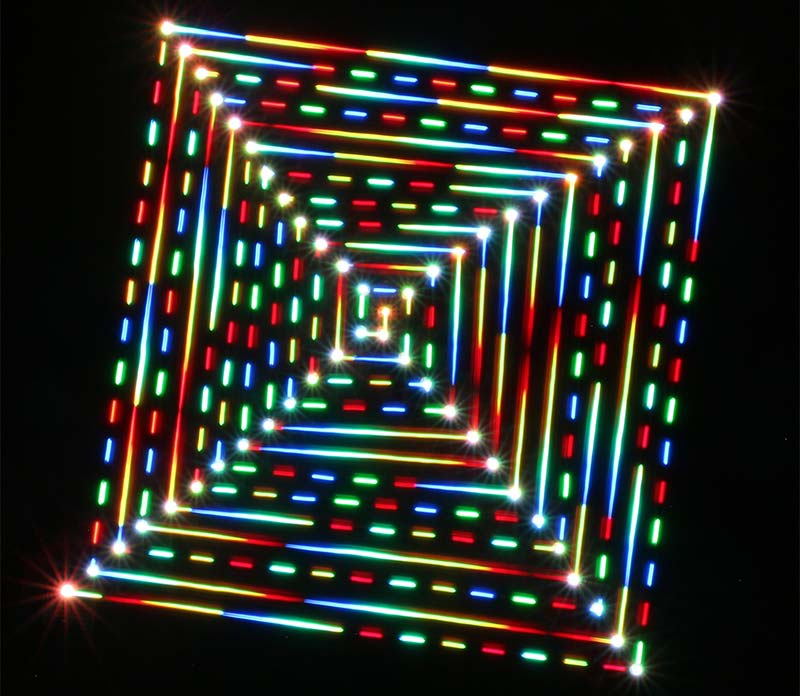
Seven Circles.
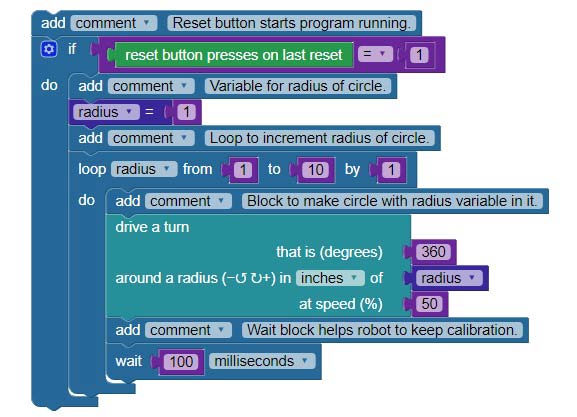
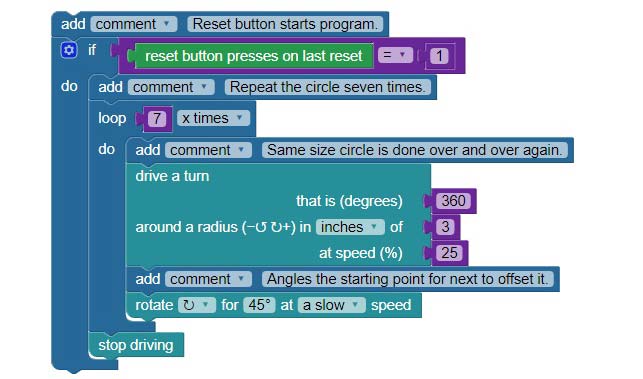
BlocklyProp code for the Seven Circles design.
Seven Circles code in C view.
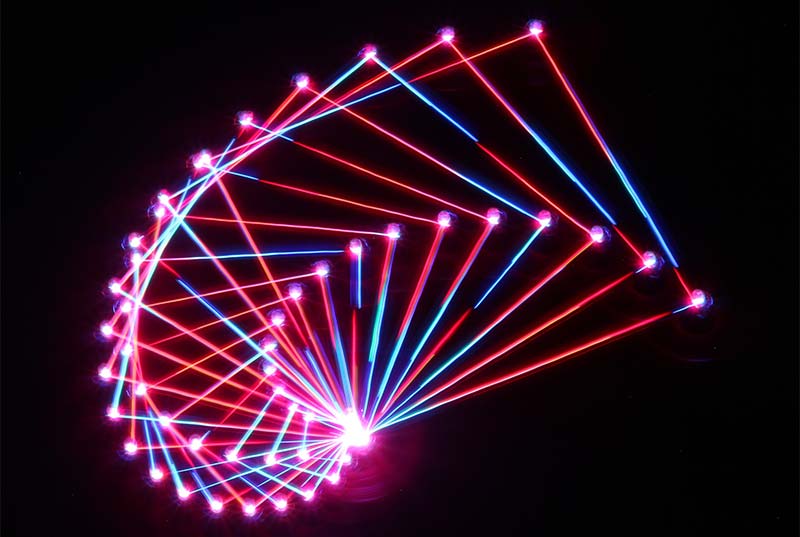
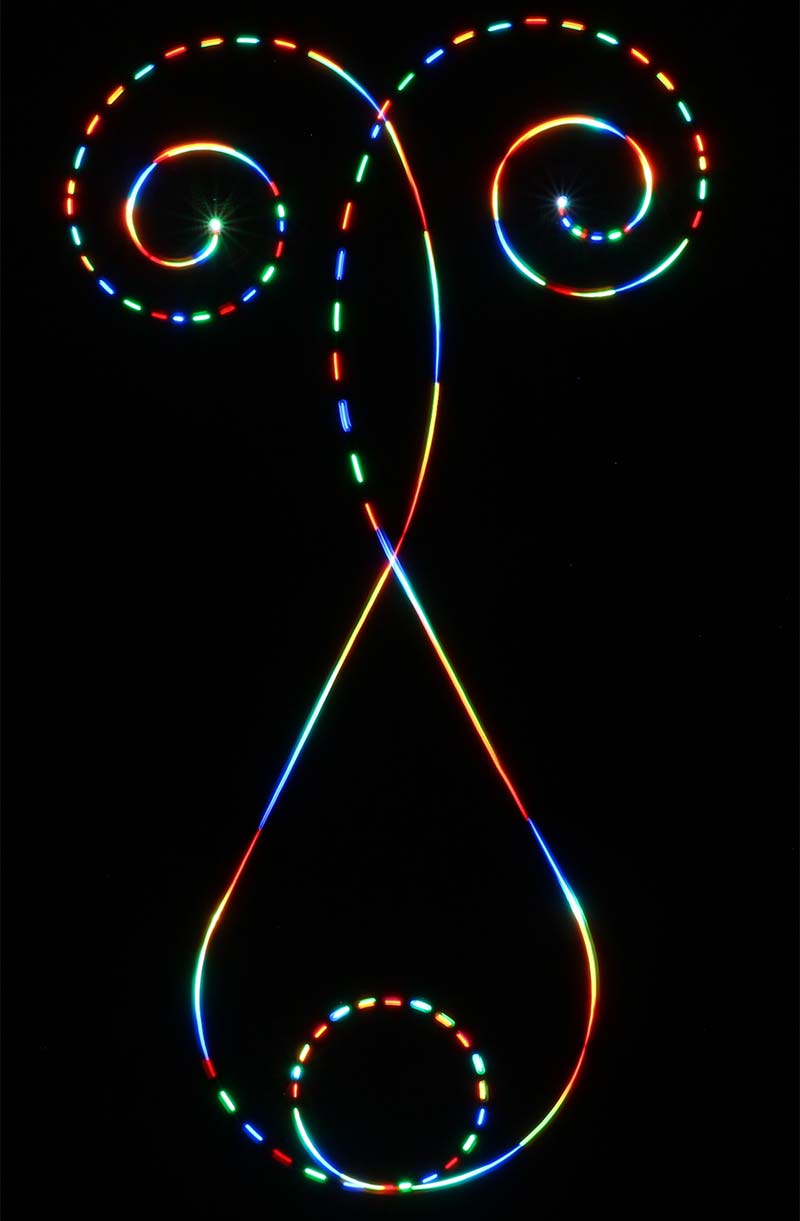
Stairway to Heaven.
Stairway to Heaven in BlocklyProp code.
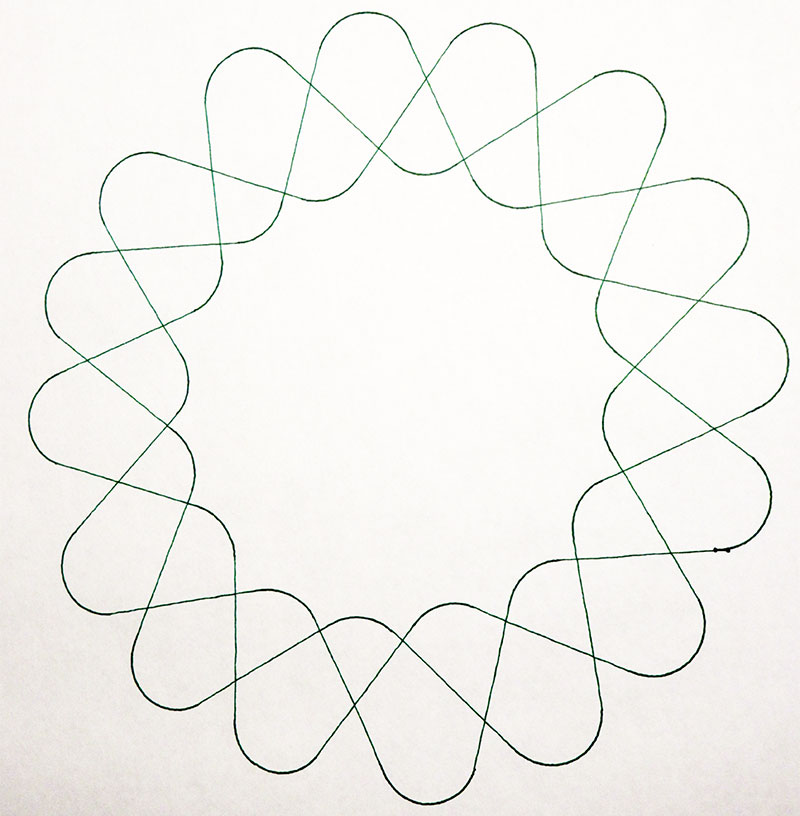
Large Flower.
Large flower in BlocklyProp code.
The design called Cepheid Star was originally programmed by Whit Stodghill, an Episcopalian priest with a blog called Robotics Under the Stole. He also has written for SERVO and some of the tutorials for Parallax. Stodghill has come up with a way to use a remote control to drive the S3 and I think I’ll try it to draw pictures with. You can see the idea on his blog.
With the old GUI for the S2, each of these would have been many pages longer to code as every step had to be incremented on its own.
The S3 can be used to make math more visible and interesting by enabling a student to actively use math to accomplish a problem, and use it in a real world way instead of just doing pages of problems. You can see some of the math problems that the students would use in the picture with the red S2 in it and written by Nikos Giannakopoulos for the S2, but it applies equally to the S3.
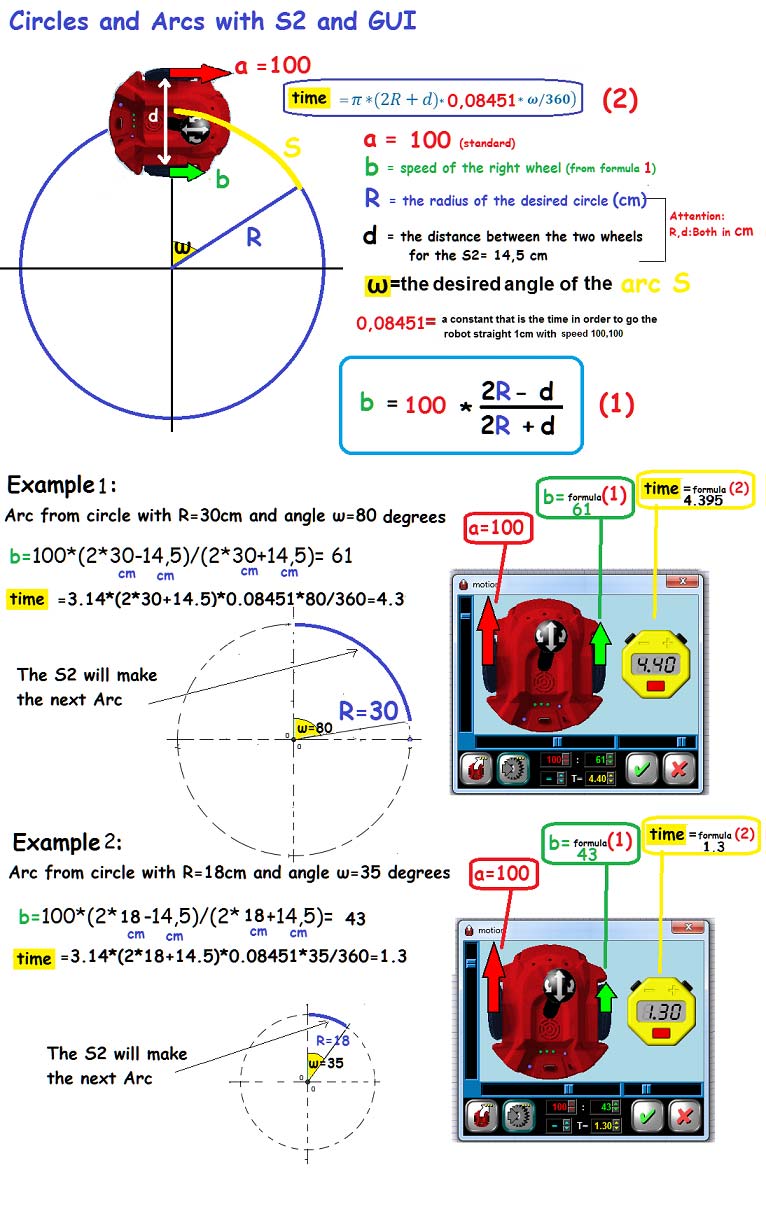
Nikos Giannakopoulos’ math for the S2.
A spiral originally drawn by Nikos Giannakopoulos.
I provided a picture of the C code for one of the drawings which can be viewed any time when you are in the BlocklyProp environment.
The LED
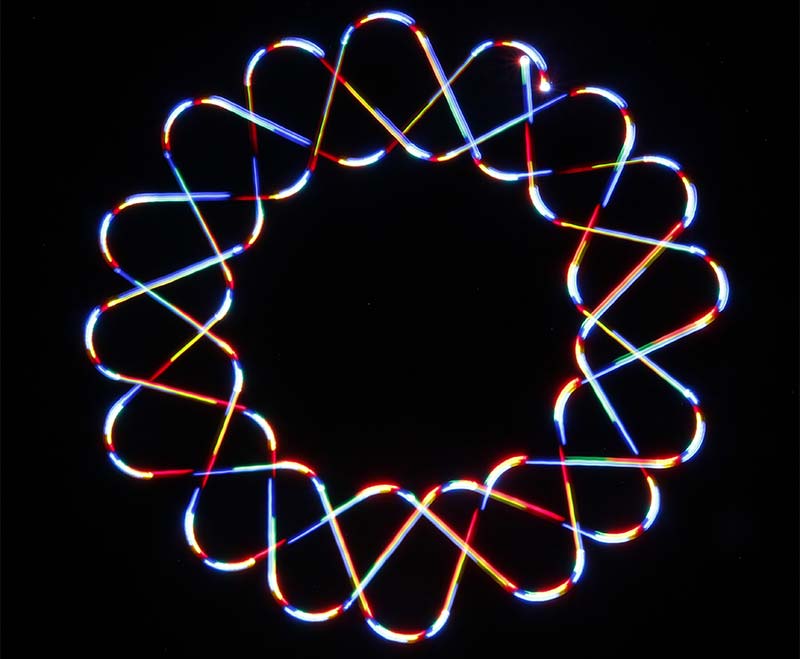
There are as many ways to use a flashing LED for this as there are tinkerers out there. The speed of the LED’s flash greatly affects the finished look of the picture, and some very interesting effects have come from using LEDs with a variable rate of flashing.
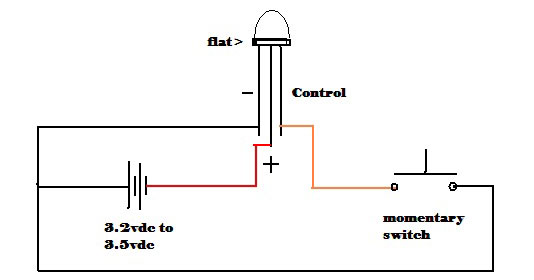
Schematic for the flashing LED.
The effect of using a variable flashing LED.
One was done on a breadboard that was taped to the Scribbler. The other was fancier using a button battery holder, then installing the LED on top and gluing a dowel to the bottom of it to hold it in the pen holder hole. Later, it occurred to me I could make a programmable one and use the hacker port.
Be sure you center the light with the pen hole to have an accurate turning radius for your graphic. If it is not centered, the corners will be rounded and circles will not cross each other evenly.
One of the projects on the Learn website is for a pen lifter using a servo and the hacker port, so one can program the pen to lift off the paper to avoid making lines in between letters and such. That could be applied to a programmable LED using the hacker port.
Setting Up the Camera
My husband did the photography for the light tracing pictures. He used a Canon DSLR with manual mode. One of these pictures took 10 minutes of exposure time. The lens was at the maximum F stop and bulb time for exposure. He didn’t have a neutral density filter to fit this lens, so we used a different sized one and put it on top of the robot itself.
The speed of the robot affects the quality of the picture quite a bit; the slower it is, the fuzzier the picture. However, with practice and some better lenses, I hope to be able to get clearer pictures soon. Meanwhile, it’s a fun way to play with the S3.
In Summary
BlocklyProp with the new S3 is a lot of fun! Many things can be done with it no matter your skill level. I hope somebody enjoys this project and can give me pointers on photographing it. SV
Article Comments