Bringing About the Apocalypse
By Ryan Clingman View In Digital Edition
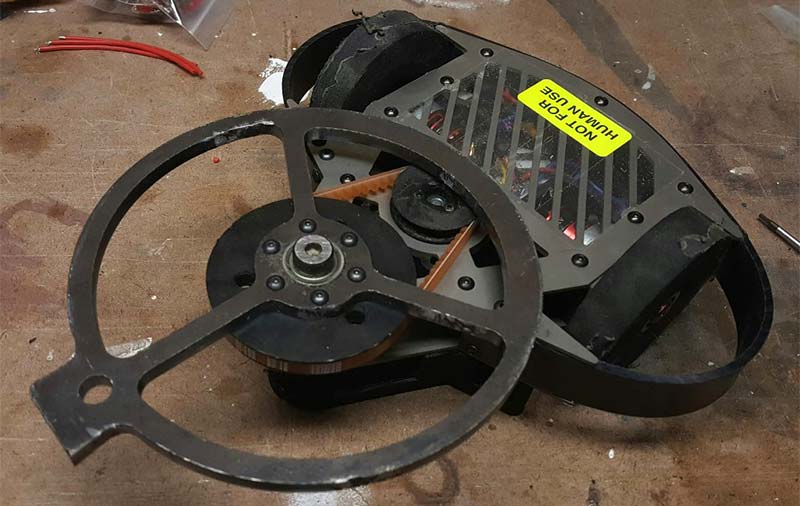
Portable Apocalypse is my current bot in the 3 lb category, and it’s an undercutter with a powerful single tooth disk. The bot has gone through four major iterations, with each new version seeking to improve on the performance and shortcomings of the previous versions.
Version 0 of the design began as a scaling-up of my 3D printed 1 lb bot design, Someone Else’s Problem. This meant that I 3D printed the frame as a solid chunk of glass-filled nylon, and then supplemented with UHMW plastic for armor to protect the wheels.
Unfortunately, life happened, and it never saw competition. While I was waiting for the opportunity to make it to another competition, I slowly put together the design for Version 1 of Portable Apocalypse.
Portable Apocalypse version 0, with a 3D printed frame.
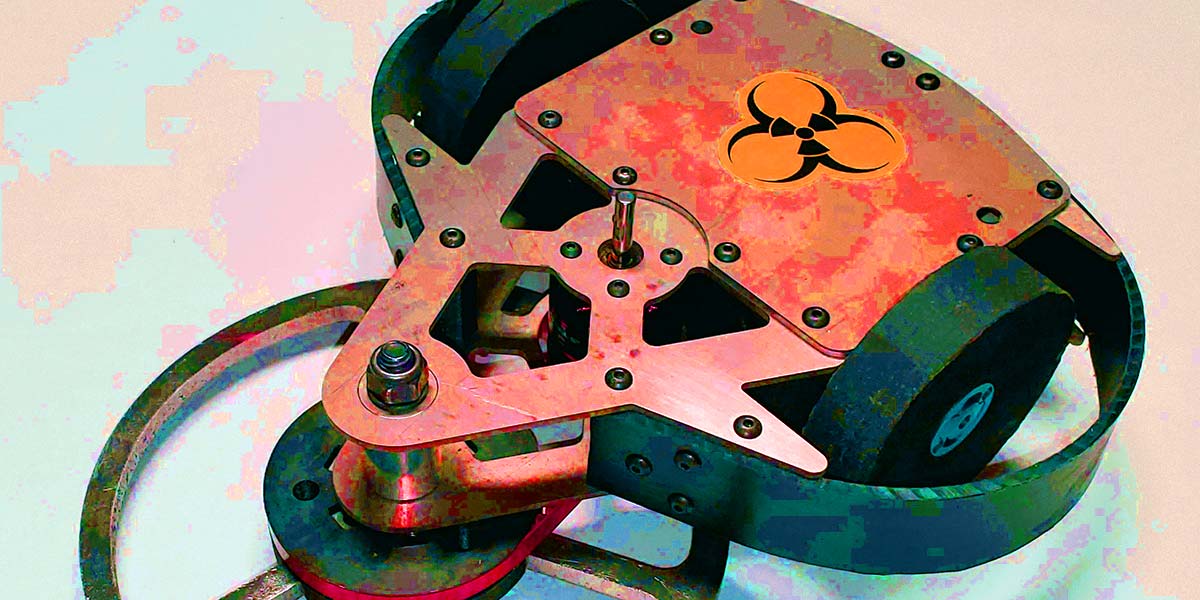
The overall shape remained the same, but my discovery of metal laser and waterjet cutting services inspired me to make the frame out of metal instead; 2 mm titanium works great for the wedges for the popular D2 kits, so why not make your bot out of that?
Portable Apocalypse version 1, featuring a titanium frame.
The main structure of the whole bot comes from its top and bottom plates. Aluminum standoffs between the plates provide the rest of the structure, and the standoffs can be press-fit into 3D printed walls to contain the electronics, as well as giving something to mount the motors and armor to.
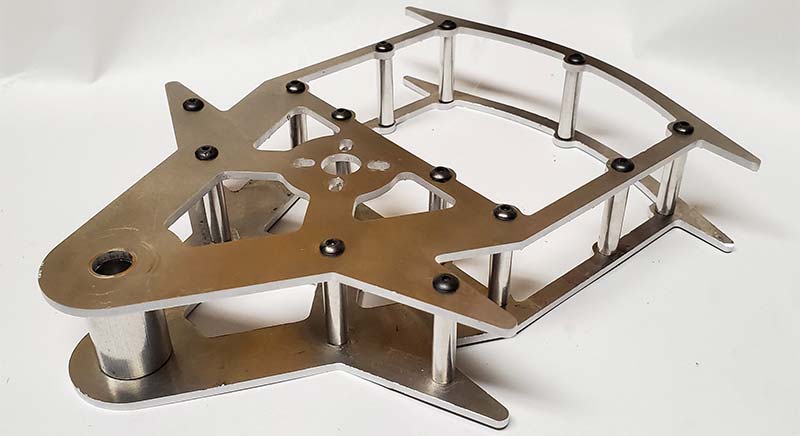
The two metal plates combined with some standoffs form the key part of the frame.
Due to the space constraints inherent in making an undercutter, there weren’t a lot of parts that were ideal for dealing with both axial and radial forces in a small package.
So, I wound up making my own unique bearing setup. There’s a bearing in both the disk and the pulley, with a nested pair of washers squeezed between them to help handle axial loads on the weapon disk.
I can really tighten the shoulder bolt shaft down hard to lock the inner races of the bearings together and make the frame nice and tight, while still leaving the outer races and the weapon disk free to spin.
The disk is designed to always be over the weapon motor to avoid having it deflect into the side of the pulley and damage it.
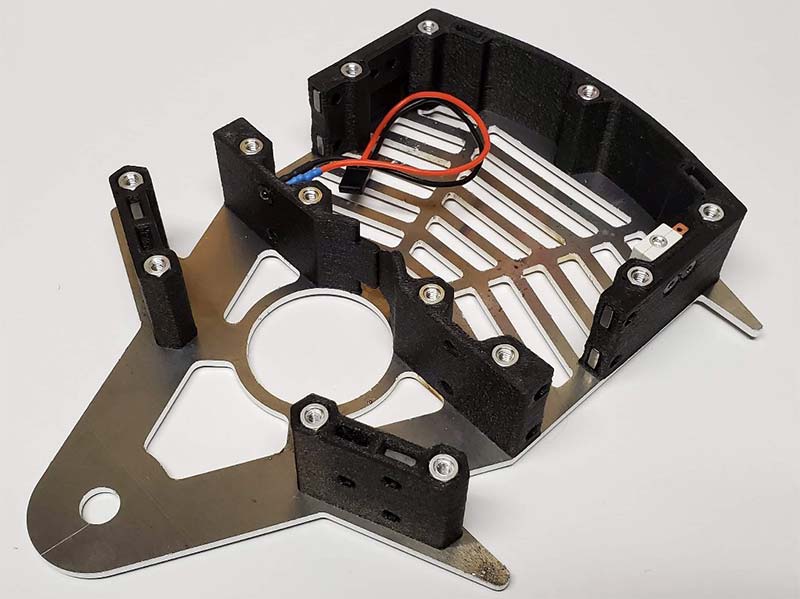
Slots in the 3D printed pulley let me put in square nuts to clamp the pulley to the disk.
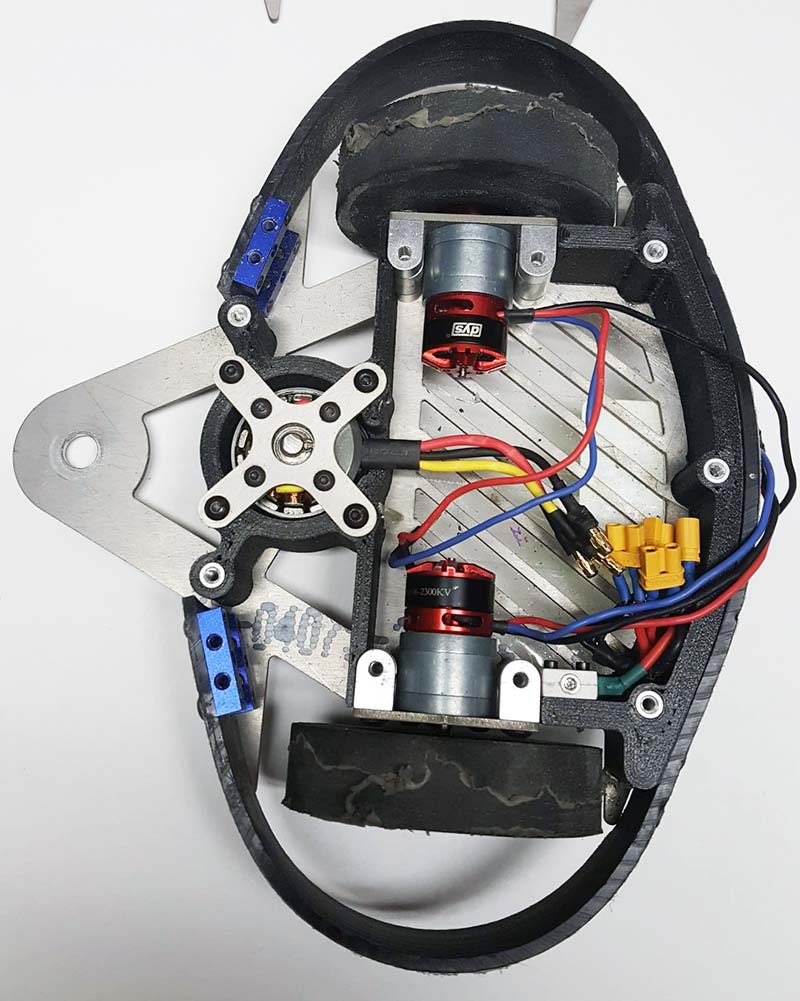
3D printed walls combine with the standoffs to complete the electronics compartment and provide mounting points for the motors and armor.
After some issues I had with the weapon of the earlier versions of my 1 lb bot flexing enough to damage its own pulley, I designed it so that the disc is always directly over the weapon motor and pulley.
This way, even if the weapon flexes, it just rubs on the pulley instead of having the chance to bite into the pulley and risk disabling itself.
I designed all this so that (with the exception of the weapon shaft and power switch) I would only need one size of hex wrench to fully assemble/disassemble the entire bot.
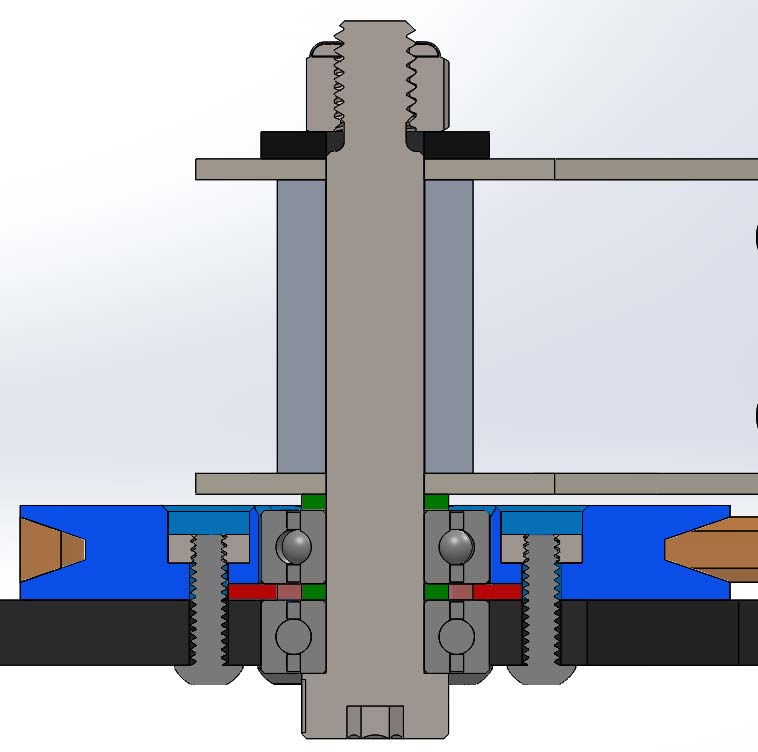
The weapon shaft setup allows the center of the bearings to be clamped to the frame while leaving the outer part free to spin with the disk and pulley.
All the 6-32 screws for the frame use a 5/64” hex drive, and all the metric screws for the motors need a 2 mm hex drive, but the two are so close together that I can use one hex wrench for all of it.
Portable Apocalypse v1 performed fairly well at the NERC Franklin Institute 2019 event at least in terms of offense and durability, but the competition also served to highlight several points in the design that could be improved on.
Portable Apocalypse v2 may look much the same on the outside, but every part on the inside got changed out.
I learned that having to completely remove the top plate to get the battery out for charging was more annoying than anticipated, so I made the lid for the electronics compartment its own separate part.
Not needing to completely remove the top plate also means that the weapon motor can simply be mounted directly to the top plate instead of needing to find a funky way to mount it off the bottom plate.
The other problem with the electronics compartment of version 1 was that I apparently failed to leave enough room for all the wires, leaving me to play a rousing game of spaghetti Tetris every time I took the battery in and out. To alleviate this, the height and length of the electronics compartment were increased slightly to provide much needed space for wire routing.
Version 1 of the design used a combination of heat-set inserts, nutstrip, and Actobotics parts to attach the wheel guards and drive motors to the frame.
After seeing the apparent success of the technique in the EndBots Vector kits, I decided to change to using square nuts press-fit into the 3D printed parts to attach these parts instead.
In Version 2 onward, square nuts pressed into the printed walls provide all the horizontal attachment points for the frame.
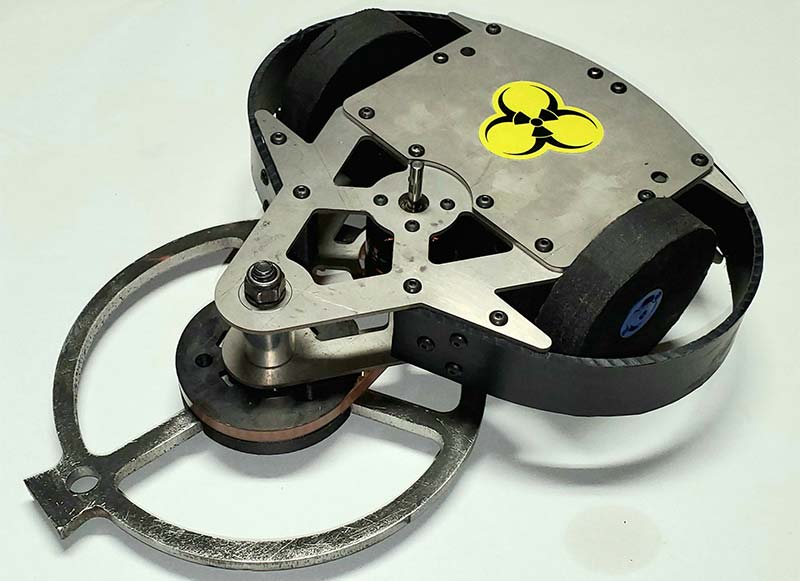
At the time of building, I had some inklings of trying to turn the design into a kit to sell, so I also tried to reduce the cost and complexity of the parts where I could.
The titanium frame plates were replaced with thicker aluminum ones; the DIY brushless gear motors were replaced with off-the-shelf brushed motors; and I tried out some cheap Chinese brushed ESCs. All of it performed admirably.
After a respectable showing at NERC’s Motorama 2020 event, I have now built Portable Apocalypse v3 with the goal of achieving a spot on the podium the next time around (no small feat when the competitions I frequent have 30-60 competitors to overcome to get there).
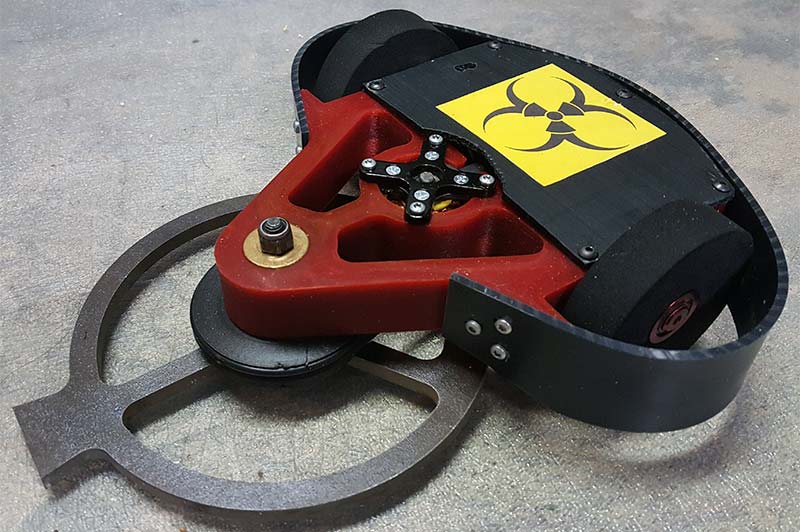
Portable Apocalypse Version 2, with aluminum frame for a less expensive option.
With the v2 design working well, the changes were relatively minor this time.
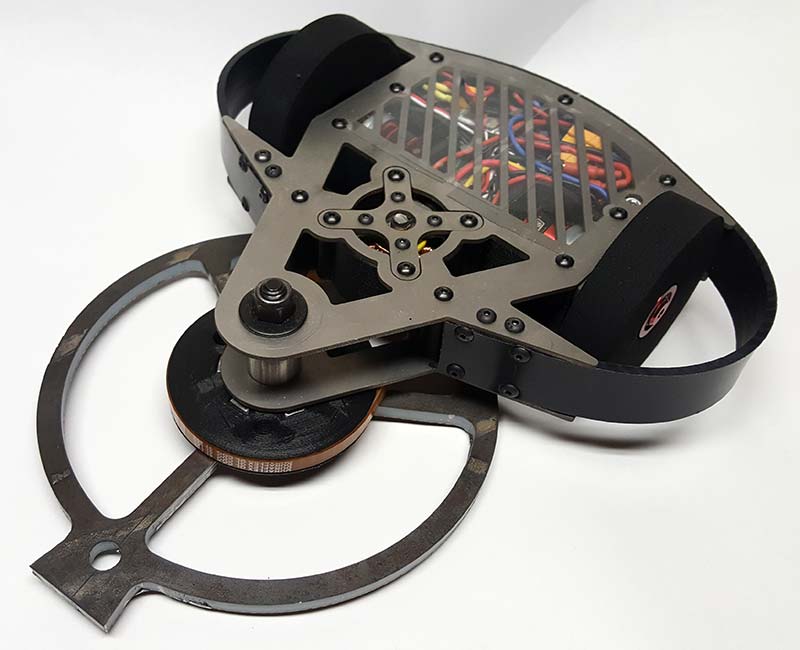
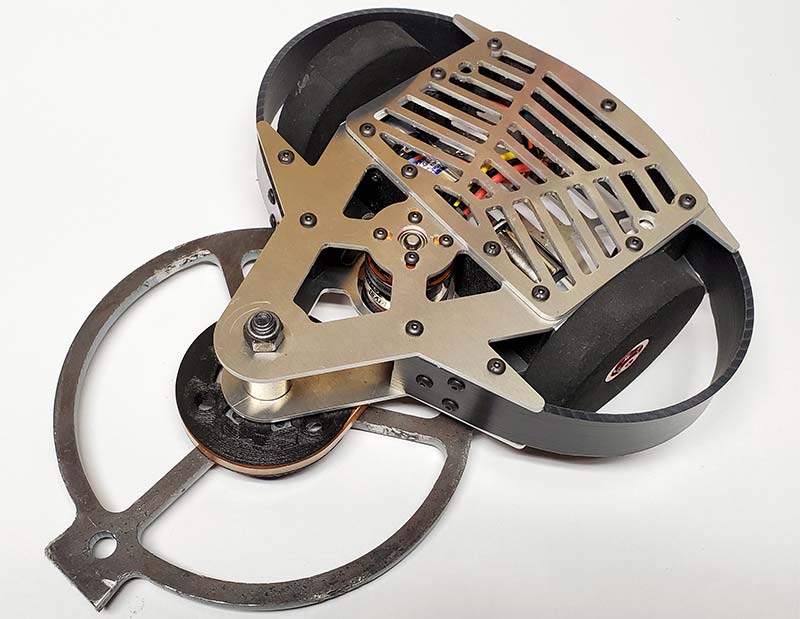
While the aluminum frame worked great, I have switched back to a titanium frame for the best durability. What lost me both matches and knocked me out of the previous tournament was my receiver slowly failing due to repeated impacts.
Portable Apocalypse Version 3 — back to titanium and better than ever.
Wrapping all the electronics in foam should help to abate the impacts and increase the lifespan of the parts.
Bringing Portable Apocalypse to this point has been a measured process of evolution in the design, addressing flaws in the design as well as looking at the building techniques that have worked well for others and, incorporating them into my own designs.
Only time will tell if it will come out on the top of the pile, but I plan to keep improving it until it gets there! SV
Article Comments