RC Tankbot
This part of the project is called a Tankbot, instead of a generic RC tank, because it uses a platform that was originally designed for a robot and we are using Synapse Wireless RF nodes that are user-programmable and can be used to control the tank autonomously or as a hybrid autonomous/user-controlled system. The tankbot can easily become autonomous by adding sensors and programming the on-board node to sense, compute, and react. You could even hook the node up to another microcontroller, such as an Arduino, and program it over the air.
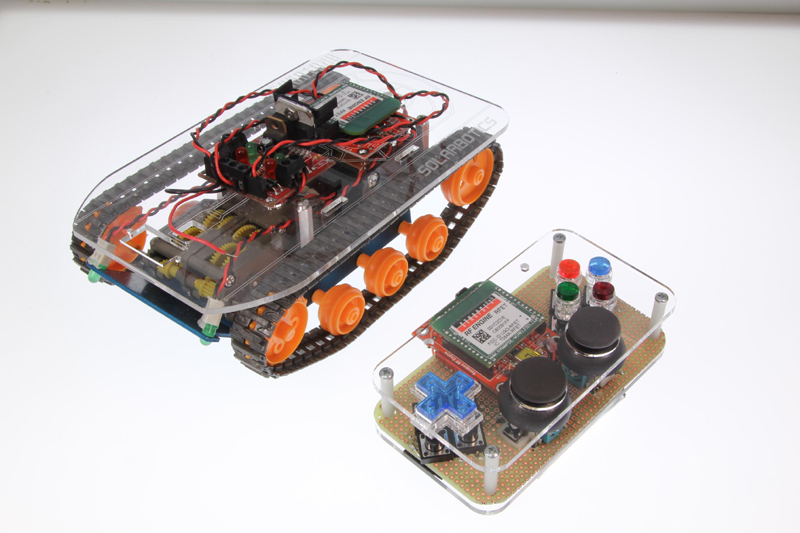
We just can’t help ourselves. The Brutusbot is just too cool to not play with, so we keep tweaking and messing around with it. We just finished Herbert, and already we decided to go even further by developing a complete remote control setup for the platform. By utilizing some RF100 nodes from Synapse Wireless (in their standard mesh networking configuration), this makes an excellent example of wireless actuator control. We even managed to get 250 feet of range between the ‘bot and our homemade controller. You can download code and a circuit diagram for the project here. We just need to add some airsoft guns before we can declare war and retaliate against the neighborhood squirrels.
Here’s how to build your own
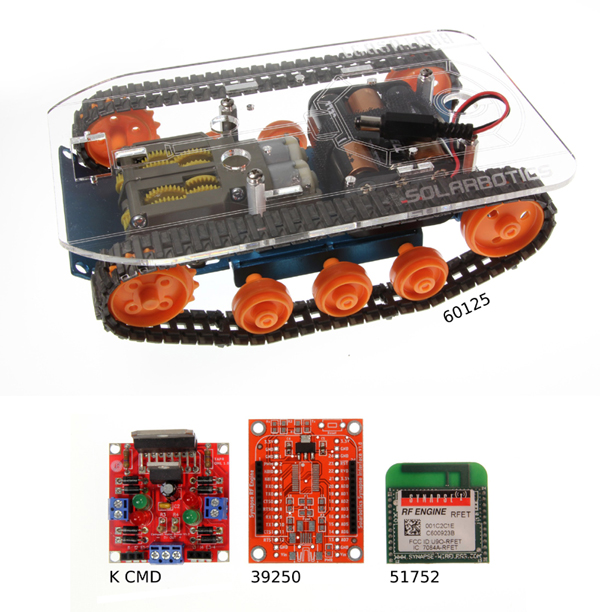
1. Gather the parts (pictured below), which include the not-so-well known but simple/robust Synapse Wireless RF100 modules and their breakout boards, a Brutusbot Tank Kit, a Motor Driver Kit, and some miscellaneous parts to build a controller.
2. Assemble these kits and connect them to match up with the circuit diagrams (also pictured below)
3. WITHOUT your LiPo battery plugged in, use the Synapse FTDI adapter board to hook one of your Synapse RF nodes to USB and upload the code provided. For now you can follow the instructions from this PDF, I’m working on instructable that should be done this week that will better illustrate the steps in doing this. Plug the battery back in once you are done using the USB port.
4. Provide power first to your tank and then to your controller (order seems to matter when establishing the link)
5. Push both or your controller’s thumbsticks forward and your RC tankbot should now be on it’s way with each thumbstick controlling a separate tank tread.
[Source] HackedGadgets
Posted by .(JavaScript must be enabled to view this email address) on 11/08 at 02:08 PM